Table of Contents
This guide provides a practical overview of Take Screenshots Quickly, No Need to Install Additional Software, including its main features, benefits, limitations, and important considerations.
Here are two quick screenshots, no need to install additional software, but directly use the built-in tools of Windows such as Print Screen key, Snipping Tool.
Take a screenshot with the Print Screen key (Prt Sc)
Step 1 : If you want to take a picture of the full screen, you press the Print Screen (Prt Sc) key on the keyboard. And if you just want to capture the application that is open on the screen, then press the key combination Alt + Print Screen on the keyboard.

Step 2: Open a simple photo editing application available on your computer, so that you can quickly use the computer's Paint application. To open Paint, select the Start Menu icon -> enter the keyword Paint -> select the Paint application.

Step 3: Press Ctrl + V to paste the image just taken into Paint. You can edit the image with the support tools on Paint.

Step 4: Finally you save the image by clicking Paint -> Save and save the file again.

Take screenshots with the Snipping Tool available
Using the Print Screen key or Alt + Print Screen, you can only take a screenshot of the full screen or capture an open application on the screen. If you just want to capture an area of the screen, you can use the built-in tool of Windows, Snipping Tool . Here are the steps to take a screenshot with Snipping Tool.
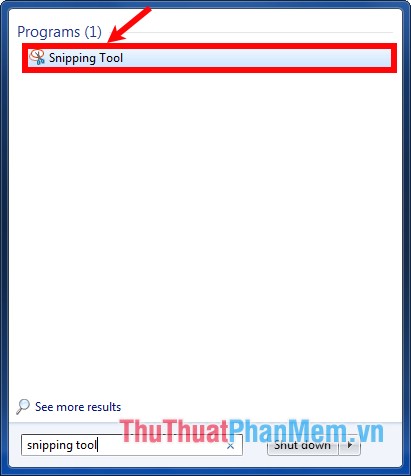
Step 1: Open the Snipping Tool.
Click the Start window (or the window key on the keyboard) -> enter the Snipping Tool -> select the Snipping Tool.
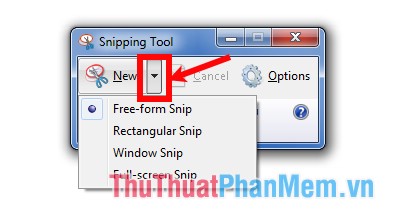
Step 2: On the Snipping Tool interface, click the triangle icon next to New to select the shooting style, you have 4 shooting style options:
- Free-form Snip: delineate any area on the screen to capture with a brush stroke.
- Rectangular Snip: Capture an area of the screen in a rectangle of your choice.
- Window Snip : capture a window, any application is open on the screen.
- Full-screen Snip : capture the whole screen.
Step 3 : After selecting the shooting type, depending on the shooting style, Snipping Tool handles differently:
- If you choose Free-form Snip , the mouse cursor appears, drag the area you want to capture by holding and drawing the area, then the Snipping Tool will capture and bring up the editing interface.
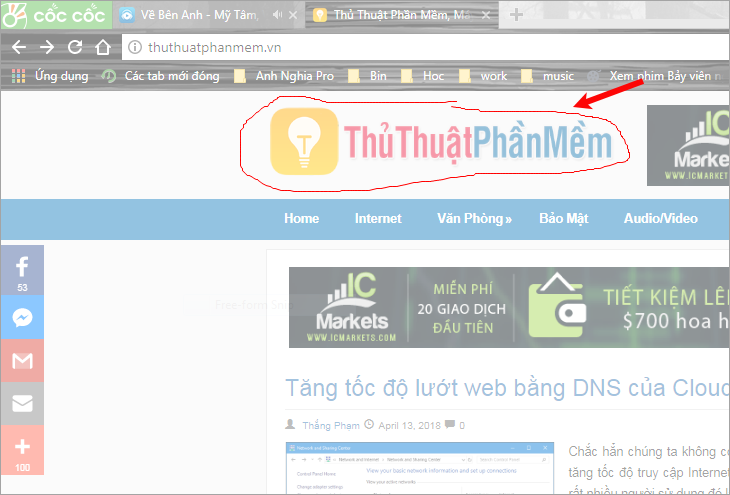
- If you select Rectangular Snip , then hold down the mouse cursor and select the area you want to capture, this area will be the rectangle of your choice.
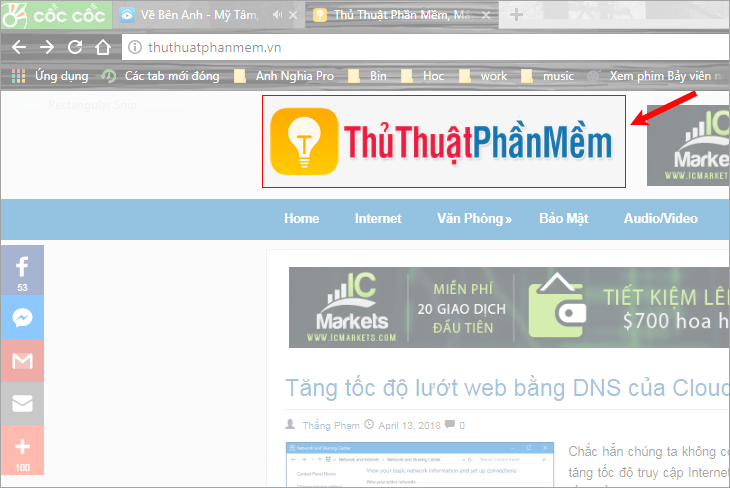
- If you choose Windows Snip , click on the application on the screen you want to capture, Snipping Tool will capture that application and offer an editing interface.

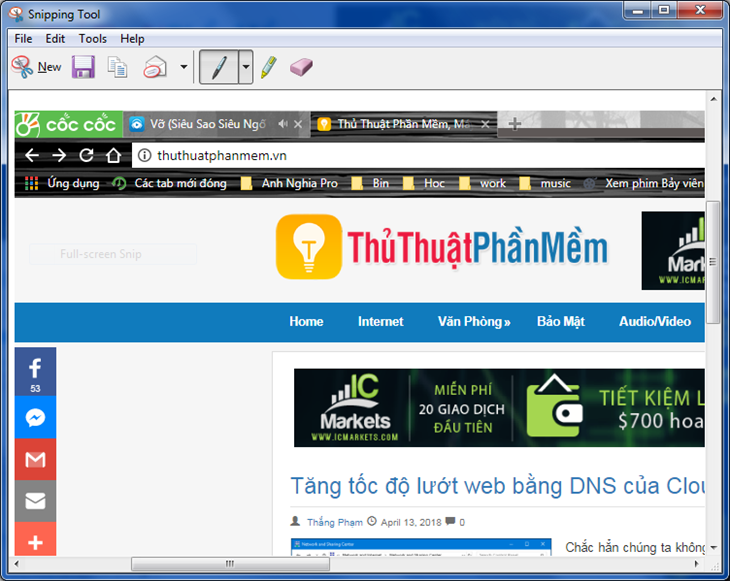
- If you select Full-screen Snip, then immediately after selecting the type of shooting tool, the tool will automatically capture the full screen and offer an editing interface.
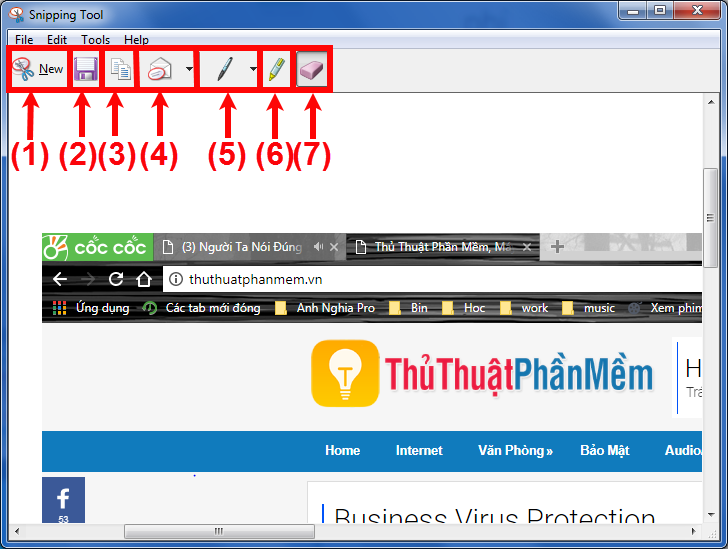
Step 4 : After the Snipping Tool presents the captured image to the editing interface, here you can edit or save the image using the functions supported by the tool:
- New : reopen Snipping Tool main interface to take another picture (1)
- Save images to a computer (2)
- Copying images (3)
- Emailing pictures (4)
- Use a pen to draw notes (5)
- Highlight pens (6)
- Delete edits (7)
Good luck!
FAQ
What should I know about Take Screenshots Quickly, No Need to Install Additional Software?
Focus on the key features, requirements, limitations, and practical use cases explained in this guide.
How do I get the best results with Take Screenshots Quickly, No Need to Install Additional Software?
Follow the recommended steps, use current software or information, confirm compatibility, and review settings before major changes.
Are there any risks or limitations?
Potential limitations depend on compatibility, data quality, cost, privacy, support, and how the product or method is used.
Related Articles
 How to Take Screenshots on a Windows 10 Computer8 minutes read
 How to Time Off the Computer Very Quickly and Easily by the Command CMD, No3 minutes read
 How to Install Snagit to Take Screenshots on Your Computer6 minutes read
 How to Take Screenshots Win 10 Fastest and Simplest4 minutes read
 How to Display CPU, RAM and FPS Parameters on Windows 10 Does Not Need to3 minutes read
 How to Quickly Delete Screenshots from Android Phone10 minutes read
Reader Comments 0
Sign in with email or Google to join the discussion.