Table of Contents
This guide explains how to insert an Excel Table into Word, with clear steps, practical tips, and important checks before you begin.
There is a small note when you perform inserting Excel table into Word you should keep these 2 files in the same root directory, during work you should not move to another location, if so when you update on the table calculation will occur when the Word file has inserted the spreadsheet. To insert an Excel table into Word, follow these steps:
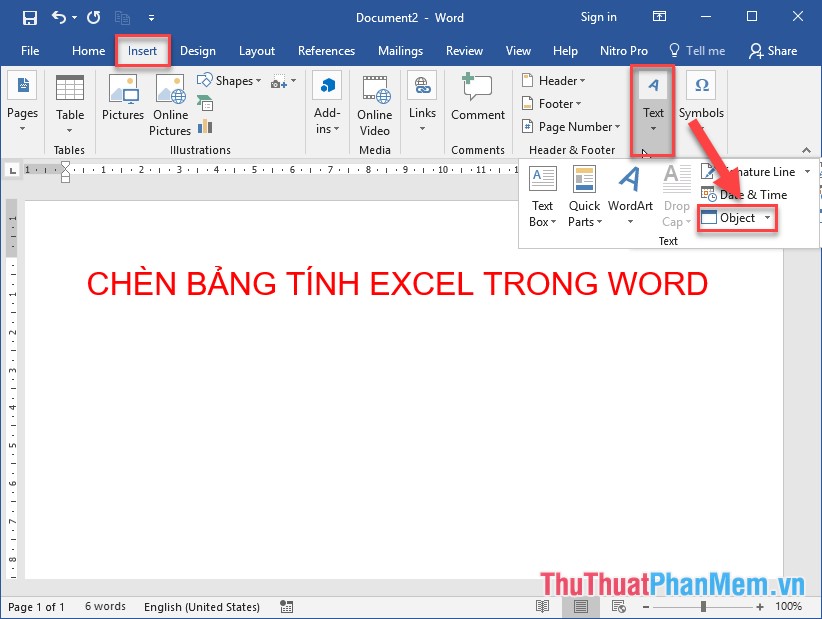
Step 1: In the Word file you want to insert the Excel table, click the Insert tab -> Text -> Object:
Step 2: The object dialog box appears, select the Creat From File tab -> click Browse to select the Excel table to insert:

Step 3: Select the path to the Excel file to be inserted -> click Insert:

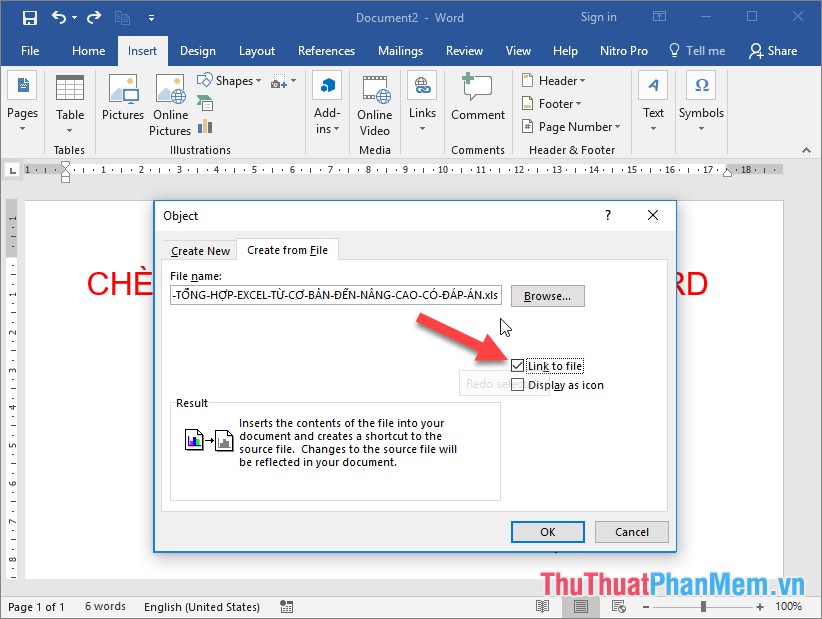
Step 4: After selecting the Excel worksheet, select the Link to file check box, so that when you edit the content on the Excel workbook, the Excel workbook in Word is updated -> click OK:
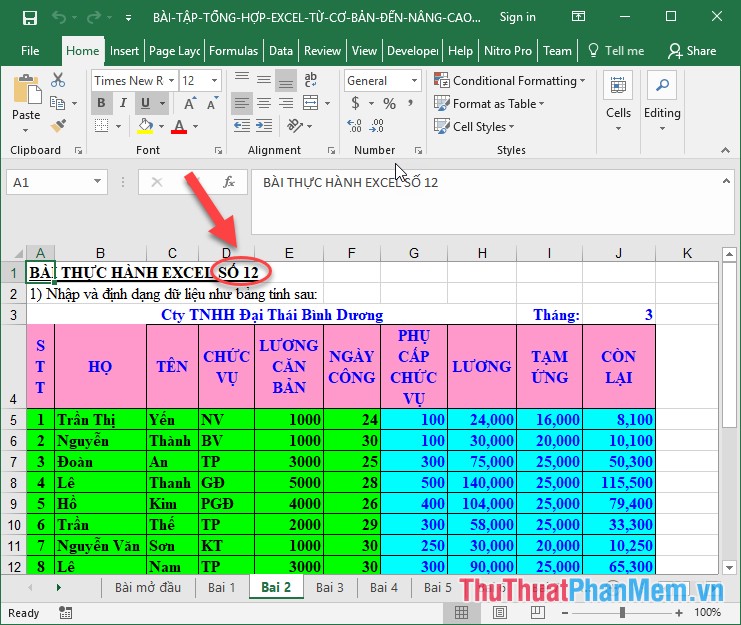
After clicking OK, the Excel spreadsheet is inserted into Word:

You can edit a spreadsheet directly in Word by double clicking on the worksheet:

So when you edit on Word or on Excel spreadsheets, the content updates both places that contain the workbook.
The above is a detailed guide on how to insert Excel tables into Word.
Good luck!

FAQ
What should I know about Insert an Excel Table into Word?
Focus on the key features, requirements, limitations, and practical use cases explained in this guide.
How do I get the best results with Insert an Excel Table into Word?
Follow the recommended steps, use current software or information, confirm compatibility, and review settings before major changes.
Are there any risks or limitations?
Potential limitations depend on compatibility, data quality, cost, privacy, support, and how the product or method is used.
Related Articles
 Instructions for Inserting Table Captions in Word3 minutes read
 How to Insert a Word Document into an Excel File4 minutes read
 How to Create a Table in Word 20077 minutes read
 How to Create a Table, Insert a Table in Excel 20168 minutes read
 How to Insert a Table, Create a Table in Word 20165 minutes read
 MS Word - Lesson 8: Creating a Table: Microsoft Word 20073 minutes read
Reader Comments 0
Sign in with email or Google to join the discussion.