Macromedia Flash - Strange planet
This tutorial will show you how to create a moving planet image in a very simple way. You can fully practice in Flash.
This tutorial will show you how to create a moving planet image in a very simple way. You can fully practice in Flash.
Step 1. Create a file with the parameters shown in Figure 1:

Figure 1
Step 2. Select File> Import> Import to Stage , go to the folder (system drive) : Documents and SettingsAll Users.WINDOWSDocumentsMy PicturesSample Pictures select the picture named Sunset (see picture 2a, 2b)
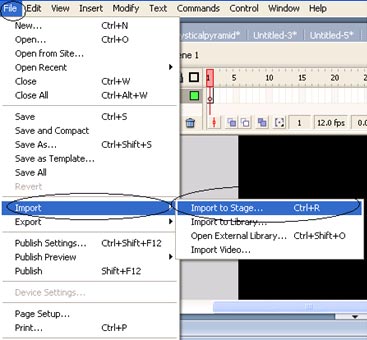
Figure 2a
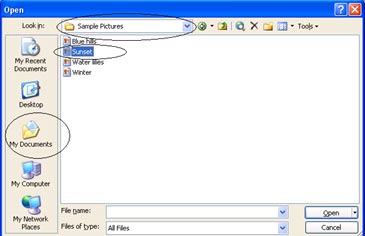
Figure 2b
Step 3. Select Window> Align to open the Align panel, and select the 3 items shown in Figure 3 to make sure your image is in the middle (see Figure 3a, 3b).
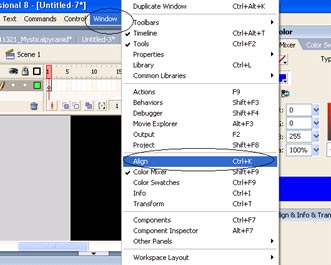
Figure 3a
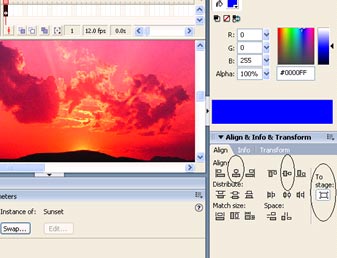
Figure 3b
Step 4. Right-click on the image and select Convert to Symbol . (see Figure 4).
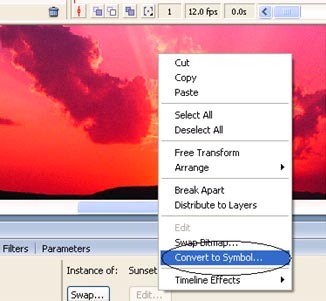
Figure 4
Step 5. In the dialog box that appears, select Movie Clip and click OK (see Figure 5).
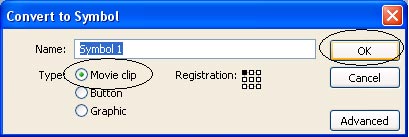
Figure 5
Step 6. Double click on the newly created Movie clip to enter it (see Figure 6).
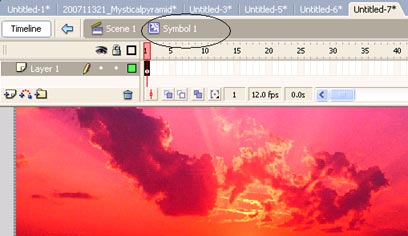
Figure 6
Step 7. Right-click on File 20 and select Insert KeyFrame (see Figure 7)
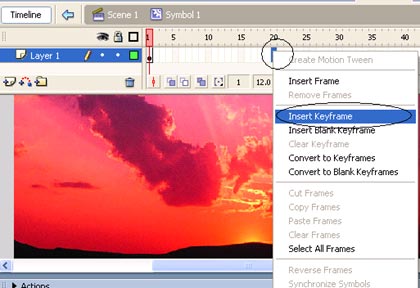
Figure 7
Step 8. Right-click anywhere between Frame 1 and Frame 20 and select Create Motion Tween (see Figure 8).
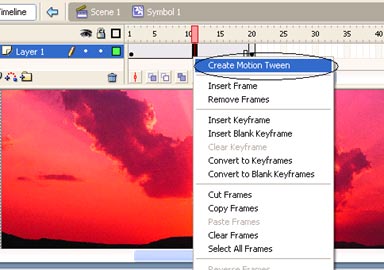
Figure 8
Step 9. In the Rotate section of the Properties panel select CW ( or CCW) (see Figure 9).

Figure 9
Step 10. Click Scene 1 to return to the Timeline of Scene 1 (see Figure 10).
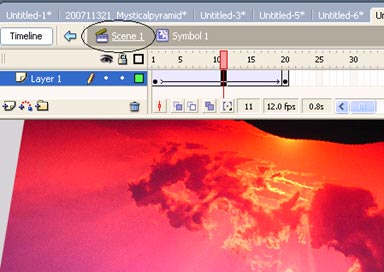
Figure 10
Step 11. Create a new layer (see Figure 11).
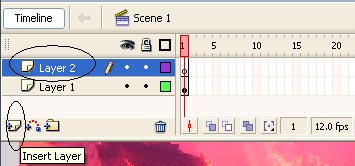
Figure 11
Step 12. At Frame 1 of the new layer, select the Oval Tool , remove the border color, select any color and draw a circle (press the Shift key while drawing) (see Figure 12).
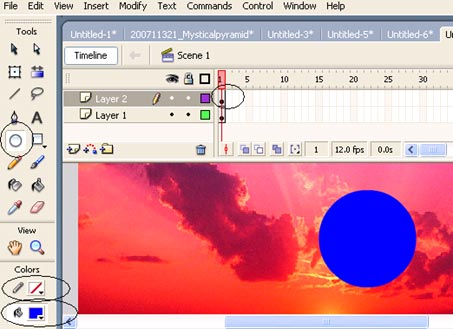
Figure 12
Step 13. Click on the new circle drawn in the Align panel and click on 3 items as shown in Figure 13
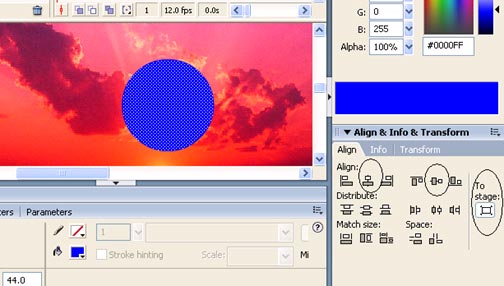
Figure 13
Step 14. Right-click on Layer 2 's flipping paper icon and select Mask (see Figure 14).
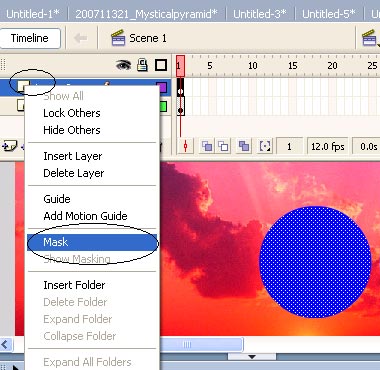
Figure 14
Step 15. Press Enter + Ctrl to check the result.
Download the sample file !
Le Thanh Hai
thanhhaikg@gmail.com


 Overview of the Forefront TMG 2010 management interface
  Microsoft System Center Service Manager - Part 4: Use
  Install and configure email handling solutions on TMG 2010 Firewall - Part 2: E-Mail Policy
  Check the TMG 2010 virtual private network server - Part 2: Configure TMG Firewall as the PPTP Remote Access VPN Server
  Troubleshoot problems with Kerberos in SharePoint - Part 2
  Configure Web Services URL of Exchange Server 2007