Macromedia Flash - Falling text effect
The words that just fall and rotate will be what you can do after reading this exercise ...
The words that fall and rotate will be what you can do after reading this exercise.
1. Create a file with the parameters shown in Figure 1

Figure 1
2 Select the Text Tool and adjust the settings, color as shown in Figure 2, and type in the letter h
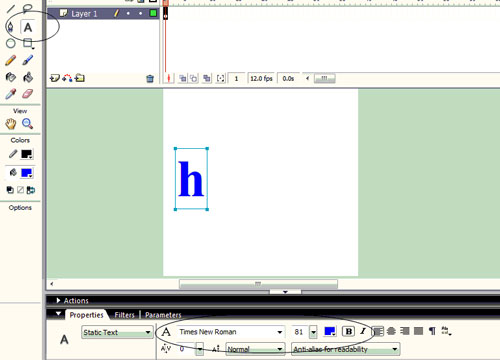
Figure 2
3. Move the letter h onto the stage ( Stage )

Figure 3
4. Right-click Frame 10 and select Insert KeyFrame
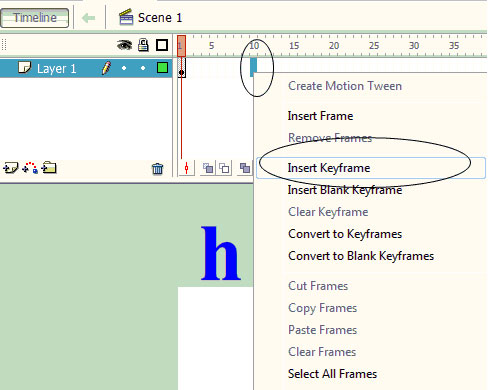
Figure 4
5. (Note that the letter h is still selected) Use the mouse to drag down the middle of the canvas (or you can use the Align panel to adjust it to your liking)
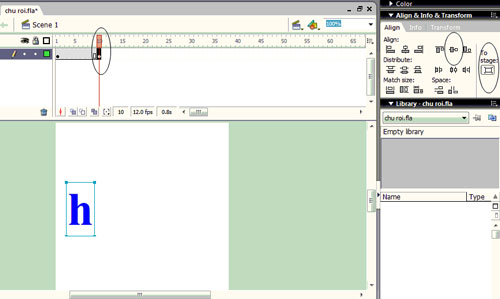
Figure 5
6. Right-click anywhere between Frame 1 and Frame 10 and select Create Motion Tween
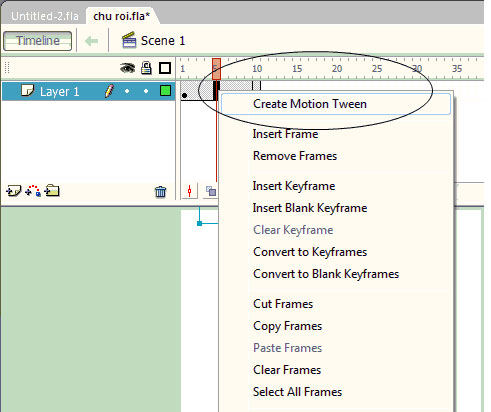
Figure 6
7. Click Frame 10. Select Modify> Transfrom> Flip Horizon tal
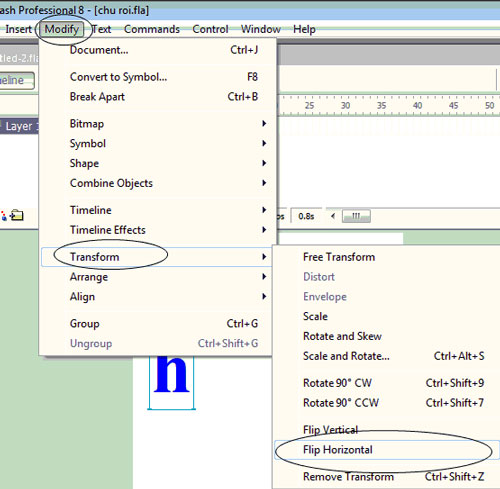
Figure 7
8. Create a new layer
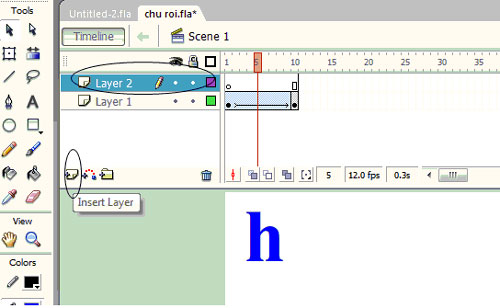
Figure 8
9. At Frame 10 of the new layer, right-click and select Insert KeyFrame
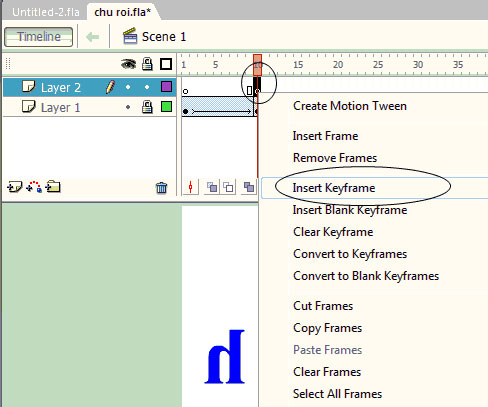
Figure 9
10. Do the same from Step 2 to Step 7 for the letter e
11. Do the same steps 9, 10, 2 to 7 at Frames 20, 30 and 40 to get the words l, l, o
12. At Frame 50 of the fourth layer (Layer 4), right-click and select Insert Frame (see Figure 10).
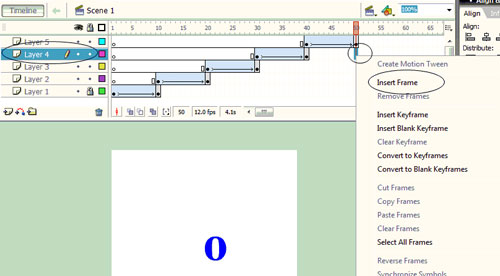
Figure 10
13. Do the same Step 12 for Layer 3, Layer 2, Layer 1 also at Frame 50
14. Right-click Frame 51 of Layer 1 and select Insert KeyFrame (see Figure 11).
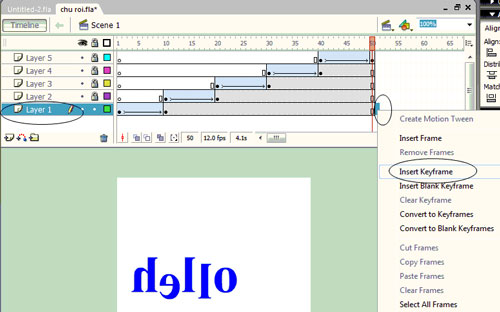
Figure 11
15. (Note that we are working on Frame 51 of Layer 1) Select Modify> Transform> Flip Horizontal (see Figure 12)
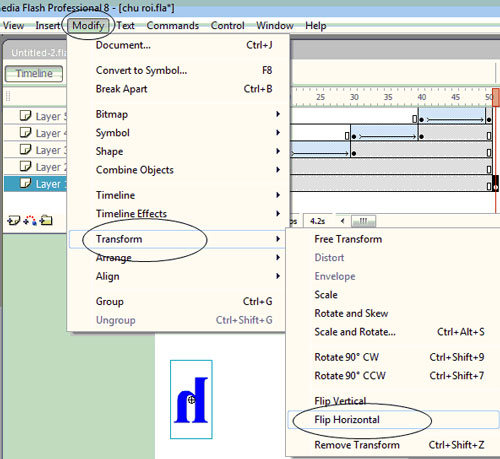
Figure 12
16. Do the same Step 14, Step 15 for the remaining layers
17. Create a new layer on Layer 5 (see Figure 13)

Figure 13
18. Right-click Frame 51 of Layer 6 and select Insert KeyFrame (see Figure 14).
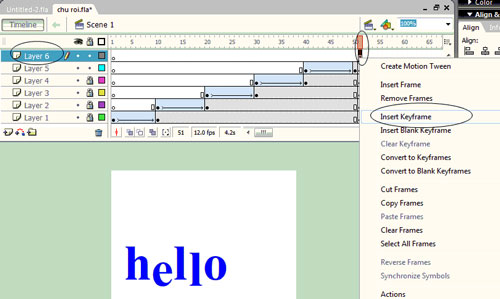
Figure 14
19. Open Actions and enter the command stop (); (see Figure 15)

Figure 15
20. Press Enter + Ctrl to check the result. Download the source file here.
Was this article helpful?
Your feedback helps us improve.
Related Articles
 Macromedia Flash - Running text effect2 minutes read
 Macromedia Flash - Create banner text effect5 minutes read
 Macromedia Flash - Text display effect5 minutes read
 Macromedia Flash - Product image advertising effects5 minutes read
 Macromedia Flash - Effects of lighting on photos3 minutes read
 Macromedia Flash - Effect of 'oil spill'2 minutes read
Reader Comments 0
Sign in with email or Google to join the discussion.