Macromedia Flash - Effect of 'oil spill'
Through this tutorial you can make an effect for small ads that are quite simple but no less strange ...
Through this tutorial you can make an effect for small ads that are quite simple but no less fancy.
B1. Create a file with parameters like Figure 1
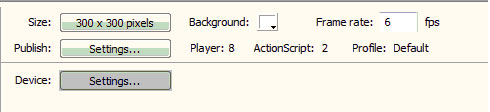
Figure 1
B2 Select File> Import> Import to Stage and choose a picture of your choice

Figure 2
B3. Select Window> Align to open the Align panel and select the positions on Figure 3 to correct the alignment
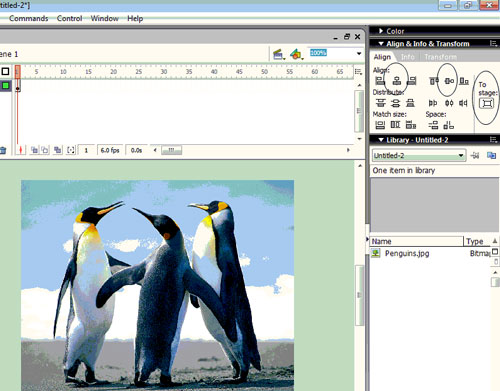
Figure 3
B4. Right-click Frame 2 and select Insert KeyFrame (see Figure 4).
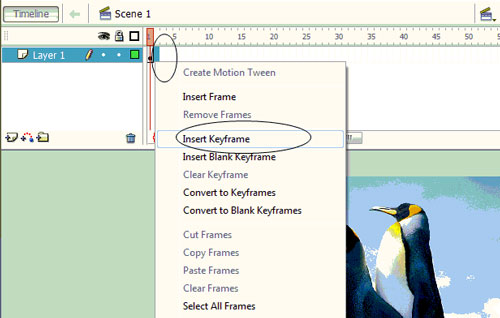
Figure 4
B5. Do the same for Step 4 for Frames 3, 4, 5, ., 10 (see Figure 5).
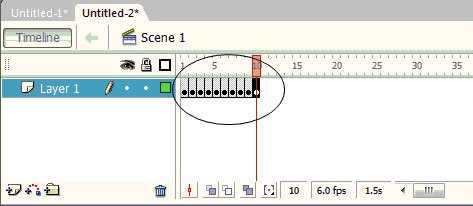
Figure 5
B6. Create a new layer (see Figure 6)

Figure 6
B7. Click Frame 1 of Layer 2. Select the Oval Tool, remove the border color, select the blue fill color (see Figure 7).
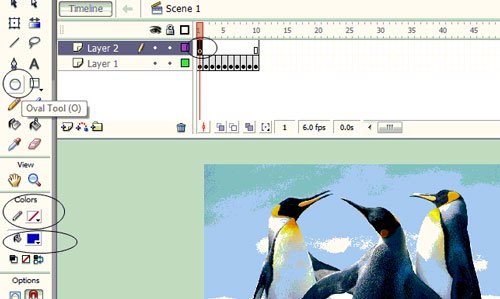
Figure 7
B8. Draw a green circle right in the middle of the image and use the Align panel to adjust it right in the middle of the canvas (see Figure 8).
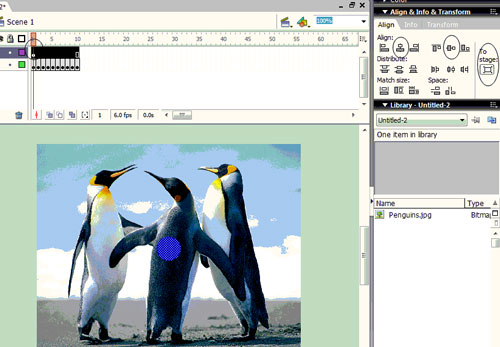
Figure 8
B9. Right click on Frame 2 of Layer 2 and select Insert KeyFrame (see Figure 9).
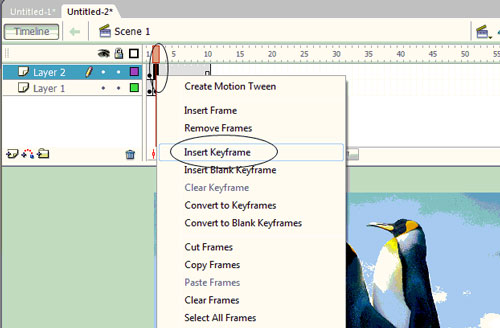
Figure 9
B10. Right click on the circle and select Free Transform (see Figure 10)
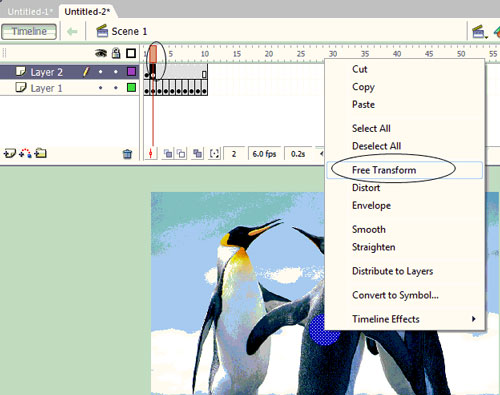
Figure 10
B11. Press the Alt + Shift keys simultaneously and use the mouse to drag the circle out (see Figure 11).
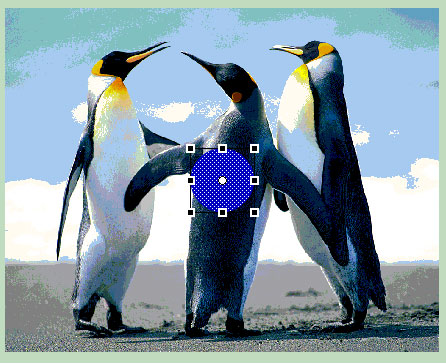
Figure 11
B12. Do the same steps Step 9, 10, and 11 for Frame 3, 4, ., 10 of Layer 2, each of the following Frames is larger than the previous Frame (see Figure 12).
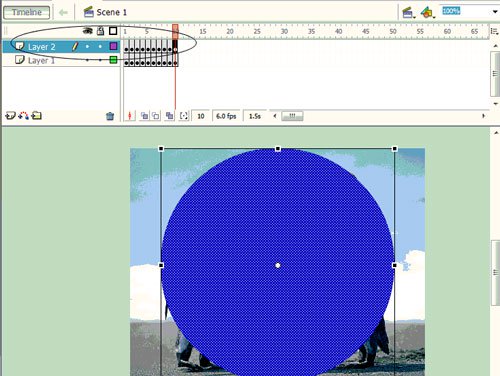
Figure 12
B13. Right click on Layer 2 and select Mask (see Figure 13).
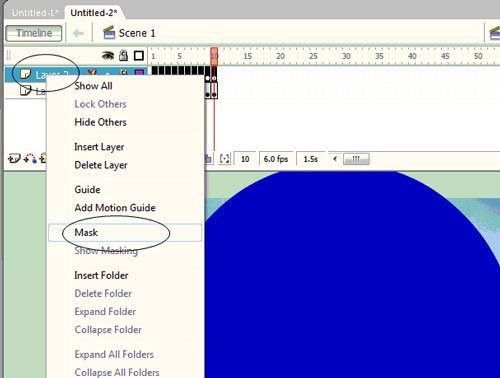
Figure 13
B14. Press Enter + Ctrl to check the result.
Download the original file here.
Was this article helpful?
Your feedback helps us improve.
Related Articles
 Macromedia Flash - Running text effect2 minutes read
 Macromedia Flash - Product image advertising effects5 minutes read
 Macromedia Flash - Effects of lighting on photos3 minutes read
 Macromedia Flash - The spotlight2 minutes read
 Macromedia Flash - Create a snow effect2 minutes read
 Macromedia Flash - An attractive photo appearance effect4 minutes read
Reader Comments 0
Sign in with email or Google to join the discussion.