Table of Contents
The following guide provides a clear overview of Figure, with the most relevant background, details, and practical takeaways.
Figure Overview
Step 1. Create a file with the parameters shown in Figure 1:
 Figure 1
Step 2 Using the Oval Tool (O), remove the border color, select the fill color that is the same as the chicken egg, and draw an egg (see Figure 2).
 Figure 2
Step 3. Select Window> Align to make the Align & Info & Transform panel appear (see Figure 3).
 Figure 3
Step 4. Click on the egg on the stage, in the Align panel click on the 3 positions shown in Figure 4 to make sure the egg is in the middle of the canvas (see Figure 4).
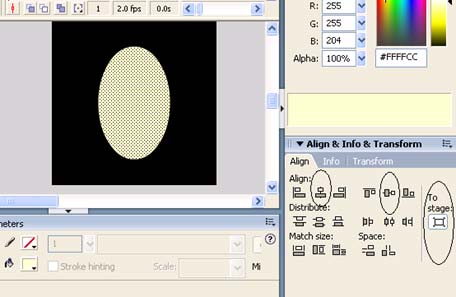 Figure 4
Step 5. Right-click Frame 10 and select Insert Frame (see Figure 5).
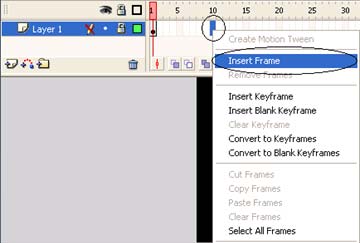 Figure 5
Step 6. Create a new layer (see Figure 6).
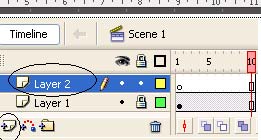 Figure 6
Step 7. Click on Frame 1 of Layer 2, on the tool panel select the Pencil Tool and draw a crack (see Figure 7).
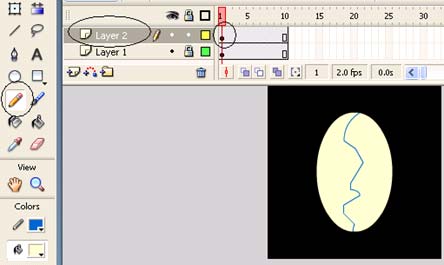 Figure 7
Step 8. Right-click Frame 2 of Layer 2 and select Insert KeyFrame (see Figure 8).
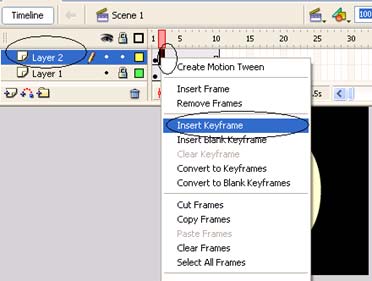 Figure 8
Step 9. Do the same for Frame 3,4., 10 (see Figure 9).
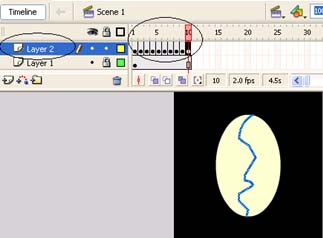 Figure 9
Step 10. Click again Frame 1 of Layer 2, select the Eraser Tool and erase most of the cracks (see Figure 10).
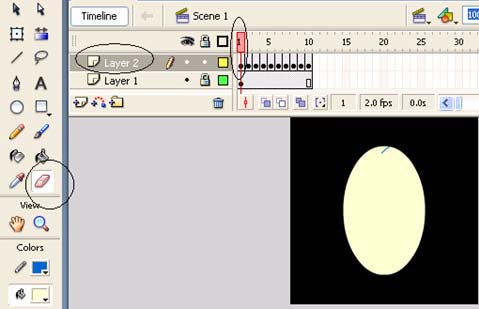 Figure 10
Step 11. Do the same delete operation for Frame 2, 3, 9 (note that the crack in Frame 2 is longer than Frame 1 and do not delete operation for Frame 10) (see Figure 11 illustrating Frame 2 )
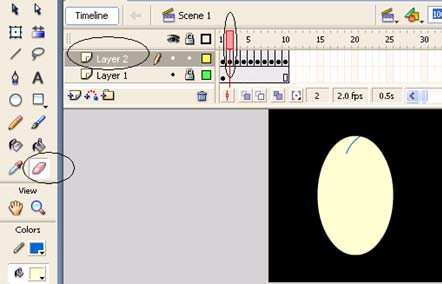 Figure 11
Step 12. Create a new layer (see Figure 12).
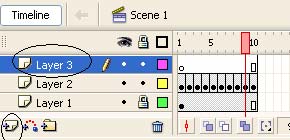 Figure 12
Step 13. Right click on Frame 11 of Layer 3 and select Insert KeyFrame (see Figure 13).
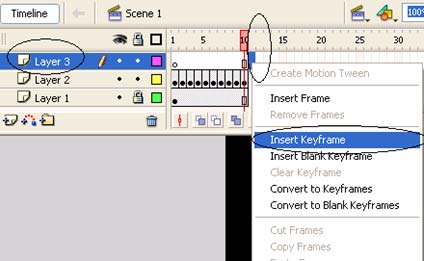 Figure 13
Step 14. Click Frame 1 of Layer 1, press Ctrl-C to copy the egg. To save it on the clipboard (see Figure 14).
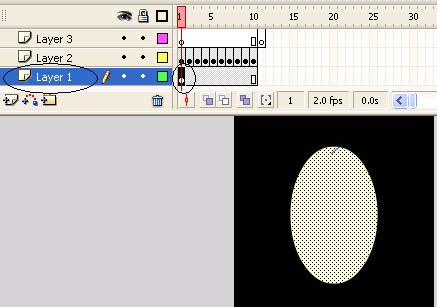 Figure 14
Step 15. Click Frame 11 of Layer 3, right-click on the canvas and select Paste in Place to paste (Paste) the egg copied in B14 into the correct coordinates (see Figure 15).
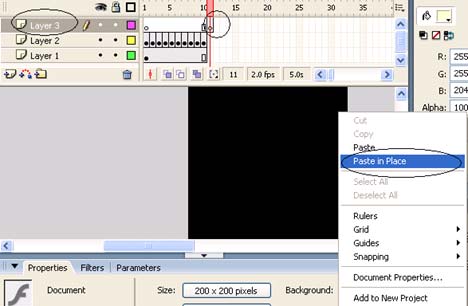 Figure 15
Step 16. Click on Frame 10 of Layer 2, press Ctrl-C to copy the crack. To save it on the clipboard (see Figure 16).
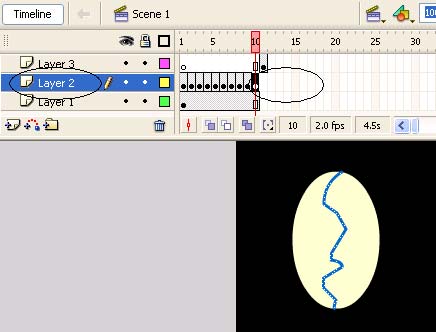 Figure 16
Step 17. Click Frame 11 of Layer 3, right-click on the canvas and select Paste in Place to paste (Paste) the saved LINE in B16 into the right coordinates (see Figure 17).
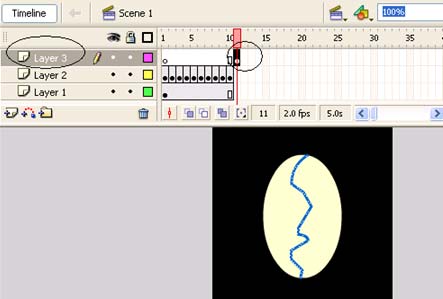 Figure 17
Step 18. Select the Selection Tool (V), (note that we are in Frame 11 of Layer 3), right-click on the half-egg to the right of the crack, select Free Transform (see Figure 18).
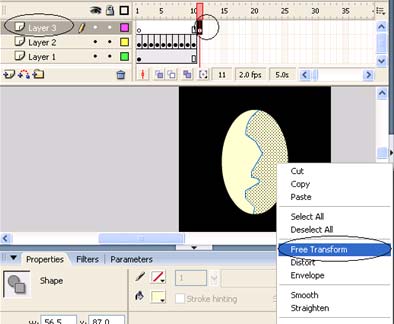 Figure 18
Step 19. Move the center of the rotation (circle between the Free Transform frame) to the foot of the crack (see the figure 19-centered rotated in black).
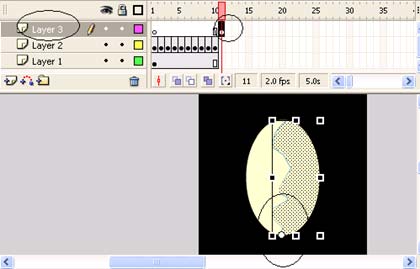 Figure 19
Step 20. Leave the mouse outside the Free Transform frame and drag the mouse to rotate the egg to the right a little bit (see Figure 20).
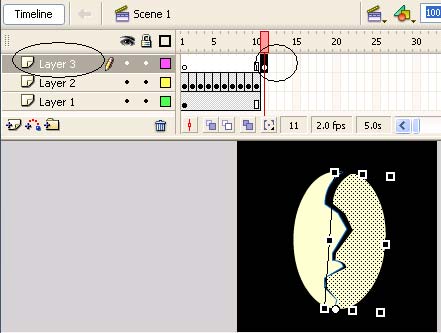 Figure 20
Step 21. Do the same for the left half (see Figure 21).
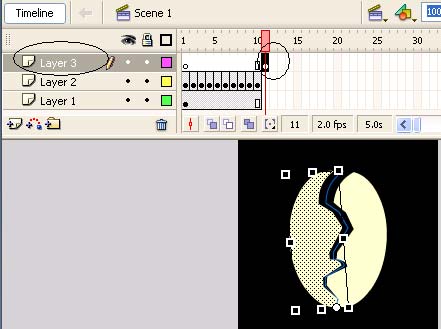 Figure 21
Step 22. Double click on the crack to select it and press the Delete key to delete it Step 23. Click on Frame 12 of Layer 3 and select Insert KeyFrame (see Figure 22).
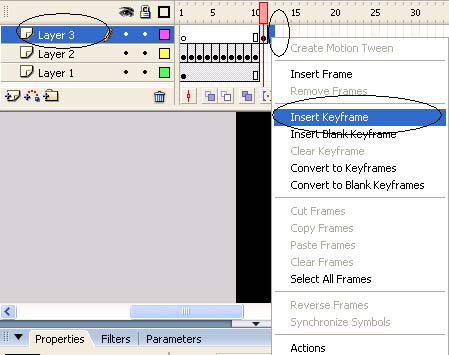 Figure 22
Step 24. Do the same for Frame 13, 14,15 (see Figure 23).
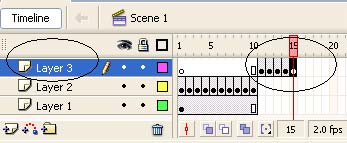 Figure 23
Step 25. Click on Frame 12, select the right half of the egg, right-click it and select Free Transform (see Figure 24).
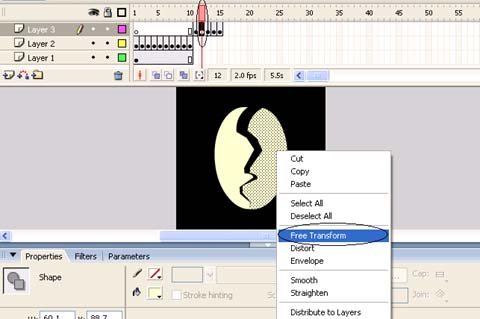 Figure 24
Step 26. Move your mind back to the foot of the crack and use the mouse to rotate it a little right (see Figure 25).
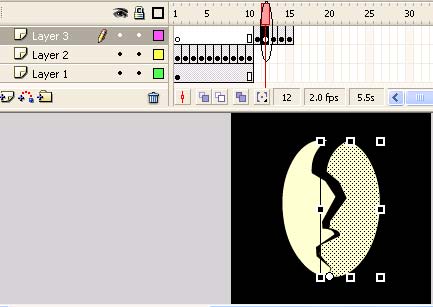 Figure 25
Step 26. Do the same B25 for the left half Step 27. Repeat step 25, step 26 for Frames 13, 14 and 15 Step 28. Create a new layer (see Figure 26).
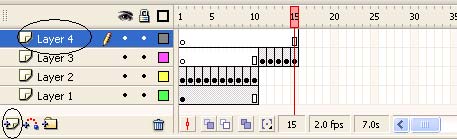 Figure 26
Step 29. Right-click Frame 15 of the newly created layer, select Window> Actions to open Frame-Actions, in this table enter the command LINE: stop (); (see Figure 27)
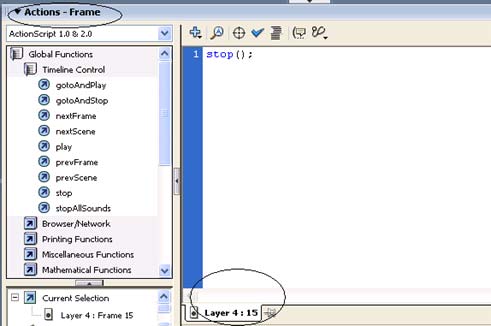 Figure 27
Step 30. Press Enter + Ctrl to check the result.
Download the sample file! Le Thanh Hai thanhhaikg@Gmail. Com
FAQ
What does Macromedia Flash - the Egg Breaks: Figure explain?
The following guide provides a clear overview of Figure, with the most relevant background, details, and practical takeaways.
Who is most affected by Figure?
Figure Overview Step 1.
What are the key takeaways from this topic?
Create a file with the parameters shown in Figure 1: Figure 1 Step 2 Using the Oval Tool (O), remove the border color, select the fill color that is the same as the chicken egg, and draw an egg (see Figure 2).
Related Articles
 Macromedia Flash - Effects of Lighting on Photos4 minutes read
 Macromedia Flash - an Attractive Photo Appearance Effect4 minutes read
 Macromedia Flash - Falling Text Effect: Falling Letters3 minutes read
 Macromedia Flash - Photo Effects with Sound7 minutes read
 Macromedia Flash - Complete Flash Banner Design4 minutes read
 Macromedia Flash: Create Effects for Nature Photos4 minutes read
Reader Comments 0
Sign in with email or Google to join the discussion.