Instructions for installing Windows 11, installing Windows 11 using ISO file
Windows 11 is officially leaked and you can even install it right now.
Windows 11 is officially launched and you can install it now. To install Windows 11, follow these instructions:
Download the ISO file and create a Windows 11 installation USB
To download the Windows 11 ISO file, visit the following links:
Next you need to create a Windows 11 installation USB according to the following instructions:
Proceed to install Windows 11
Step 1: Set up the computer to boot from USB boot
Some computers will automatically recognize the USB boot and proceed to boot into the Windows 11 installation file on the USB after rebooting. If your device is not among them, you need to set it up to boot from USB boot.
- During the boot process, press F2 or F12 (depending on the computer) to access Boot Option Setup
- Then, use the arrow keys to navigate in the BIOS to access Boot > Removeable Devices (or USB Storage Device or External Drive depending on the model), press Enter to choose to load the operating system from USB.
- If you need more detailed instructions, please visit here:
Step 2 : Start installing Windows 11
Basically, the installation process of Windows 11 is not difficult because most of the settings are similar to Windows 10 with only slight changes in the interface.
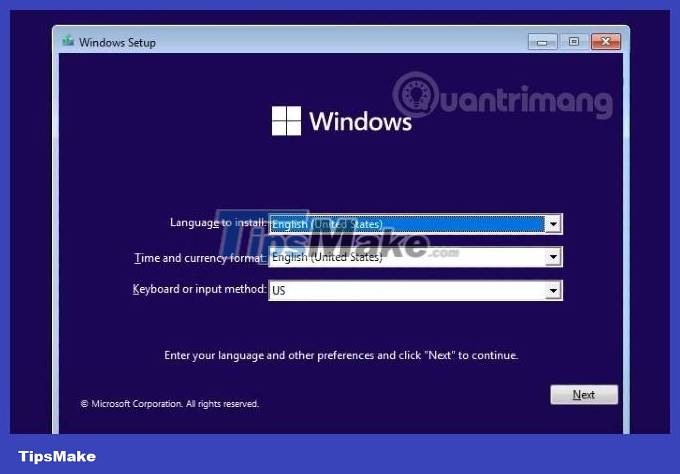
After completing the above steps, the system will run USB boot and take you to the time, language and keyboard selection screen. Once selected, click Next to continue.
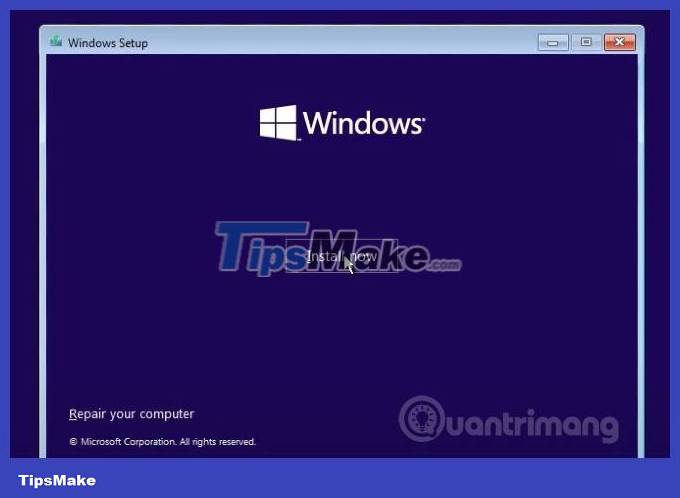
Step 3 : Click the Install now button to start the installation
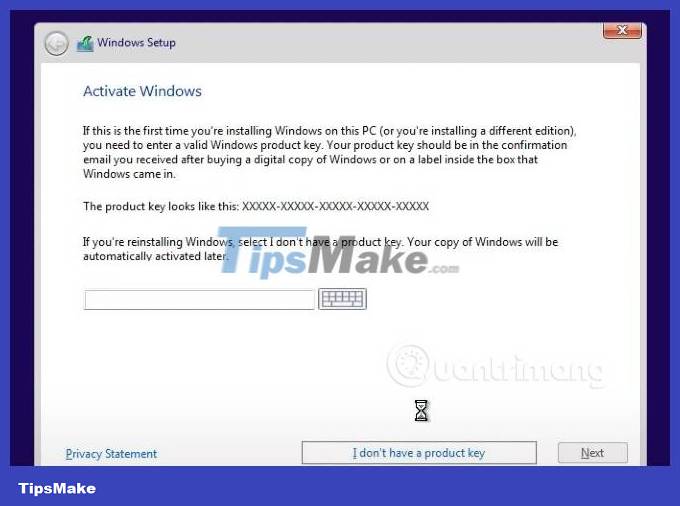
Step 4 : In the product key input interface, select I don't have a product key
Step 5 : On this new screen, you can choose the version of Windows 11 you want to install and click Next.

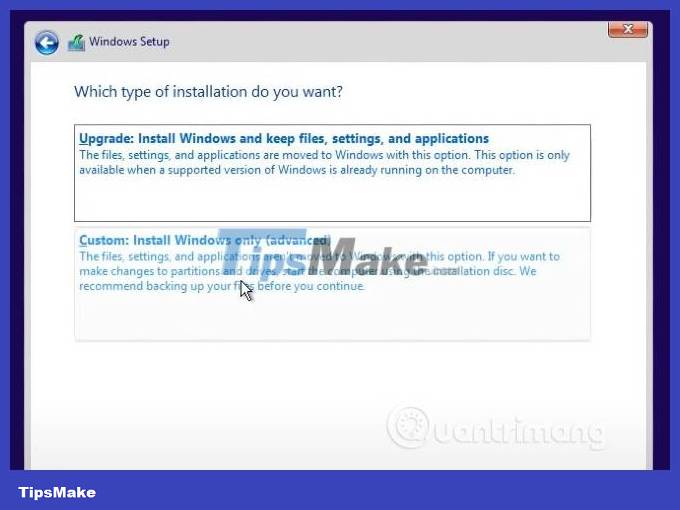
Step 6 : In the next screen, select Custom: Install Windows only (advanced) . Note: This choice may cause you to lose all data on the drive where you plan to install Windows 11.
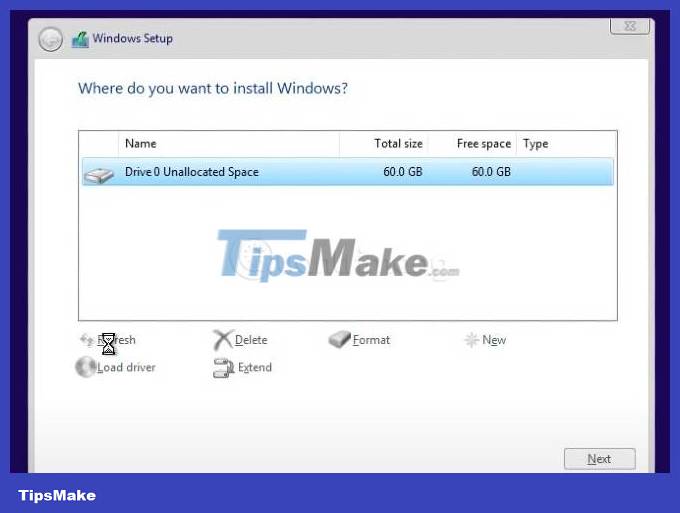
Step 7 : Select the drive where you will install Windows 11. Here, you can use existing drives (partitions) or create a new drive to install Windows 11
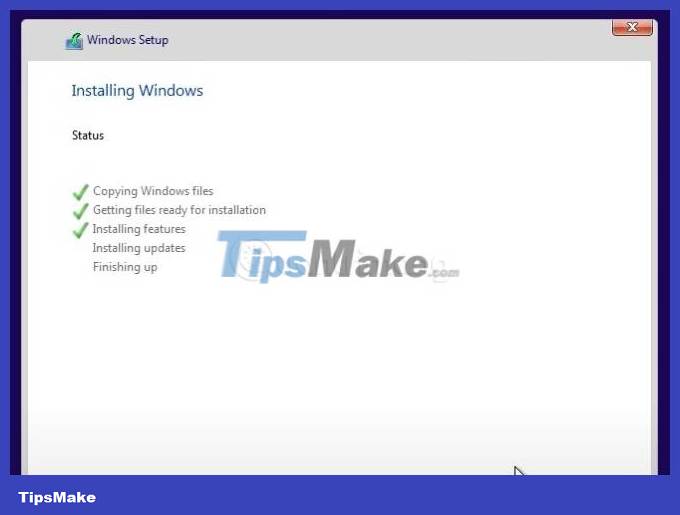
Step 8 : The installation process will take place and you will need to wait a short period of time before continuing
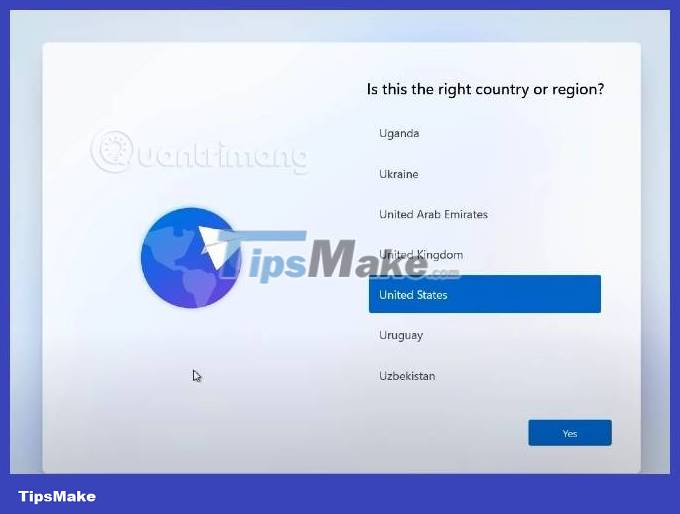
Step 9 : After completing step 8, the computer will reboot and the welcome screen with the new basic settings of Windows 11 will appear. First, Windows 11 will ask you if this is your country or region? You can reset if needed.
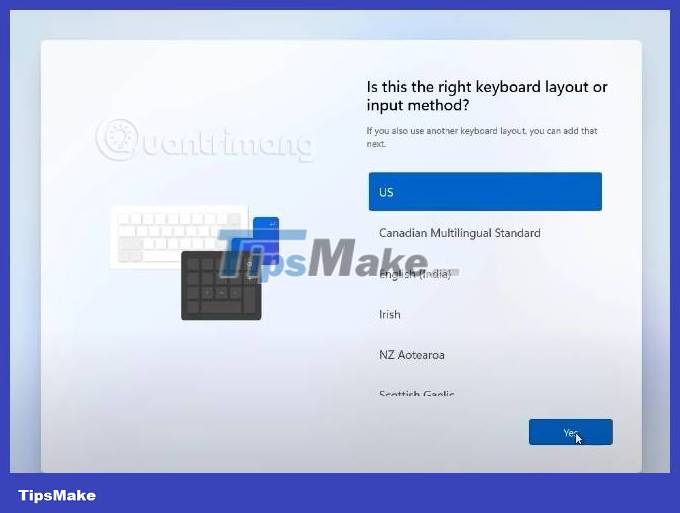
Step 10 : Next is keyboard setup. When you have selected the main keyboard, Windows 11 will ask if you want to install an additional keyboard. Click Add layout to add or Skip to skip depending on your needs.
Step 11 : You have to wait for Windows 11 to check if there are any updates available.
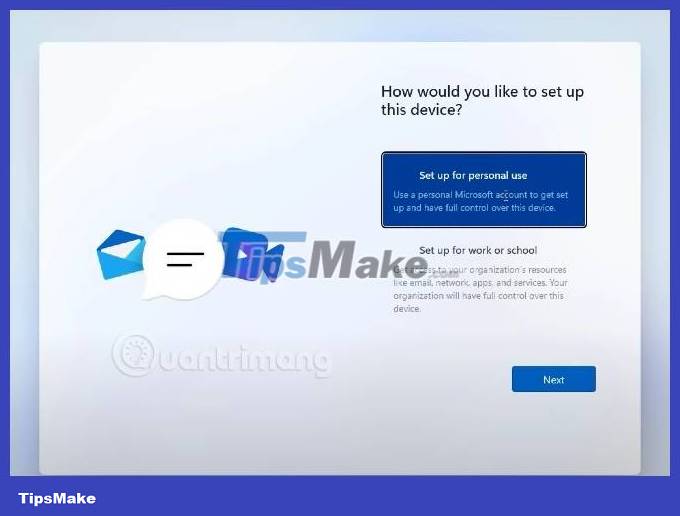
Step 12 : At this screen, Windows 11 asks you to choose the intended use of the device. There are two options: For personal use and For work or study, you choose according to your needs.
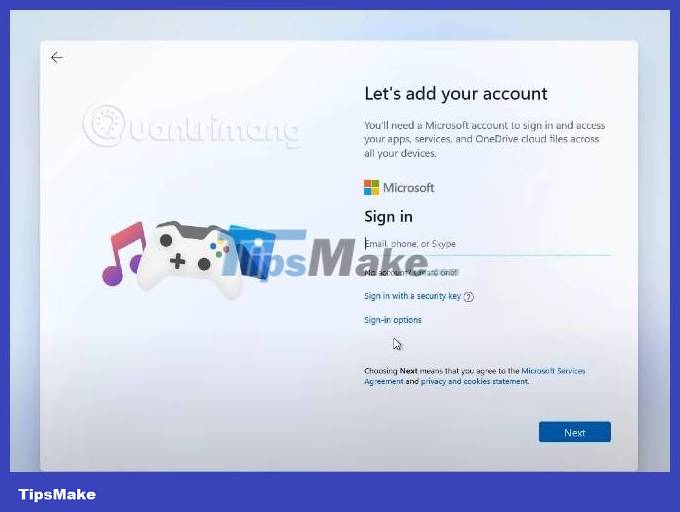
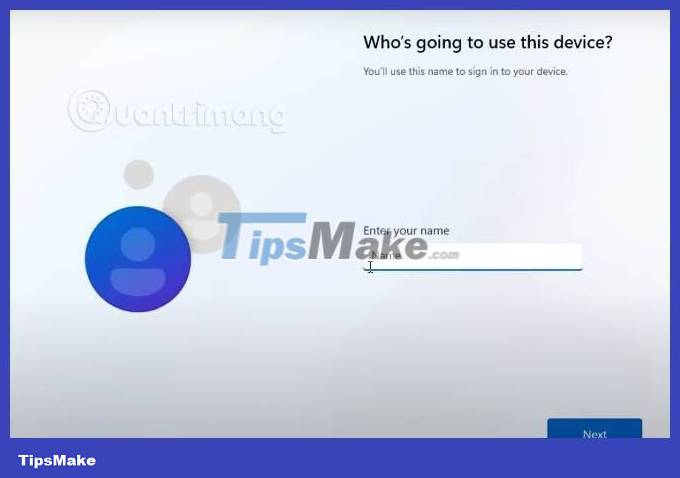
Step 13 : In this step, you need to set up an account to log in to the device. Microsoft displays the default login method with a Microsoft account. However, you can also change it by clicking Sign-in options
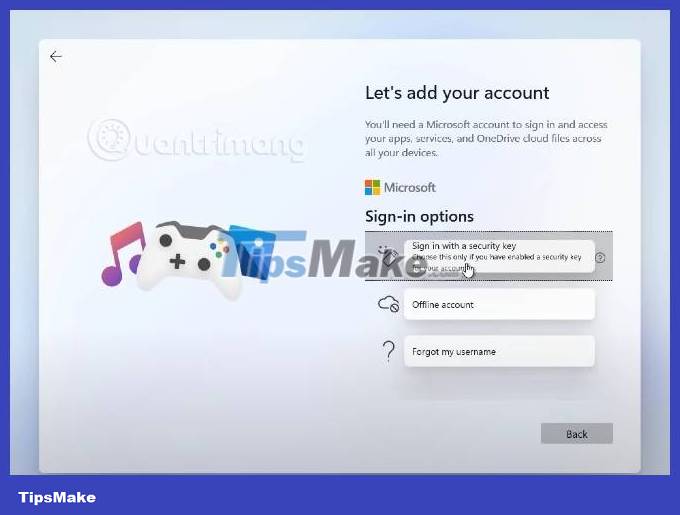
Step 14 : In Sign-in options, you have three options: sign in with a security key (USB format), set up an offline account or use the forgot username function.
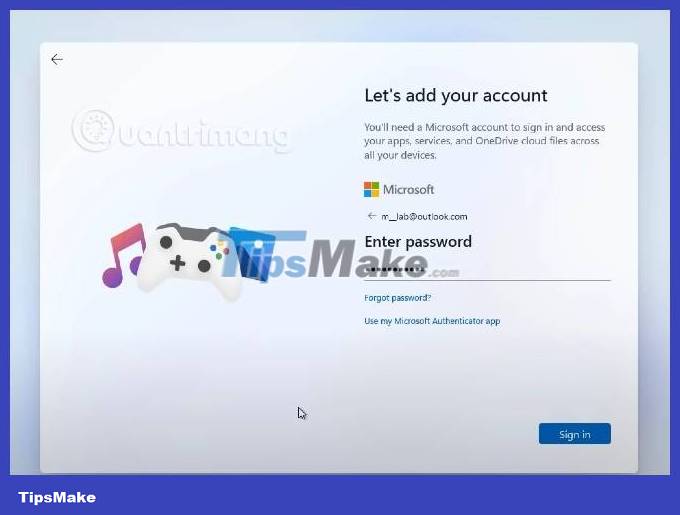
Step 15a : If you log in with a Microsoft account, press back to enter your account and password.
Step 15b : If you create an offline account for the device, you will have to set up a username and login password
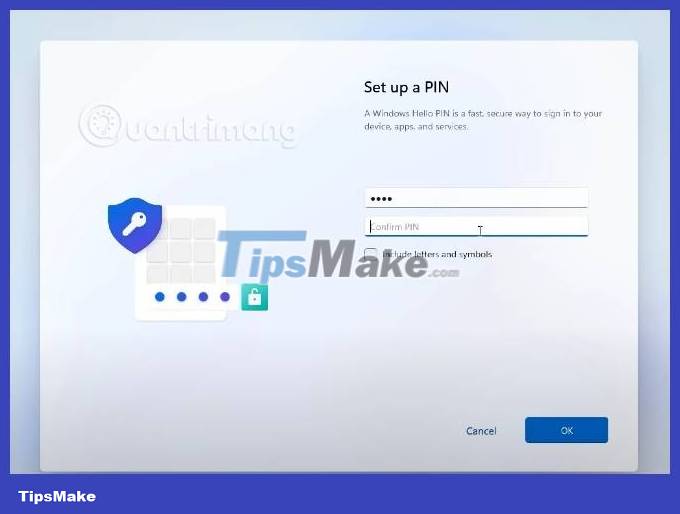
Step 16a : Set up a PIN to quickly log in to your Windows 11 computer
Step 16b : This step is for those who log in with a Microsoft account. Windows 11 will ask if you want to restore data from your old computer or want a completely new setup. You choose depending on your needs.

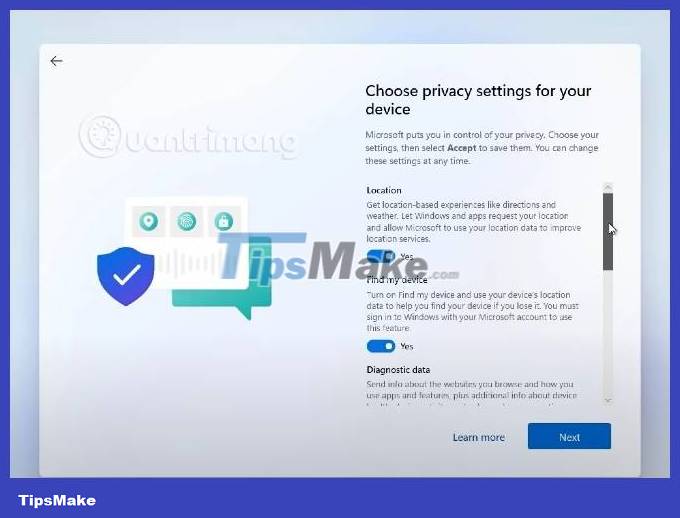
Step 17 : Choose privacy settings for your computer
Step 18 : Customize the experience

Step 19 : Select storage. Here, Microsoft will ask if you want to back up data to OneDrive or just save data locally

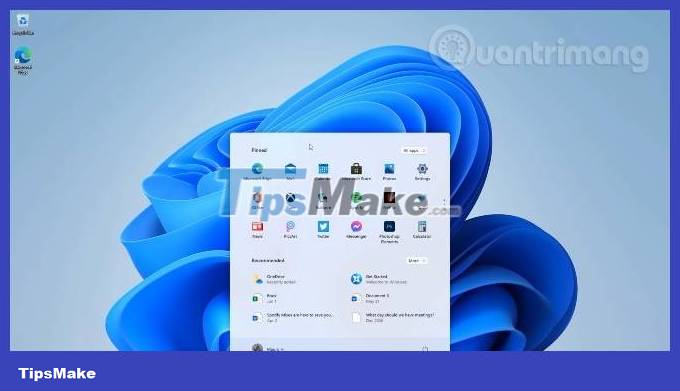
After step 19 your computer will need a few minutes to set up and you will be greeted by the new Windows 11 interface.
How to bypass TPM 2.0 requirement when installing Windows 11
Currently, many people want to install Windows 11 to experience it, but the problem is that the device does not have TPM 2.0. To help you, TipsMake.com has some of the following solutions:
You should note that computers that do not meet the minimum hardware requirements of Windows 11 will still be able to run this operating system. However, Microsoft said it will not update the security of these computers.
Another thing to note is that bypassing the TPM 2.0 requirement doesn't always work. The world of hardware devices is so large and diverse that no tool or solution is guaranteed to work on every device.
Good luck!
- Instructions on how to open and install .CRX files
- How to install Windows 10 from USB with ISO file
- Instructions for installing screensavers on Windows
- Instructions for installing Win 10 using USB with original ISO file from Microsoft
- Instructions for installing GIT and configuring GIT on Windows 10
- Instructions for installing the Window 10X emulator on Window 10
- Detailed instructions on how to install Windows 7 for beginners
- Instructions for installing Windows XP with USB step by step from A to Z
- Instructions for installing Node.js
- Instructions to change DMG file to ISO file
- Steps to change Taskbar position on Windows 11
- Download Ghost Windows 11 Pro Full Soft v1.0 Best New Standard 2021
- How to report Windows 11 errors, suggest Windows 11 features for Insider Preview users
- List of MSI motherboards that support Windows 11
- Steps to open Local Security Policy on Windows 10, Windows 11
- How to use Explorer Patcher, a tool to bring Windows 10 Taskbar to Windows 11
- How to bypass TPM 2.0 requirement when installing Windows 11?
- Download Ghost Windows 11 Pro No Soft v1.0 2021
- How to disable Sleep mode on Windows 11
- How to open multiple images side by side for comparison on Windows 11
-
 Table of common BSOD error codes on Windows 11 and Windows 10
-
5 ways to fix Wi-Fi disconnection issues on Windows 11 laptops.
-
Windows 11 Error Code Table and Most Common Issues When Updating Windows
-
Useful AI features in Windows 11
-
Laptop displaying a blue screen: Causes and effective solutions.
-
How to quickly split the screen on a Windows 10, 11, and macOS laptop.
 Table of common BSOD error codes on Windows 11 and Windows 10
 5 ways to fix Wi-Fi disconnection issues on Windows 11 laptops.
 Windows 11 Error Code Table and Most Common Issues When Updating Windows
 Useful AI features in Windows 11
 Laptop displaying a blue screen: Causes and effective solutions.
 How to quickly split the screen on a Windows 10, 11, and macOS laptop.