How to fix 'We Couldn't Set Your Default Save Location' error on Windows 11/10
Users have reported error 0x80070005 or 0x80070539 arising when they try to place newly saved apps to different external hard drive locations using Settings. Those error codes have the same message that says: 'We couldn't set your default save location' . This means users cannot change the default save location for the app.
Does that error also prevent you from changing where new apps are saved to? If so, here is how you can fix error code 0x80070005 or 0x80070539 on Windows 11/10.
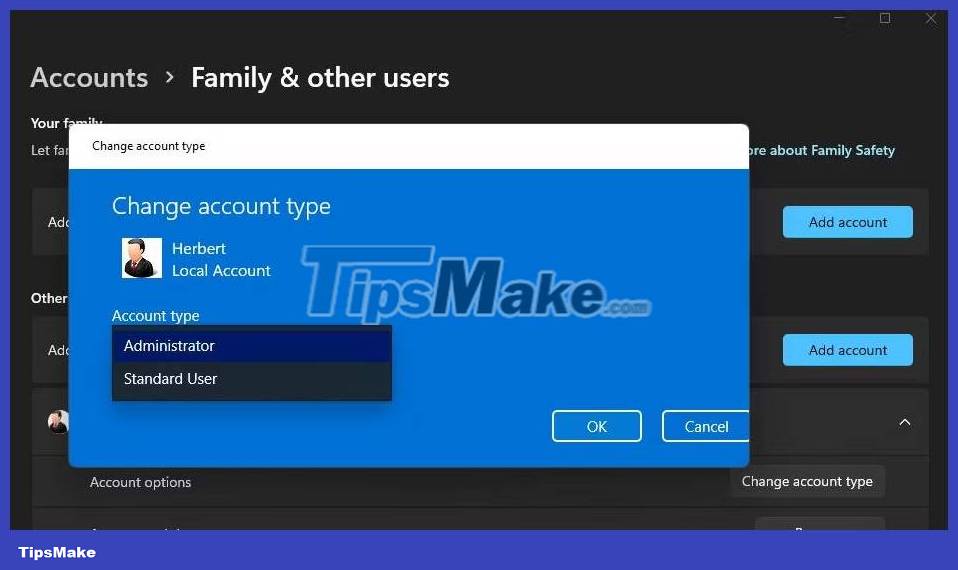
1. Set your user account to administrator
If you are using a standard Windows account, change your user account type to an admin account. A standard user account will prevent you from applying any complex system changes. Changing where an app is saved is something you may need administrator privileges for.

2. Rename the WindowsApps folder
This error may arise because the WindowsApps folder where the application is saved is corrupted. Renaming the WindowsApps folder on the drive or partition where you want to save the application can resolve such issue. To do so, rename that folder as follows:
1. If you are trying to place an application saved on an external hard drive, connect that hard drive to your PC.
2. Open the File Explorer folder navigator and click This PC .
3. Double-click the drive/partition you want to set as the default save location for the application.
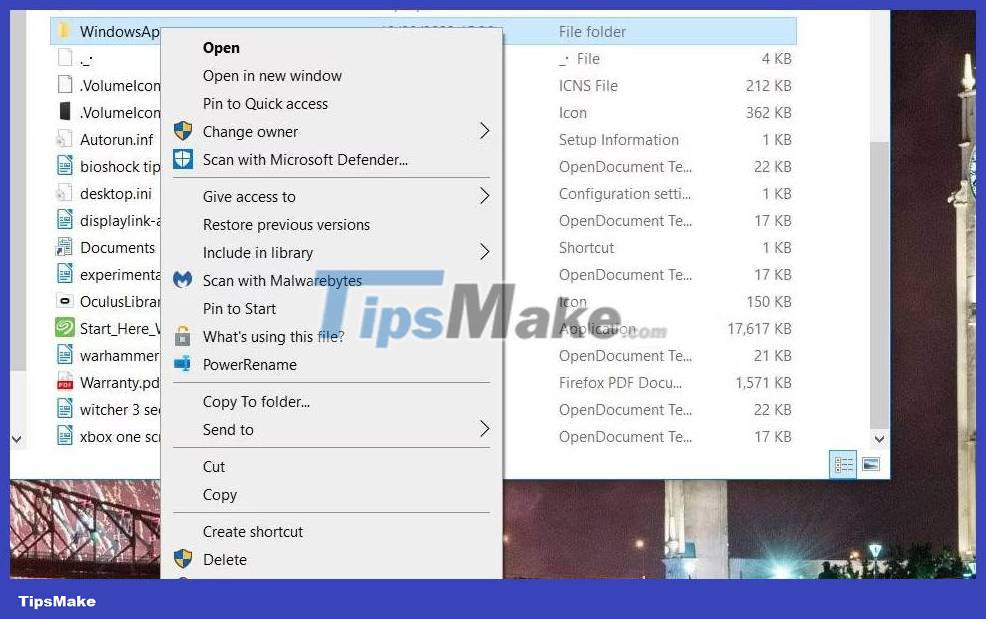
4. Then, right-click on the WindowsApps folder and select the Rename context menu option . You will find that folder in the root directory of the drive.

5. Rename the folder to WindowsApps.old and press Enter.
6. Then, try changing the default save location for applications through Settings.
If this still doesn't work, then move on to the next solution.
3. Delete or rename the WpSystem folder
Many users confirm that renaming or deleting the WpSystem folder fixes error 0x80070005. WpSystem is a directory created to store application data. Try renaming that folder to WpSystem.old on a drive that you can't set as the application save location, as outlined for the previous method. WpSystem will be in the same folder as the WindowsApps folder.
Also, delete the WpSystem folder. You can delete a file or folder in Explorer by right-clicking on the file or folder and selecting Delete . If you can't find that folder or this potential solution doesn't work, try the next solution.

4. Set full system permissions for the System Volume folder
Setting full permissions for the System Volume folder is another confirmed fix for error 0x80070005. Follow these steps to set full permissions for the System Volume folder:
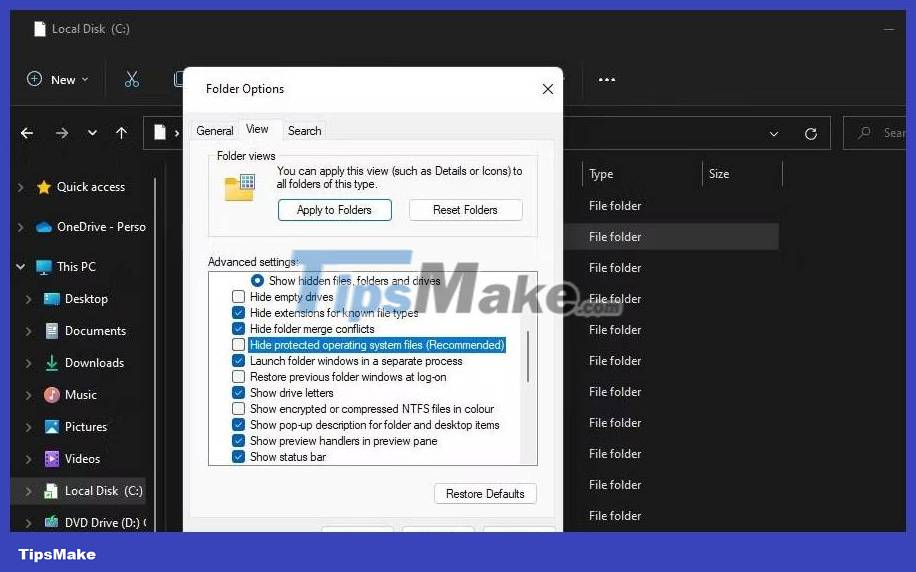
1. Go into File Explorer and click the three-dot menu See more > Options . In Windows 10, click Options on the View tab .
2. Select View on the Folder Options window.
3. Uncheck the Hide protected operating system files (Recommended) option .

4. Select Show hidden files, folders and drives .
5. Click Apply to save the new Explorer settings.
6. Select the drive you need to set as the default application save location.
7. Right-click the System Volume Information folder and select Properties .
8. Click Security > Advanced to display the Advanced Security Settings window .

9. Click the Continue button .
10. Next, click Add to see the Permission Entry window .
11. Click the Select a principal option .
12. Enter SYSTEM inside the object name box.

13. Click the OK button.
14. Select the Full control permission setting .

15. Then select the OK options on the Permission Entry and Advanced Security Setting windows .
Close all remaining open windows. Then, restart your PC and try changing the default save location.