How to Move to a New PC
Getting a new computer can be stressful—you have all of your files and folders and programs on your old PC, and you do not want to lose them. With just a few steps, you can easily move all of your files to a new PC. Apps can be...
Table of Contents
Method 1 of 3:
Using OneDrive
- Install OneDrive on your old PC. To do so, go to https://onedrive.live.com/about/en-us/download/ and click on the Download button on your PC. Then, run the installer and follow the prompts on-screen.
- Sign in to OneDrive. To do so, click on the gray OneDrive cloud, then enter your email address and password into the popup box.
- Do not sync any files yet. These files will take up space on your computer, and you may not have any space left after the syncing completes.
- Open OneDrive settings. To do so, click on the OneDrive icon, then click on the triple dots, then choose Settings.
- Check the box"Save space and download files as you use them" under Settings. This will show files that do not take up space on your computer, but will not download them unless if you use them.

- Click on Manage backup under Backup. This will allow you to back up your desktop, documents, and pictures to OneDrive.
- If you do not have an Office 365 subscription, you will not be able to use more than 5 GB of cloud storage. You can always buy more storage from https://onedrive.live.com/about/en-us/plans/ or get a shared Office 365 subscription.
- Sign in to OneDrive on your new PC. To do so, click on the gray OneDrive cloud, then enter your email address and password into the popup box.
- Do not sync any files yet. These files will take up space on your computer, and you may not have any space left after the syncing completes.
- Open OneDrive settings. To do so, click on the OneDrive icon, then click on the triple dots, then choose Settings.
- Check the box"Save space and download files as you use them" under Settings. This will show files that do not take up space on your computer, but will not download them unless if you use them.

- Click on Manage backup under Backup. This will allow you to back up your desktop, documents, and pictures to OneDrive.
- Reinstall any apps that you had on your old PC. You can view all the apps you have installed on your old PC in Control Panel > Programs and Features. You can find many of the same apps online or in the Microsoft Store.
Method 2 of 3:
Using Backup and Restore (Windows 7 and Earlier)
- Connect a USB drive to your old PC. You will need it to back up all of your files.
- The USB drive should have a large amount of storage.
- Go to Control Panel > System and Security > Backup and Restore.
- Click "Set up backup". This will allow you to create a backup to your USB drive.
- Select the external drive from the list of drives. When prompted to do so, select the external drive from the list of drives. This will allow a backup to be created to your PC. Click on Next and let the default settings do the work for you.
- Click on "Back up now". This will automatically copy all of your files to the external drive.
- Eject the USB drive. Once the backup is done, look for the "Safely remove hardware" icon on the taskbar (the icon with the USB and the checkmark), click it, and choose Eject. Then remove the drive.
- Plug the USB drive into your new PC.
- Go to Control Panel > System and Security > Backup and Restore (Windows 7).
- Choose "Select another backup to restore files from". Then choose the drive from the wizard.
- The restoration process can take anywhere from a few minutes to a few hours. Make sure that your new PC is plugged in.
- Reinstall any apps that you had on your old PC. You can view all the apps you have installed on your old PC in Control Panel > Programs and Features. You can find many of the same apps online or in the Microsoft Store.
Method 3 of 3:
Using File History (Windows 8 and Later)
- Connect a USB drive to your old PC. You will need it to back up all of your files.
- Go to Control Panel > System and Security > File History.
- Click on Turn on by the drive to back up from.
- Let the backup process run. You can continue using your PC in the background while File History is running.
- Eject the USB drive. Once the backup is done, look for the "Safely remove hardware" icon on the taskbar (the icon with the USB and the checkmark), click it, and choose Eject. Then remove the drive.
- Plug the USB drive into your new PC.
- Go to Control Panel > System and Security > File History.
- Choose "Restore personal files" from the left pane.
- Click on the green arrow. This will immediately copy the files to your PC.
- Reinstall any apps that you had on your old PC. You can view all the apps you have installed on your old PC in Control Panel > Programs and Features. You can find many of the same apps online or in the Microsoft Store.
Was this article helpful?
Your feedback helps us improve.
Related Articles
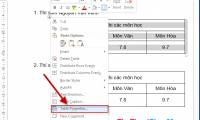 Instructions on how to move tables in Word2 minutes read
 How to move Windows window when title bar click error3 minutes read
 How to move user folders on Windows 1014 minutes read
 Starfish can walk at a speed of 1 m / min, and this is how they move2 minutes read
 How to move files by type in Windows with batch files5 minutes read
 How to move multiple apps at once on iPhone3 minutes read
Reader Comments 0
Sign in with email or Google to join the discussion.