Instructions for using File History to backup and restore data
File History is one of the main backup tools integrated on Windows 10, this is a backup tool that contains all the features. File History was first introduced on Windows 8 operating system. After setting up File History, you can connect an external hard drive to your computer and Windows will automatically back up all files.
File History is one of the main backup tools integrated on Windows 10 and Windows 8 / 8.1, this is a backup tool that contains all the features. File History was first introduced on Windows 8 operating system. Thanks to this tool, you can select the data to backup to backup without having to install 3rd party software or manual backup. . When there is a problem can quickly restore the data you need.
After setting up File History, you can connect a removable drive to your computer and Windows will automatically back up all files. So how do I enable and use this built-in File History feature to back up data and hard drives on my computer? This is also the main content that TipsMake.com introduced to you in this article. Let's follow it.
1. Activate File History
To activate File History, first connect your removable hard drive (USB, portable hard drive, etc.) to your computer.
Next on the Start Menu, open the Settings application (installation application) and navigate to Update & Security => Backup.
Click the Add a drive option under the Back up using File History section to proceed with adding a removable drive, then File History will back up.
You can also use Control Panel . Assuming you are using Windows 8, open Control Panel and navigate to System and Security => File History .
Select a removable hard drive that you want to back up.

On the screen you will see the Automatically option to backup my files in ON mode.

Windows will automatically back up all files on the drive whenever you connect an external hard drive to your computer.
2. Configure File History
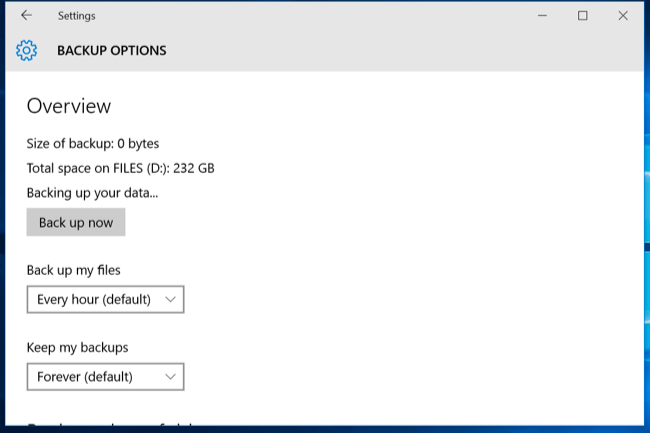
Select the More options option to set how the File History backs up, the time to store backup files .
By default, each hour the File History will automatically back up your files, but you can reset the default backup time. Can choose 10 minutes, 15 minutes, 20 minutes, 30 minutes, 1 hour, 3 hours, 6 hours, 12 hours or even 1 time / day.
In addition, File History also keeps your backups forever. However, you can set up to delete backups after 1 month, 3 months, 6 months, 9 months, 1 year or 2 years.
Or you can set File History to automatically delete backup files when needed to free up disk space .
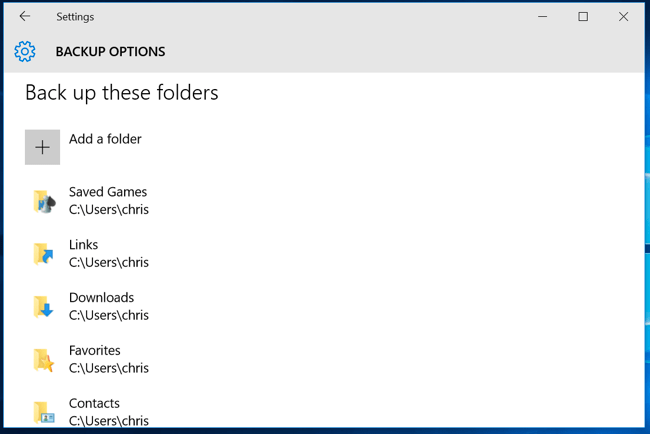
By default, File History will set up backups of important backup folders on user accounts such as Desktop, Document, Download, Music, Pictures, Video folders, Roaming folders - where data is stored. application, OneDrive folder and some other folders.
Select Add a folder then select any folder on your computer to backup.
Alternatively, you can select any folder here and then select Remove to prevent Windows from backing up.
Note:
On Windows 8, File History does not have the option to add a folder, but you can add a folder to the Library to add any folder.
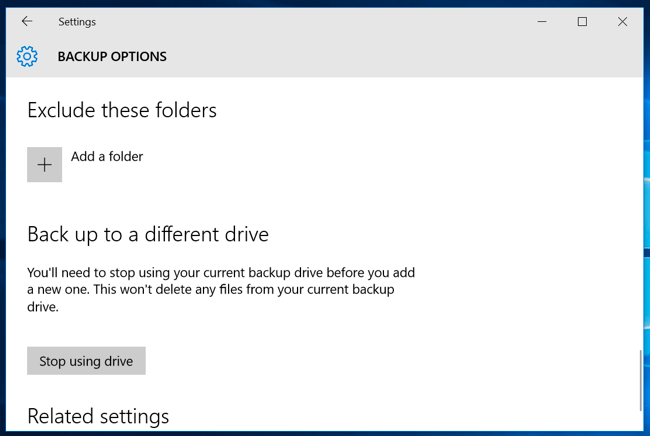
Alternatively, you can find and select the option Exclude these folders . This option allows you to prevent backing up any subdirectories in the backup folder.
For example, when Windows automatically backs up the Document folder, you can select any subdirectory in the Document folder to stop Windows from backing up that folder.
On Windows 8, you can see this option is located on the left side of the File History window.
To back up another drive, use the Stop using drive option . This option allows you to stop the process of backing up the current drive and switch to backing up a new drive.
Windows can only back up one drive at a time.
Click on the link to access Control Panel, where you can reset the File History. On the Control Panel interface, click on Advanced Settings to appear some other options such as viewing recent errors on Event Viewer, cleaning up files on the old version, and allowing other computers to join Homegroup for backup. .
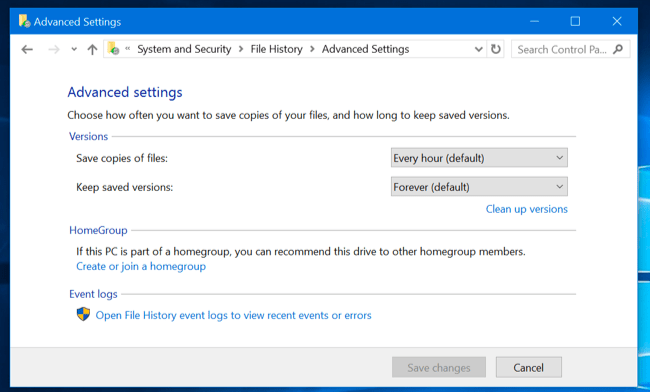
(Event Viewer is an integrated tool in Windows that allows you to review events in the system in detail with specific parameters such as user, time, computer, services . Events Discrete filters are filtered back into similar events that help us get the information we need quickly .)
3. Restore backup files
To restore files from a removable drive (USB, portable hard drive .), open the Settings application (installation application), then select Update & security => Backup => More options .
Scroll down to select Restore files from a current backup .
Alternatively, you can open Control Panel, select System and Security => File History , then click on R estore personal files to view backup files and recovery files.
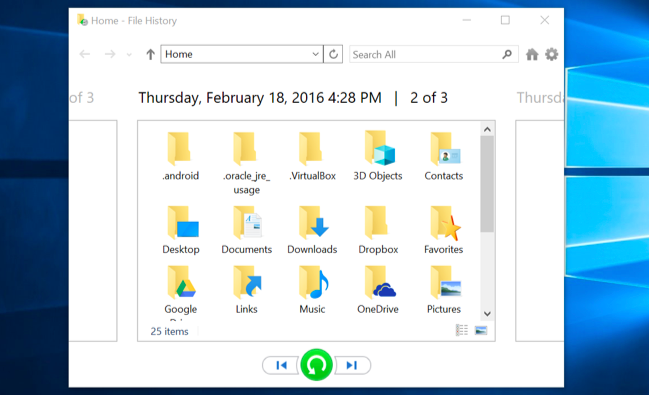
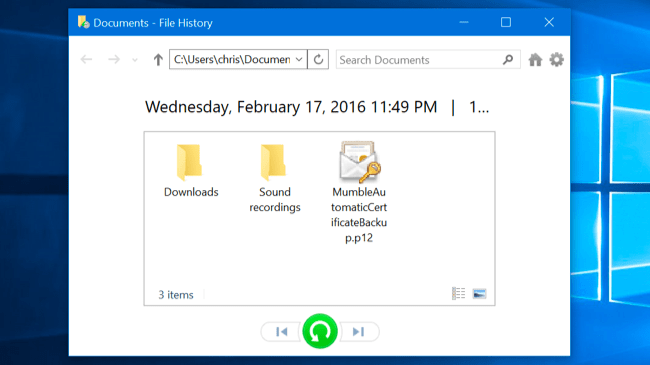
Browse for available files and select one or more files and folders. You can preview these files and folders by right-clicking or selecting files and folders then clicking the green button to restore files and folders on your computer.
To select a time period, click on the arrow or click on the frames next to the window.
4. How to recover files on File Explorer
You can quickly restore files on previous versions from File Explorer.
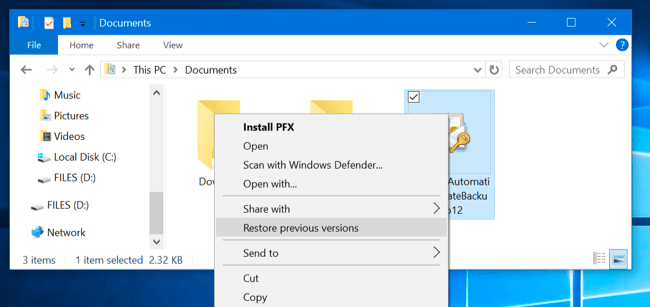
First open File Explorer, then right-click the file you want to restore, and then click Restore previous versions .
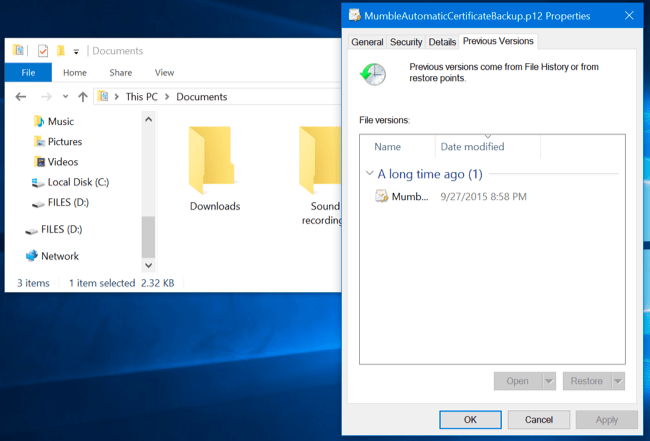
Or you can click Properties then select the Previous Versions tab.
Any files of the old Windows version are available here. You can preview files, restore files to your location first, or restore previous versions to another location on your computer.
Also you can preview previous versions and delete files in a specific folder.
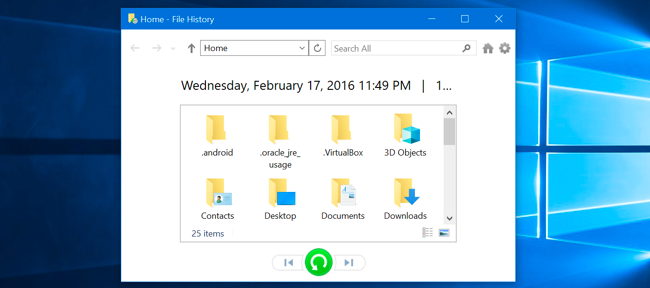
First navigate to the folder on File Explorer, then click on the Home tab on the Ribbon in the top corner of the window and then click History .

You should now see a list of files that you can restore.
Refer to some of the following articles:
- Backup and restore data on Windows Phone 8.1
- How to recover deleted messages on Facebook?
- Delete all Android devices, restore original settings
Good luck!
- How to use File History to back up data in Windows 11
- How to use Iperius Backup Free to back up Windows data
- How to backup Outlook email with File History on Windows 10
- Things to keep in mind when backing up data on your computer
- Instructions for backing up and storing data on your Android device securely
- Instructions to restore data after restoring iPhone
- How to back up and restore Linux Terminal history
- How to Backup and Restore data on iPhone, iPad
- 9 Old Windows Tools That Are Still Useful Today
- How to enable or disable the File History feature in Windows 10
- How to transfer User Profile to another Windows 10 computer
- Useful software for managing files, folders, email, Internet and computer protection
- Ultra-fast data recovery solution
- How to use iSkysoft Data Recovery to recover data
- 6 addresses to save professional data
- How to use Recoverit to recover data on your computer
- How to recover data using Easeus Data Recovery Wizard
- Recover, save files deleted completely with Recuva


-
 Create a group of files to serve as a knowledge source for the agent in Copilot Studio.
-
Upload files to create a knowledge base for agents in Copilot Studio.
-
All you need to know about PDF files - What is a PDF file?
-
Everything you need to know about ODT files - What is an ODT file?
-
What is an M4A file? Everything you need to know about M4A files.
-
The easiest way to extract RAR files on a MacBook for free in 2026.
 Create a group of files to serve as a knowledge source for the agent in Copilot Studio.
 Upload files to create a knowledge base for agents in Copilot Studio.
 All you need to know about PDF files - What is a PDF file?
 Everything you need to know about ODT files - What is an ODT file?
 What is an M4A file? Everything you need to know about M4A files.
 The easiest way to extract RAR files on a MacBook for free in 2026.