How to Remove Windows Genuine Advantage Notifications
This wikiHow teaches you how to remove the Windows validation notifications that you see when using an unregistered copy of Windows. The easiest (and most legal) way of doing this involves activating your copy of Windows from within...
Table of Contents
Method 1 of 3:
Activating Windows
-
 Make sure that you're connected to the Internet. In order to activate your copy of Windows, you'll need to be connected to the Internet so that Microsoft can validate your key.
 -
 Open Start. Click the Windows logo in the bottom-left corner of the screen. The Start menu will pop up.
-
 Open Settings. Click the gear-shaped icon in the lower-left side of the Start menu.
-
 ClickUpdate & Security. This circular arrow-shaped icon is at the bottom of the Settings window.
-
 Click the Activation tab. You'll find it on the left side of the window.
 -
 Click Change product key. It's a link in the middle of the Activation page. Doing so opens a new window.
 -
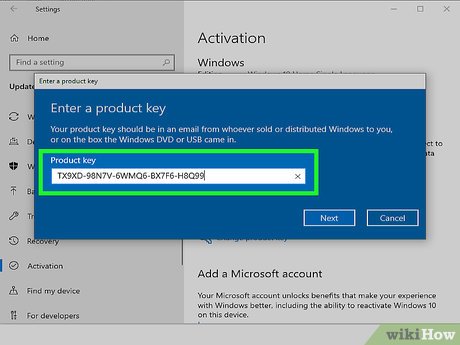 Enter your Windows 10 product key. Type the activation key that came with your copy of Windows 10 into the text box.
- You can usually find the product key on the CD box if you bought a hard copy, or in a confirmation email from Microsoft if you bought a Windows 10 product key online.
- If you bought a key for Windows 7, 8, or 8.1, you can use that key to register Windows 10.[1]
-
 Click Next. It's in the lower-right corner of the window. This will prompt Microsoft to attempt to verify your copy of Windows.
 -
 Follow any on-screen instructions. If your copy of Windows is legitimate, you should receive a notification that it has been accepted, though you may need to enter additional information if prompted.
Method 2 of 3:
Removing the Activation Watermark from Windows 10
-
 Make sure that you're on an administrator account. You'll need to be on an account that has administrator privileges in order to make changes to your computer's registry.
 -
 Open Start. Click the Windows logo in the bottom-left corner of the screen.
-
 Type in regedit. This will search your computer for the Registry Editor command.
 -
 Click regedit. It's a teal collection of blocks at the top of the Start window.
 -
 Click Yes when prompted. Doing so will open the Registry Editor window.
 -
 Go to the "Activation" key. To do so:
- Expand the HKEY_LOCAL_MACHINE folder by double-clicking it.
- Expand SOFTWARE
- Scroll down and expand Microsoft
- Scroll down and expand Windows NT
- Expand CurrentVersion
- Expand Software Protection Platform
- Click Activation
-
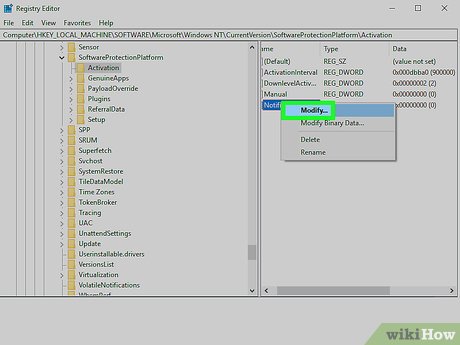
 Right-click Manual. It's a blue-and-white icon on the right side of the window. A drop-down menu will appear.
- If your mouse doesn't have a right-click button, click the right side of the mouse, or use two fingers to click the mouse.
- If your computer uses a trackpad instead of a mouse, use two fingers to tap the trackpad or press the bottom-right side of the trackpad.
-
 Click Modify. It's at the top of the drop-down menu. A window will appear.
 -
 Change the value data. In the "Value data" text box, replace the "0" with a "1", then click OK.
- You may be prompted to confirm this choice. If so, click Yes or OK before proceeding.
-
 Right-click NotificationDisabled. This item is also on the right side of the page.
 -
 Click Modify.
 -
 Change the value data to 1. This will prevent the activation notification from appearing on your desktop.
 -
 Restart your computer. Click Start, click Power
 , and click Restart in the pop-up menu. Your computer will shut down and then turn itself back on.
- Repeat this process if the notification reappears. While removing the watermark notification will work temporarily, you may need to disable it again in the future.
Method 3 of 3:
Disabling Genuine Advantage in Windows 7
-
 Open Start. Click the Windows logo in the bottom-left corner of the screen.
-
 Click the search bar. It's at the bottom of the Start window.
 -
 Type in task manager. This will search your computer for the Task Manager application.
 -
 Click Task Manager. It's at the top of the Start window.
 -
 Open the Run window. Press ⊞ Win+R at the same time to do so.
- If this doesn't work, re-open Start, type in run, and click Run.
-
 Type in system32. System32 is a folder that contains many of your computer's sensitive files.
 -
 Click OK. It's at the bottom of the Run window. This will open the system32 folder.
 -
 Enable viewing for hidden files and file extensions. To do so:
- Click the View tab.
- Check the "Hidden items" box.
- Check the "File name extensions" box.
-
 Find the "WgaLogon.dll" file. The easiest way to do this is by typing wga into the search bar that's in the upper-right side of the window and then waiting for the "WgaLogon.dll" file to appear.
 -
 Rename the "WgaLogon.dll" file. Right-click the file, click Rename, and type .bak at the end of the file name and extension, then press ↵ Enter.
- The file should now read "WgaLogon.dll.bak" instead.
- You may be prompted to confirm this choice. If so, click Yes or OK.
-
 Create an empty copy of the "WgaLogon.dll" file. To do so:
- Right click on a blank space in the system32 window.
- Select New
- Click Text Document
- Type in WgaLogon as the file's name.
- Replace the .txt with .dll
- Press ↵ Enter, then click Yes if prompted.
-
 Find the "WgaTray.exe" file in both system32 and Task Manager. Since you'll need to delete both entries within 5 seconds of each other, you'll want to find them now. To do so:
- system32 - You should see "WgaTray.exe" in the window if "wga" is still typed into the search bar.
- Task Manager - Click the Processes tab, scroll down until you find the "WgaTray.exe" option, and click it.
-
 Delete both "WgaTray.exe" files. Select the system32 "WgaTray.exe" file and press the Del key, then switch to Task Manager and click End process or End task in the lower-right corner of the window.
 -
 Restart your computer when finished. Once your computer finishes rebooting, your Genuine Advantage notifications should be gone.
- You may have to repeat this process at some point, since Genuine Advantage notifications often return with critical updates.
Was this article helpful?
Your feedback helps us improve.
Related Articles
 Problems with Windows Genuine Advantage and workarounds9 minutes read
 How to Control and Customize Notifications in Windows 117 minutes read
 How to turn off Focus Assist notifications on Windows 103 minutes read
 Remove CCleaner's annoying messages in 2 steps1 minutes read
 Here's how to disable notifications from Windows Phone phones on Windows 10 computers2 minutes read
Reader Comments 0
Sign in with email or Google to join the discussion.