
How to Make Your Own Animation
Part 1 of 3:
Creating an Animation with Moovly
-
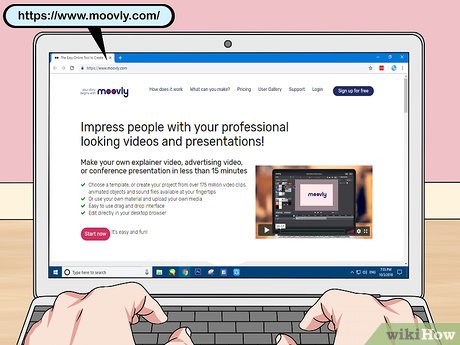 Open Moovly. Go to https://www.moovly.com/ in your computer's web browser.
- Keep in mind that Moovly is only free for 30 days, during which time you cannot download a video. If you want to be able to download your animation, try using Animatron.
-
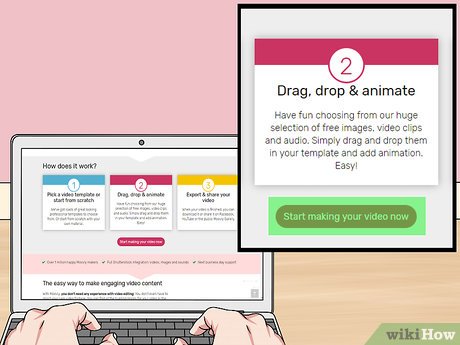 Scroll down and click Start making your movie now. It's a red button near the middle of the page. The animator interface will open and a pop-up window will appear.
 - Enter your name and email address. Type your first name into the "First name" text box, then type your email address into the "Email" text box.
- If you'd rather sign up with a social media account, tap the Facebook, Google, or LinkedIn option and follow the on-screen prompts.
- Check the "I accept" box. It's below the "Email" text box.
- If you want to view the privacy statement or the terms and conditions, click the Privacy Statement or the Terms & Conditions link respectively to open the related document in a pop-up window.
- Click Submit. This is at the bottom of the pop-up window.
- Navigate through the tutorial. Click through each of the prompts until the tutorial closes. At this point, you can begin animating.
- Select a group of templates. Click the Moovly Libraries heading in the upper-left corner of the page, then click the title of the template you want to use.
- Drag an item onto the canvas. Click and drag the item you want to animate onto the white canvas in the middle of the page, then drop it there.
- Resize and reposition the item. You can click and drag one of the item's corners to resize it, and you can move the item around by clicking and dragging it on the canvas.
- Click Add animation. It's a box at the bottom of the page. A pop-up menu will appear.
- Select an animation category. In the pop-up menu, place your cursor over the type of animation you want to apply to the selected item. This will prompt a pop-out menu to appear next to the current menu.
- For example, to move the character, you might select the Move & Transform category.
- Select an animation. Click the animation that you want to apply to your selected item.
- If you selected the Move & Transform option, for example, you might click Move left to move the character to the left.
- Change the animation's speed. You can click and drag the end of the animation's white bar in the timeline to the left to speed up the animation, or you can drag it right to slow down the animation.
- Add other objects. Click and drag other objects that you want to animate onto the canvas, then animate them as you please by using the Add animation menu.
- Add a clip. Once you've added enough objects to one clip, you can create a blank clip by clicking Add clip on the lower-left side of the page. You can then add more objects and animations to this clip in order to continue your story.
- Confirm your email address. Now that you've created your animation, you'll need to confirm your email address in a new tab in order to save it:
- Open in a new tab the inbox for the email address you used to create your Moovly account.
- Open the "Activate your Moovly account" email.
- Click the activation link in the email.
- Create a password, then click Continue.
- Publish your animation. While you can't download animations from Moovly without paying for the premium version of Moovly, you can publish animations to Moovly's servers:
- Open your Moovly dashboard if it isn't already open.
- Click Publish.
- Click Moovly Gallery.
- Click OK, I agree.
- Enter a title and description, then click Publish.
- Copy the link at the bottom of the "Publishing your project" window if you want to share the animation with other people.
Part 2 of 3:
Creating an Animation with Animatron
- Open Animatron. Go to https://www.animatron.com/studio in your computer's web browser.
- Animatron's free version will allow you to create and download up to 10 seconds of animated video in standard definition.
- Click Sign Up. It's on the upper-right side of the page. A pop-up window will appear.
- Enter an email address. Type a working email address into the "EMAIL ADDRESS" text field.
- You can also select Facebook, Twitter, or Google to sign up with your Facebook, Twitter, or Google login information.
- Click CREATE ACCOUNT. It's below the text field.
- Verify your account. Do the following:
- Open your email inbox.
- Open the "Please confirm your account at Animatron.com!" email.
- Click the blue ACTIVATE YOUR ACCOUNT button.
- Enter your account details. Type your preferred name and password into the appropriate text fields, then click the "What do you do?" text box and select an answer based on your occupation (e.g., Business). Depending on your answer, you may also need to answer a follow-up form. Once you've filled out the whole form, click CREATE MY FREE ACCOUNT at the bottom of the page.
- Click START CREATING. It's a red button on the upper-right side of the page.
- Skip the introduction section. To do so:
- Click CONTINUE twice.
- Click LITE at the top of the page.
- Click Cancel in the top-right corner of the tutorial window.
- Select an animated set. Click one of the animated set options in the left-hand column.
- Select a background. Click the background you want to use at the top of the left-hand column.
- Depending on your selected set, there may be only one background to use.
- Move the playhead to the point where you want to insert a character. Click and drag the vertical bar on the timeline to the point at which you want to add your first animated character.
- Add a character. Click one of the animated characters in the left-hand column.
- Position the character. Click and drag the character to the point where you want to place them.
- You can also resize your character by clicking and dragging in or out one of the corners of the selection box that's around the character.
- Open the "Appear" menu. Click the white box with overlapping circles to the left of the timeline to do so.
- This will only appear when a character is selected.
- Select an appearance animation. Click one of the appearance animation options (e.g., POP IN) in the menu at the bottom of the page.
- You can also click the MOVE tab on the left side of the timeline to see movement animations.
- Click APPLY. It's below the selected appearance option.
- Add more characters and appearance animations. You can add more characters and movements to your animation by moving the playhead to the section where you want to place a character, selecting a character, and adding animations to that character via the "Appear" menu.
- Save your animation. You can save your animation as a 10-second standard definition video by doing the following:
- Click DOWNLOAD on the upper-right side of the page.
- Click Video... in the drop-down menu.
- Click CONTINUE, then click CONTINUE WITH RESTRICTIONS.
- Click RENDER.
- Click the Download link when it appears.
Part 3 of 3:
Learning Traditional Animation Basics
- Learn about different animation concepts. There are too many different micro-components of animation to address in this article, but several common (and important) concepts can be found in online forums, courses, and guides, as well as in any animation or art resources found at your local library. Common concepts to study include the following:
- Color — Knowing which colors pair well and which combinations to avoid will help you create a more pleasant animation (or, if you're going for dissonant imagery, create a distressing animation).
- Composition — This refers to knowing how to fill the screen with your animation in an efficient, aesthetically pleasing manner.
- Perspective — Knowing how to demonstrate the dimensions of an image will deepen your animation.
- Anatomy — Proper understanding of anatomy can help you create structurally accurate animations. It can also help you figure out which anatomical rules you can break while maintaining a believable animation.
- Script your animation. First, write down everything that you want to happen. This doesn't just mean dialogue; you should include actions and facial expressions as well. You need to have a clear idea of exactly what's going to happen before you start.
- Make some storyboards. Storyboards are the next step: these are drawings that show major actions and scenes throughout your animation. They tell the story overall and look much like a comic book.
- Draw some character sheets or make character models. You'll want to have a reference to look at as you draw your frames so that the character looks consistent and real from pose to pose. Draw your characters from every different angle and with a number of different expressions. You should also draw out what they'll be wearing, especially if what they're wearing changes between scenes.
- Make your animation sketch. This is a single drawing on a single piece of paper that shows all of the major stages of movement in a single frame. This will often result in a picture that looks like conjoined quintuplets, but it's designed to make sure that your key frames are correctly aligned and that your motions look natural.
- Try using squash and stretch. Squash and stretch is when you exaggerate motions to help the human brain perceive them as real. A common example would be when you imagine a ball. It's much more interesting to see a ball squish down to the floor a little when it lands, instead of just seeing a normal sphere. This helps the viewer feel the motion that the ball is making.
- Master facial expressions. Animation is at its best when the viewers are emotionally connecting with the characters. This is much easier if you get your characters making faces that convey real emotions, instead of largely static faces. Practice drawing emotions on faces. You should focus on the motions of changing emotions too, not just the poses of sad-angry-laughing and so on.
- Implementing subtle facial expressions—eyebrow movement, twitching of the corner of the mouth, and even eye (specifically pupil) movement—along with body language (e.g., standing up straight versus loosening up) will convey adequately a wide range of character emotions.
- For example, if a character transitions from surprised to angry, they might start with raised eyebrows, wide eyes, and an open mouth and then transition to having a frown, narrow eyes, and bared teeth.
- Draw the key frames. The key frames are the major stations of the movement that the character makes. For example, if you're animating a character turning from left to right, the key frames would show the character facing left, then the character facing the camera, and then the character facing right.
- Check for flow. Flip between the key frames to see how the movement looks.
- It's a good idea to check for flow any time you finish making a change to your document.
- Create the in-betweens. The in-betweens are all of the small movements between the key animations. Start by drawing the image that should go directly between two key frames, then make the image that goes between the key frame and the first in-between. Keep doing this until you have the appropriate number of frames to illustrate the movement (this will differ depending on what your purpose is with your animation).
- You'll want to check for flow again after doing this.
- Clean up the drawings. Clean any sketch lines and stray marks that distract from the movement of the character. You may even choose to ink the frames of animation, depending on what you plan to do with your work.
- Process the animation. Add and stitch the images together using a computer program like Photoshop, GIMP, or Pixlr in order to create the final video.
- Experiment with different forms of animation. Traditional animation isn't limited to a pen-and-paper medium. Common examples of more accessible animations include the following:
- Flipbooks
- Stop-motion
- GIF
- Machinima (video game-based animation)
Update 24 March 2020
You should read it
- Animation animation effects in CSS
- How to copy and insert animated GIFs?
- Adobe Animate 19, download Adobe Animate 19 here
- Animation in JavaScript
- How to fix Character Map not working on Windows
- How to use Face Animation to convert still portraits to GIFs
- 7 best computer animation software
- Instructions to turn off Focus Ring Animation on Mac
- How to Animate in FireAlpaca
- How to Add Animation Effects in Microsoft PowerPoint
- Disney's AI model creates animated sequences from scripts
- How to Get Into Character
Maybe you are interested
How to protect outdoor spaces from harsh weather These Android Apps Could Put Your Passwords at Risk If You're Not Careful 4 New Canva Features You'll Love What is the reason for the world's largest corporations to hire Indian CEOs? Successfully developed self-propelled bicycles using AI chips capable of reasoning and learning like humans Farewell legend Fernando 'Corby' Corbató, the father of computer passwords