How to Make a PC Theme
Do you want to make a PC Theme in Windows XP and Vista? Here is how to do it. Right click on an empty area on the desktop, and click Properties. (Or click Start, Run..., and type .).
Method 1 of 3:
For Windows XP
-
 Right click on an empty area on the desktop, and click Properties. (Or click Start, Run..., and type desk.cpl.)
 -
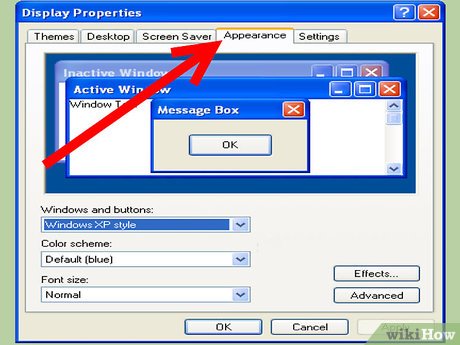 Click on the Appearance tab
- Then click Advanced

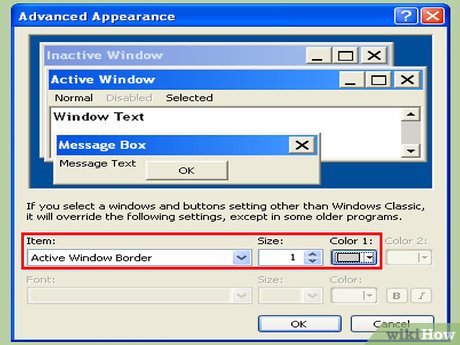
- Use Active Window, Font Size, and more interfaces.
- Then click Advanced
-
 Click OK, click on the Themes tab, click Save As, type your name of the theme (default is My favorite theme), click Save, and click OK.
Method 2 of 3:
For Windows Vista
-
 Right click on an empty area on the desktop and choose Personalize.
 -
 Click on Window Color and Appearance, then click Open classic appearance properties for more color options if you use Aero, click Windows Standard or Windows Classic, click Advanced, change these interfaces, click OK and OK again.
 -
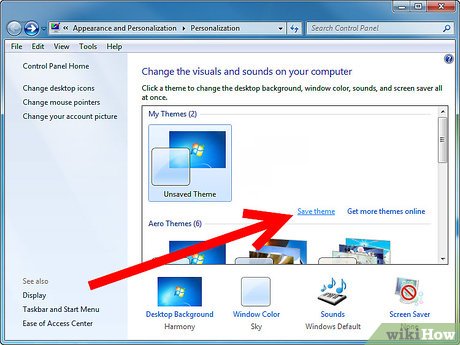
 Click on Theme in the Personalization window, click Save As, and type a name of your theme.
Method 3 of 3:
For Windows 7
-
 Right click on an empty area on the desktop and choose Personalize.
 -
 Click on Desktop Background, then choose the folder where your images are, check one box for wallpaper or more boxes (if you want a slideshow), click the "Change picture every" box, specify an interval (10 seconds - 1 day), then check "Shuffle" if needed and click OK.
 -
 Click on Window Color and click the built-in colors or use the color mixer (if you have Aero enabled), and click OK.
 -
 Click on Sounds, click the events, change some or all sounds, and click OK. (You can also use the built-in sounds from Windows 7.)
 -
 Click on Screen Saver, pick the list of screen savers (options are 3D Text, Blank, Bubbles, Mystify, Photos, and Ribbons), and click OK.
 -
 Now click "Save theme".