How to Rename the Windows Recycle Bin
Have you ever wanted to give a clever name to the Windows Recycle Bin? Rename the Recycle Bin using the Windows Registry Editor. Start, Run, 'Regedit'..
Method 1 of 2:
Renaming Every Instance
-
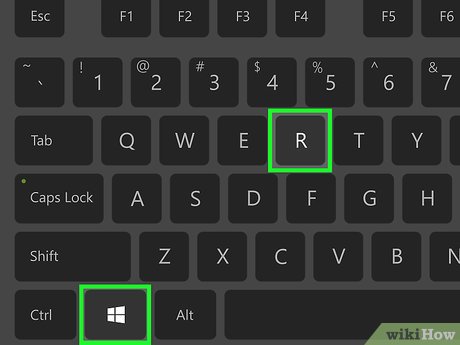
 Start, Run, 'Regedit'.
- As a good practice, always backup your registry before changing anything, although changing 'Recycle Bin' name is a simple tweak and doesn't affect anything else.
-
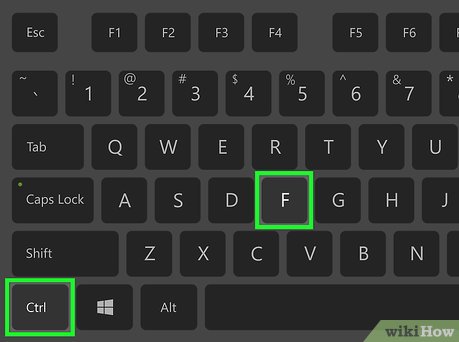 Press 'Ctrl'+'F' to open find box and type 'Recycle Bin' to search.
 -
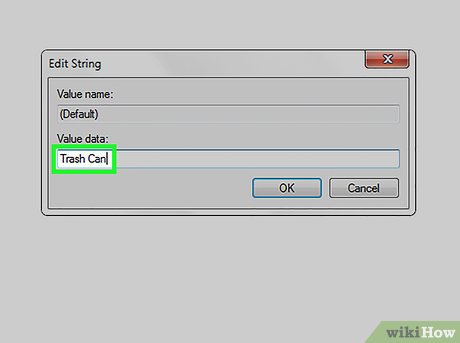 Change any value data with 'Recycle Bin' to whatever name you want to give it (ie, like 'Trash Can' or 'Dump' etc).
 -
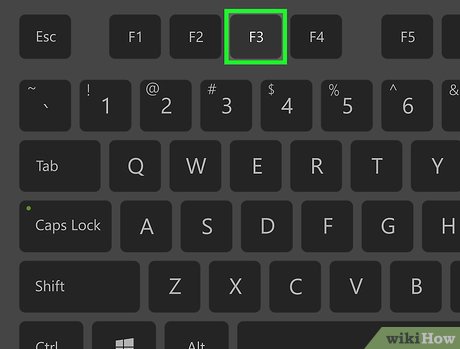 Press F3 to continue searching for 'Recycle Bin' and change wherever you come across 'Recycle Bin' to new its new name.
 - Repeat step 4 until you have finished with searching and changed all values to its new name.
-
 Close regedit and hit F5 on desktop to see the new name on screen.
Method 2 of 2:
Renaming the Value Data
-
 Go to START → Run...
 -
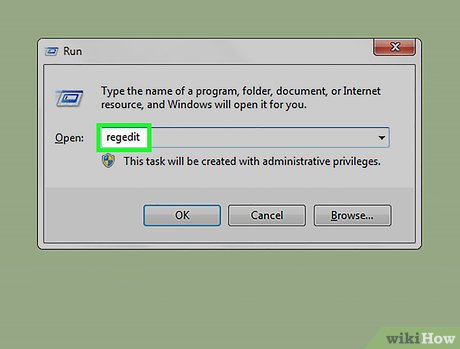 Enter regedit and hit enter to open the Registry Editor.
 -
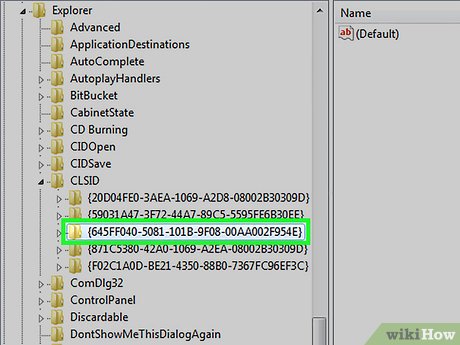 Navigate to the following location:HKEY_CURRENT_USER → SOFTWARE → MICROSOFT → WINDOWS → CURRENT VERSION → EXPLORER → CLSID → {645FF040-5081-101B-9F08-00AA002F954E}.
 -
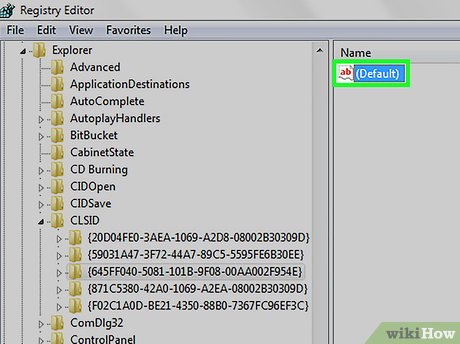 Double click on Default on the right panel. A small window will pop up.
 -
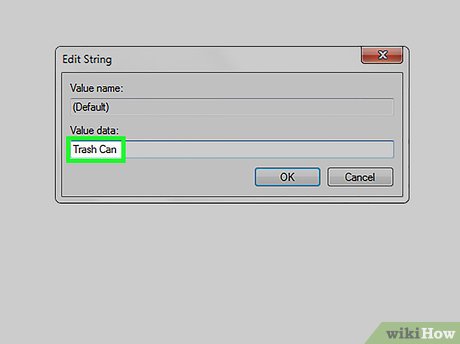 Enter your desired name for the Recycle Bin into the empty space called 'Value Data'. When you have entered what you would like click 'OK'.
 -
 Close the Registry Editor.