How to Insert Hyperlinks in Microsoft Word
Create links to other documents or websites

Select the text or image you want to convert into a link. You can convert any text or image in the text into a link. Highlight the text or click on the image you want to convert into a link.
To insert an image into your text, you'll click the Insert tab and select "Pictures." You can find and add image files saved on your computer, or insert clipart (pre-made graphics) to create hyperlinks.
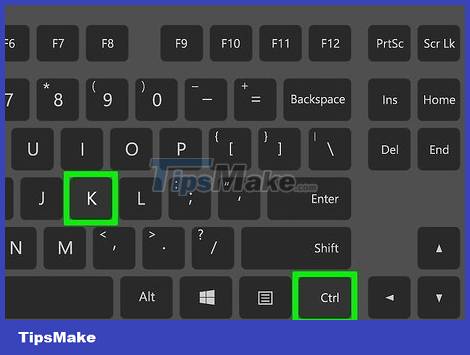
Press ⌘ Command+K (on Mac) or Ctrl+K (on Windows). The Insert Hyperlink window immediately appears. You can also open this menu by clicking the Insert tab and clicking the Link button in the toolbar.
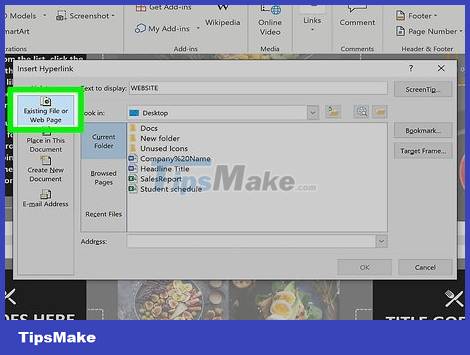
Select Existing File or Web Page in the left pane. You will see more options displayed in the right pane.

Select a file or enter a web address.
To link to a web page or web-accessible file, you'll type or paste the full address (including the "https://" prefix) into the "Address" field near the bottom. window.
To create a link to a file on your computer or local network, you'll select the file in the middle pane. If the file is saved in the current folder, click Current folder to open the folder. If the file was opened recently, just click Recent Files to find the file. You can also use the menu above to navigate to the appropriate folder and select files.
To create a new document instead of opening a file, click Create a new document in the left menu, then select the folder to save the document.
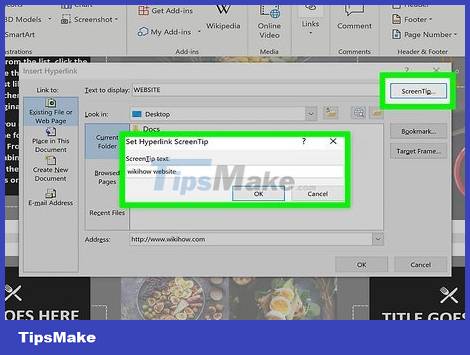
Set up ScreenTip (optional). You can change what is displayed when the user places the cursor on the link by clicking the ScreenTip button in the upper right corner and entering different content. If you don't change the content, the display will be the web address or file path.
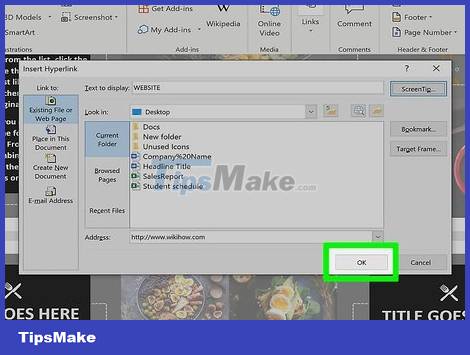
Click OK to save the path. You can now test the path by pressing the Command (Mac) or Ctrl (Windows) key on your keyboard while clicking the path.
Create a link to the new email editor
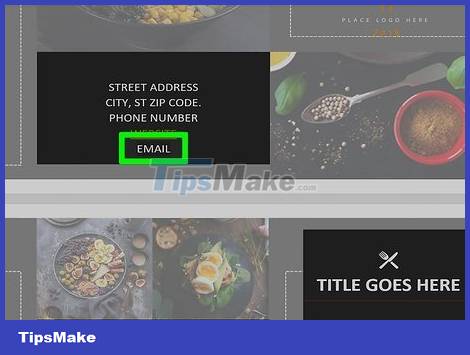
Select the text or click the image you want to convert into an email link. You can use any text or image in the text. Once this method is completed, clicking the selected text or image will open a new email compose window to send to the email address of your choice.

Press ⌘ Command+K (on Mac) or Ctrl+K (on Windows). The screen immediately displays the Insert Hyperlink window. You can also open this menu by clicking the Insert tab and clicking the Link button in the toolbar.

Click E-Mail Address in the left pane. This allows you to set up a new email editor.
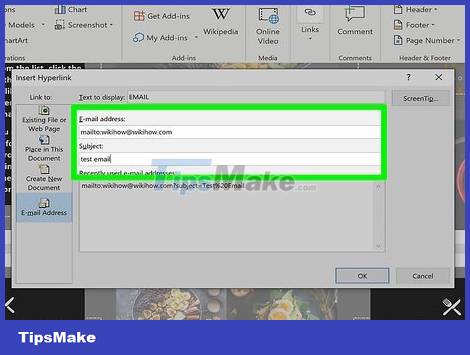
Enter email address and subject. This is the address that will receive emails sent by readers. What you enter in the "Subject" field becomes pre-filled information for readers, but they can change it if they want.
If you use Outlook, you'll see recently used email addresses in the field below the window. Choose one of these addresses if you want.
Some email clients, especially web email clients, will not recognize subject lines.
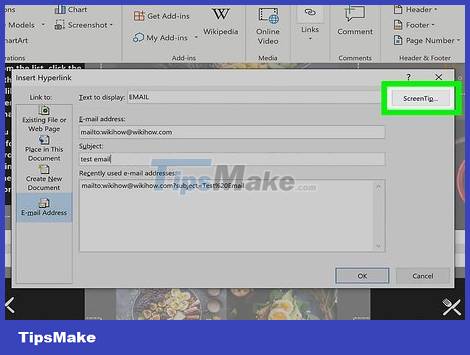
Set up ScreenTip (Optional). You can change what is displayed when the user places the cursor on the link by clicking the ScreenTip button in the upper right corner and entering different content. If you do not change the content, the display will be the email address.
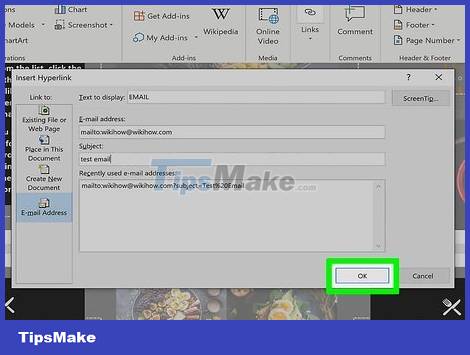
Click OK to save the path. You can now test the path by pressing the Command (Mac) or Ctrl (Windows) key on your keyboard while clicking the path. Your default email application will open a new email compose window with the address you entered earlier.
Create a link to somewhere in the same text
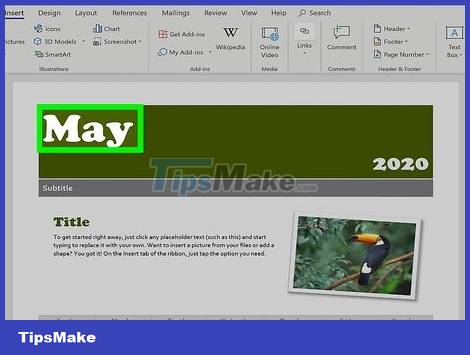
Place the cursor at the location where you want to create the link. You can use the Bookmark tool to create links to specific points in the text. This is appropriate for tables of contents, notes, and citations. You just need to highlight a portion of text, select an image or just place the cursor at the location you want.

Click the Insert tab . This is an option in the menu bar above Word.
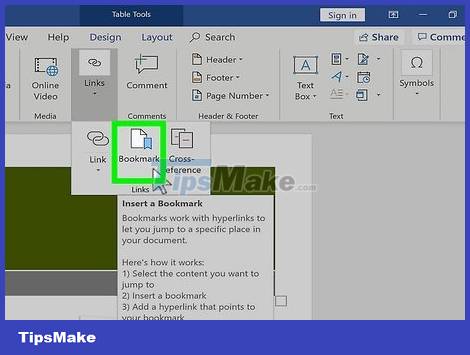
Click the Bookmark button . This option is in the "Links" section of the toolbar at the top of Word.

Enter a name for the bookmark. Remember to enter a specific name for easy identification. This is important when you use a lot of bookmarks or text that is edited by multiple people.
Bookmark names must begin with letters and can contain numbers. Whitespace is not accepted, but underscores are (such as "Chapter_1").
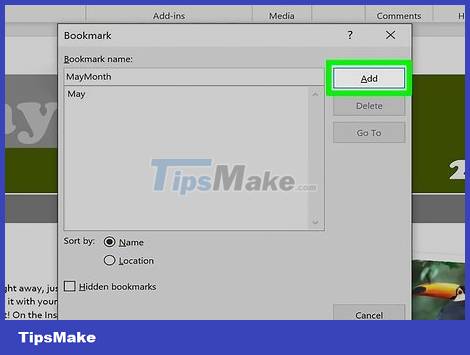
Click Add to insert the bookmark. Bookmarks will appear in brackets. You don't see the bookmarks on that page if you use the new version of Word, but in older versions, bookmarks are placed in brackets.
If you want to see your bookmark displayed in brackets so you don't forget where you placed it, click the File menu , choose Options , and click Advanced in the left pane. The next thing to do is pull down the scroll bar in the right pane and check the box next to "Show bookmarks" under the "Show document content" heading.

Select the text or image you want to use to create the link. Highlight text or click the picture you want to turn into a bookmark link.
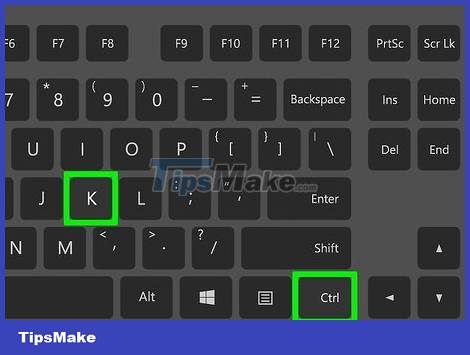
Press ⌘ Command+K (on Mac) or Ctrl+K (on Windows). The Insert Hyperlink window immediately appears on the screen. You can also open this menu by clicking the Insert tab and clicking the Link button in the toolbar.
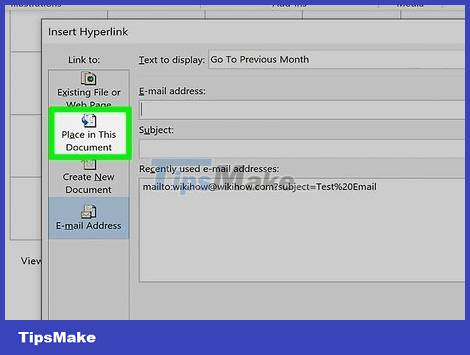
Click Place in This Document in the left pane. This shows you a selection of heading and bookmark styles.
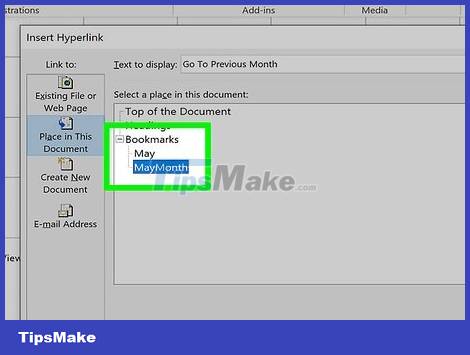
Select the bookmark you want to link. Expand the "Bookmarks" selection list if it's not already visible and select the bookmark you created. You can also choose a formatted title style in the text.
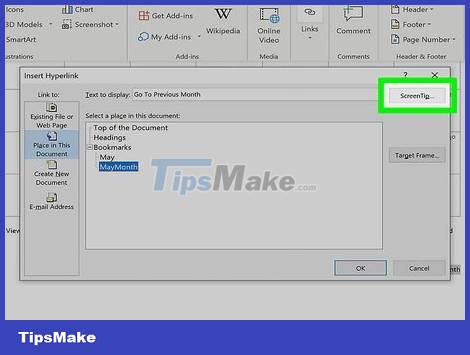
Set up ScreenTip (Optional). To change the content displayed when the user places the cursor over the link, click the Screen Tip button in the upper right corner. If you do not change the content, the display will be the website address or file path.

Click OK to save the path. You can now test the path by pressing the Command (Mac) or Ctrl (Windows) key on your keyboard while clicking the path. This will take you to the line where the bookmark was placed.