How to do automatic table of contents in Word 2013, 2016
How to make automatic table of contents in Word 2013, 2016. Unlike manual table of contents creation, automatic table of contents helps you edit and update text content quickly, easily without losing the typing. Back the table of contents whenever there is a change in content. At b.
Unlike manual table of contents creation, automatic table of contents helps you edit and update text content quickly and easily without having to retype the table of contents every time there is a change in content. In this article, you can create an automatic table of contents for your report on MS Word 2016.
Switch the View of the document.
To create a table of contents easily you need to convert your text to Outline mode to facilitate the creation of the table of contents. Go to the View tab -> select Outline to switch to Outline mode for the text:

Text results are transferred to Outline mode :

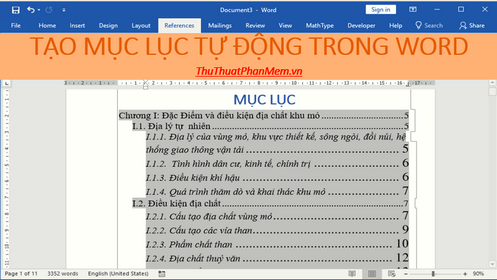
Create a table of contents automatically
Step 1: Once you have changed the text to Outline mode, you only need to select the table of contents corresponding to the levels to create the table of contents, the big title corresponds to the low level in the table of contents. The example here Chapter I corresponds to level 1:

Step 2: Similar to section I.1, Natural geography is equivalent to level 2, I.1.1 corresponds to level 3:

After selecting the level, the titles are decentralized as shown:
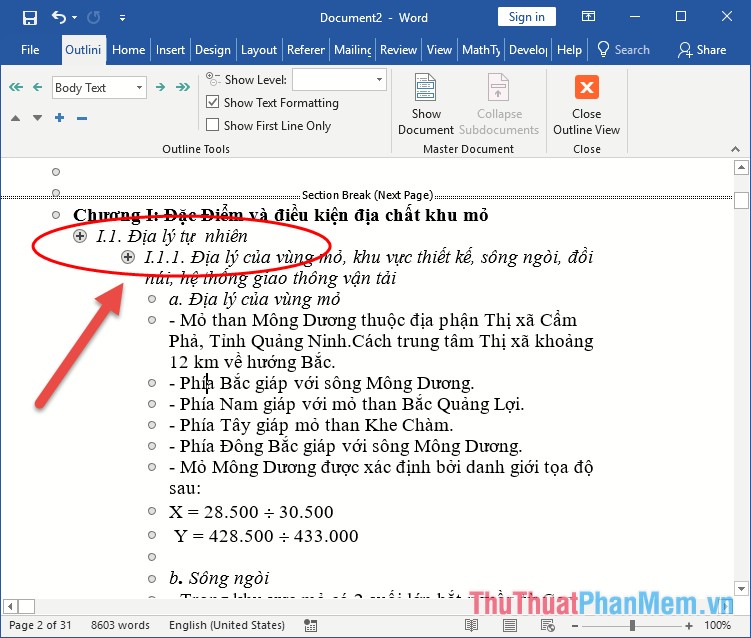
Similarly, you choose the level level for all the titles in your text:

Step 3: After leveling up all the titles to create a table of contents in your document, place the mouse cursor at the position you want to create the table of contents (here to create the table of contents after the introduction). References tab -> click Table of Contents -> select display style for table of contents:

Step 5: After selecting the display style for the table of contents -> the table of contents has been created:
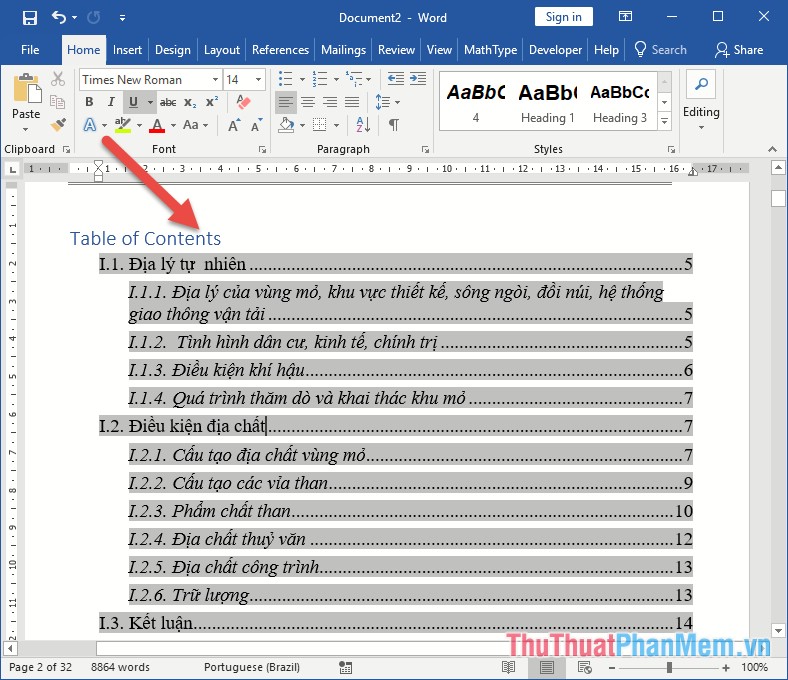
Step 6: Edit the name, font formats, position for the table of contents to get results:

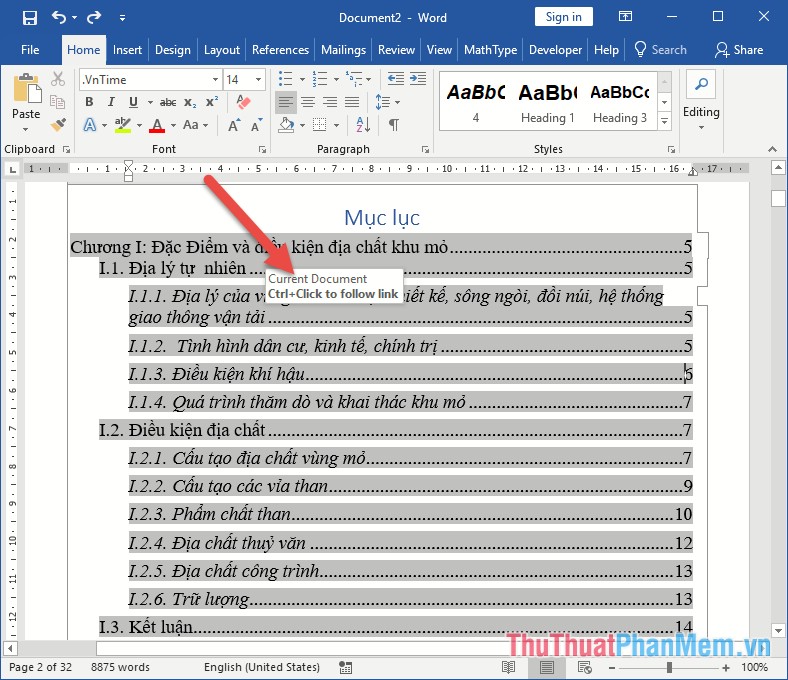
So you've created the table of contents for your text, now when you want to move to any page, go to the table of contents page -> hold down Ctrl and click the position to move to immediately That page is displayed:
Update Table of Contents
In case you want to edit the text content, this makes your table of contents wrong, very simple after you finish editing you go back to the page containing the table of contents -> right-click and choose! Update Field:
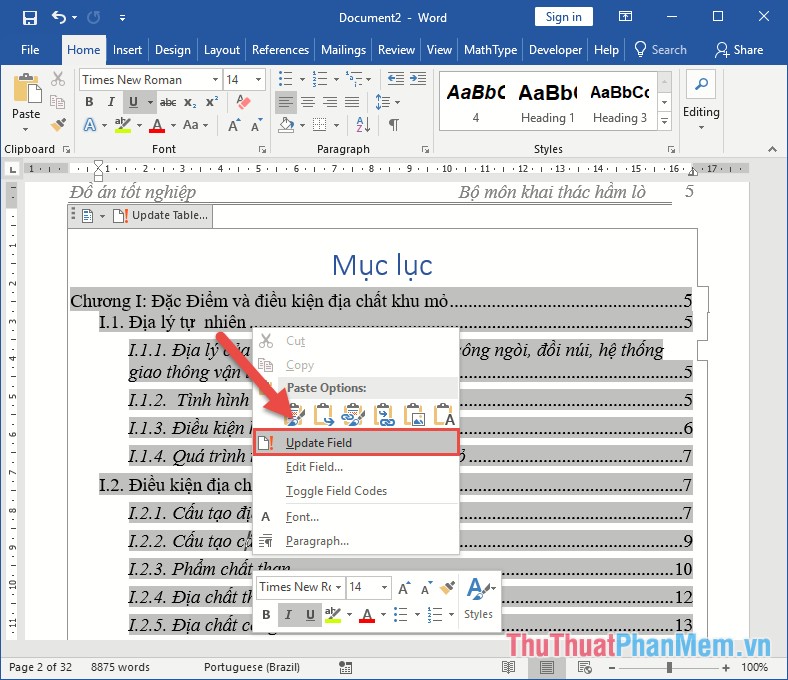
The dialog box includes the following options:
- Update page number only: Only update the page number in the table of contents.
- Update entire table: Perform updates all the content in the table of contents, including adding titles to show in the table of contents.
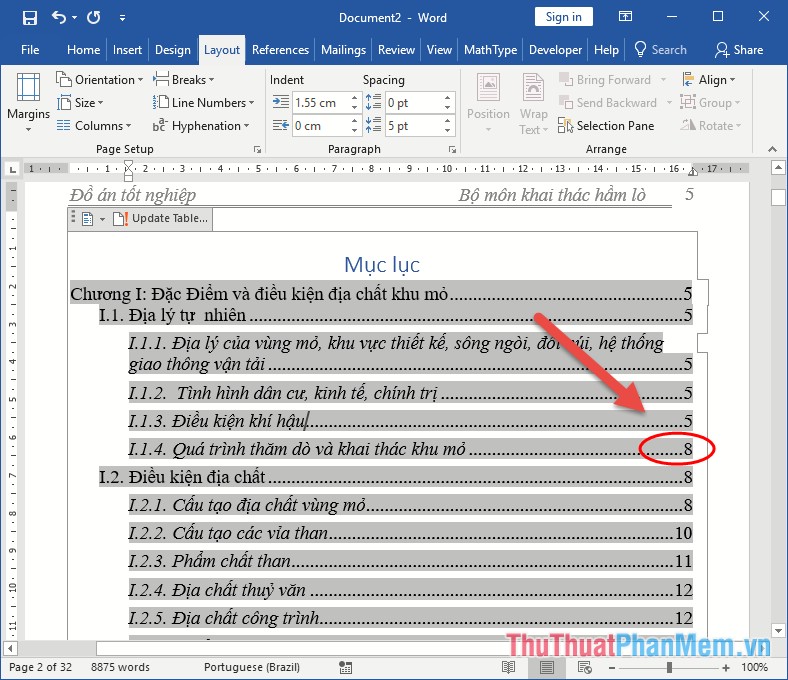
For example, here I need to add content, so I.1.4 on page 7 is pushed to page 8. Need to update the page number for the table of contents should select Update page number only -> click OK:

The result of the newly updated page number corresponds to the updated titles:
This way you can create an automatic table of contents for your text. Good luck!