Full Word tutorial 2016 (Part 4): Formatting text
Text format aims to attract the reader's attention to a specific part of the document and emphasize the important information in it.
Table of Contents
In Word, you have many options for editing text, including font and font colors. You can also adjust the text alignment to display the changes you want on the document.
Refer to the video below to learn more about text format in Word:
1. Change the font size
1. Select the text you want to edit.

2. On the Home tab , click the Font size drop-down arrow to find the font size. Choose a font size from the menu.
If the font size you need is not available on the menu, click the Font size box and enter the font size you want, then press Enter.

3. The font size on your document will change.

In addition, you can use the Grow Font and Shrink Font commands to change the font size.

2. Change the font
By default, the font set on each new document is Calibri . However Word provides users with many other fonts, used to customize their documents.
1. Select the text you want to edit.

2. On the Home tab , click the drop-down arrow next to the Font frame. And a menu containing the fonts will display.
3. Select a font you want to use.

4. The font on your document will change.

3. Change the font color
1. Select the text you want to edit.

2. On the Home tab , click the Font Color drop-down arrow. And the Font Color menu will appear.

3. Select a color for the font you want to use. The font color on your document will change.

Note:
Colors in the drop-down menu will be limited. Select More Color under the menu to access the Color s dialog box. Select the color you want, then click OK .

4. Using Bold, Italic and Underline commands
You can use commands like Bold (bold), Italic (italic) and Underline (underline) to mark important words or phrases in your document.
1. Select the text you want to edit.

2. On the Home tab , click the Bold ( B ), Italic ( I ) or Underline (U) command in the Font group . In the example below we click Bold .

3. The text you selected in the document will change.

5. Change the text case
When you need to change text case quickly, you can use the Change Case command instead of having to sit down and retype the text.
1. Select the text you want to edit.

2. On the Home tab , click the Change Case command from the Font group .
3. A drop-down menu will appear on the screen. Select a case option that you want from the menu.

4. The text case in your document will change.
6. Highlight text (text)
Text markup is a useful tool to highlight important documents in your documents.
1. Select the text you want to bookmark.

2. From the Home tab , click the Text Highlight Color drop-down arrow, and a Highlight Color menu will appear.

3. Select a color to mark the text you want. And the text you selected will be highlighted as more prominent in the document.

- To remove highlight marks, select the text you marked, then click the Text Highlight Color drop-down arrow. Select No Color from the drop-down menu.

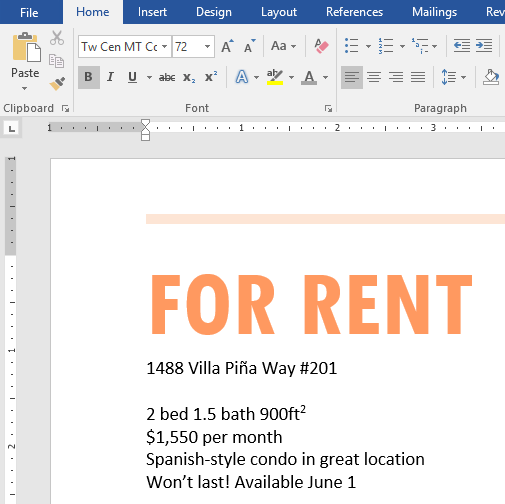
7. Align, adjust the text margins
By default, in a new text the alignment is set to left alignment. However in some cases you will have to adjust the right alignment or center alignment.
1. Select the text you want to edit.

2. On the Home tab , select 1 of 4 options aligned from the Paragraph group . In the example below we select the center alignment (Center Allignment).
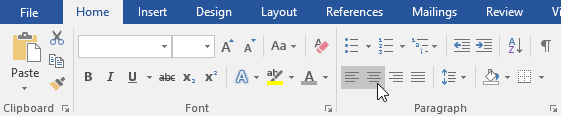
3. The text in your document will be aligned, aligned to your wishes.

Alternatively, you can use Word's Set as Default feature to save all formatting changes that you have created and automatically apply these formats to new documents.
Good luck!
Was this article helpful?
Your feedback helps us improve.
Related Articles
 Control formatting when pasting text in Word23 minutes read
 Full Word Tutorial 2016 (Part 7): Use Line and Paragraph Spacing4 minutes read
 Word 2013 Complete Guide (Part 7): Text printing operations3 minutes read
 Word 2013 Complete Tutorial (Part 9): Use Line and Paragraph Spacing5 minutes read
 Word 2013 full-text tutorial (Part 12): How to break pages, paragraph breaks6 minutes read
 Trick to remove Formatting text format in Word2 minutes read
Reader Comments 0
Sign in with email or Google to join the discussion.