Table of Contents
This guide explains how to create an Image Table of Contents in Word, with clear steps, practical tips, and important checks before you begin.
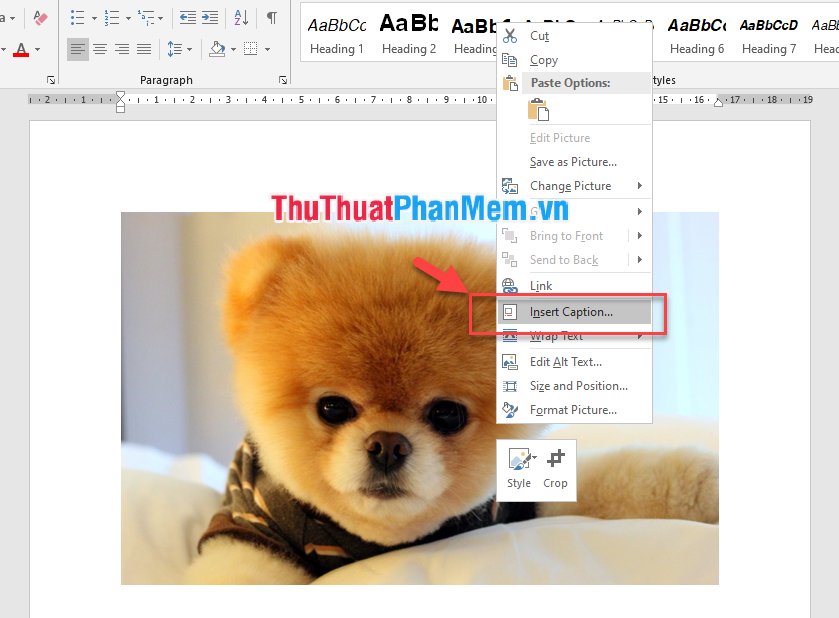
Step 1 : After inserting the image into the Word file, select the first image, right click and select Insert Caption .
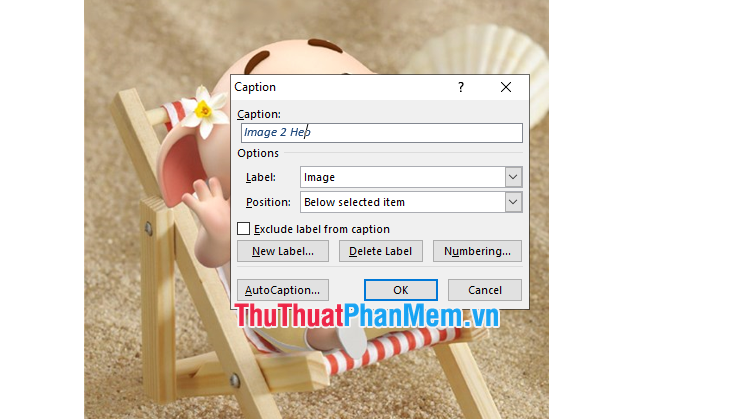
Step 2: Caption window appears, first select a new label by clicking the New label . button.

Step 3 : Create a new label name for your liking, for example Image .

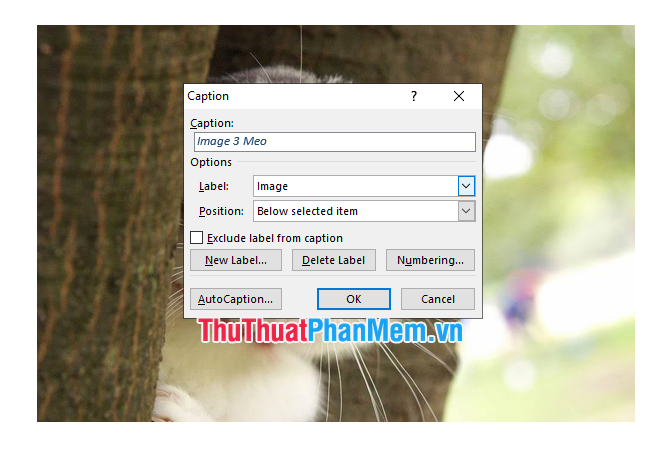
Step 4: After creating a new label, you name the image by typing the name in the Caption section. For Label, select Image. Position is the position setting of the image name. The default will put the name below the image.

The resulting name will appear right below that image.

Step 5: Do the same with the remaining images.
Step 6 : Insert the table of contents automatically after indexing the images.
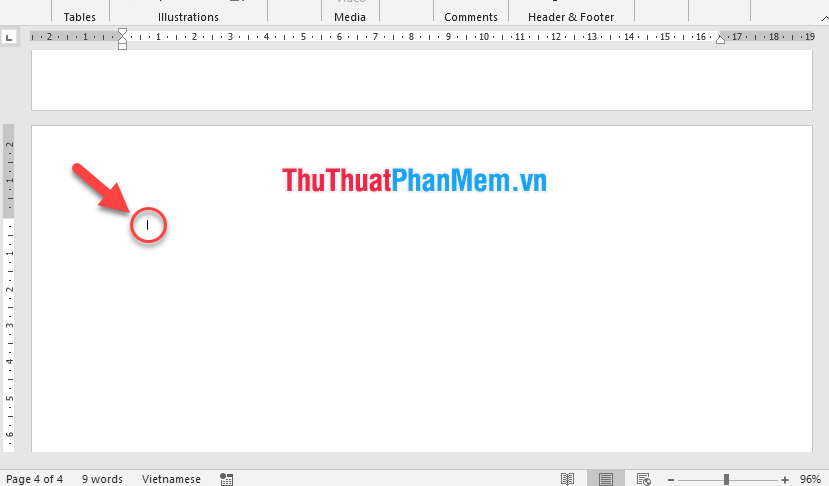
- Choose where to place the image index, which can be the first or last page.
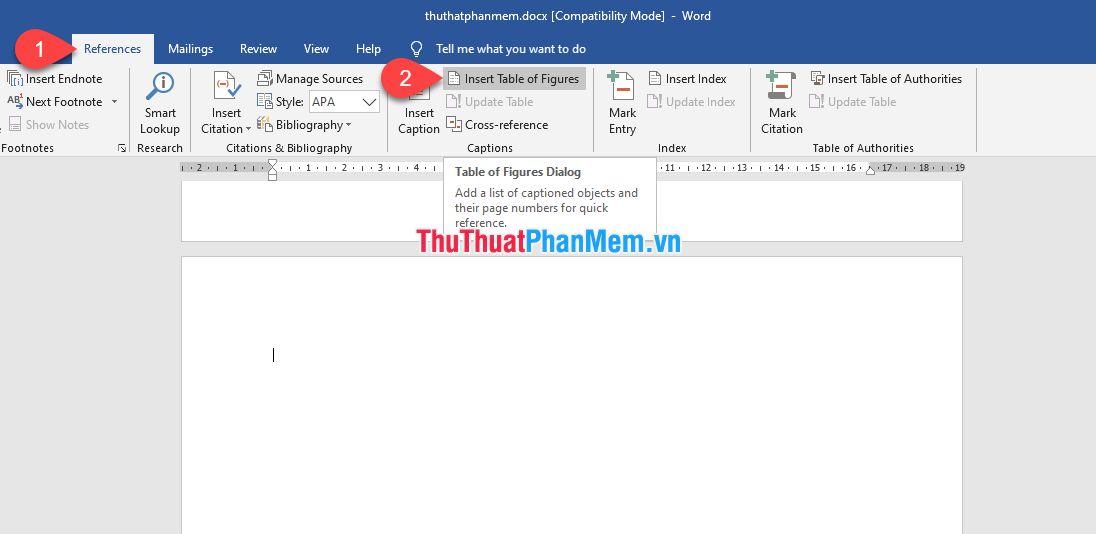
- On the References tab (1) select Insert Table Of Figues (2) .
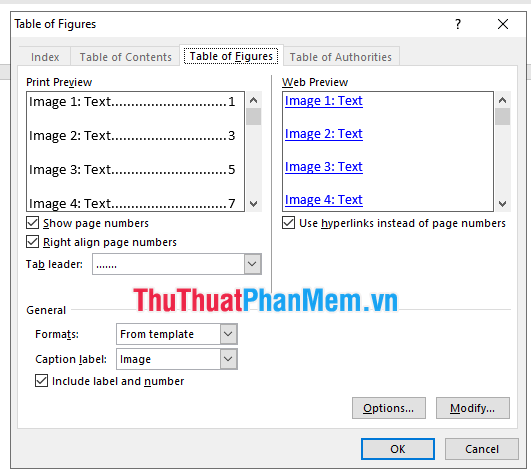
- The Insert Table of Figures window appears, click the OK button.
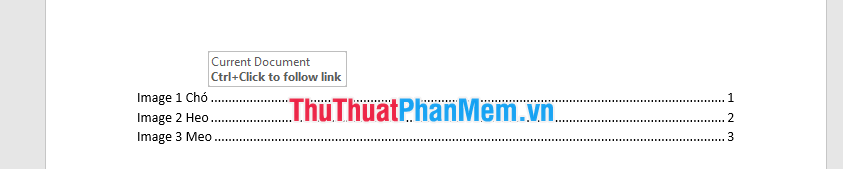
- The result shows automatic table of contents for the image. To get to the position of the image, simply hold down the Ctrl key on the keyboard and click on the index.
Hope you are succesful.
FAQ
What should I know about Create an Image Table of Contents in Word?
Focus on the key features, requirements, limitations, and practical use cases explained in this guide.
How do I get the best results with Create an Image Table of Contents in Word?
Follow the recommended steps, use current software or information, confirm compatibility, and review settings before major changes.
Are there any risks or limitations?
Potential limitations depend on compatibility, data quality, cost, privacy, support, and how the product or method is used.
Related Articles
 Create Automatic Table of Contents in Word 20039 minutes read
 How to Create an Automatic Table of Contents in Word 2019/2016/2010/200712 minutes read
 Create Automatic Table of Contents in Word for Word 2007, Word 20106 minutes read
 How to Create Automatic Table of Contents in Word 20164 minutes read
 10 Impressive Table of Contents for Microsoft Word: MS Word12 minutes read
 Create Table of Contents Automatically in Word 2007 and 20103 minutes read
Reader Comments 0
Sign in with email or Google to join the discussion.