Table of Contents
This updated guide explains how to Disable User Account Control (UAC) on Windows through clear steps, practical examples, and important checks that help prevent common errors.

Today we will show you how to turn off UAC to eliminate annoyances you don't like.
Quick Adsense WordPress Plugin: http://quickadsense. com/Instructions to Turn Off UAC for Window 7
Step 1 : Go to Start in the Search Programs box and the file you type the keyword UAC

Step 2 : Next, select Change User Account Control Settings
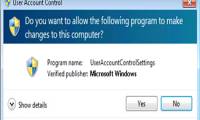
Step 3 : A dialog box appears as shown below

Step 4 : You drag the bar to the bottom Never Notify to turn off UAC
Quick Adsense WordPress Plugin: http://quickadsense. com/
Click OK to complete the steps to turn off UAC for Windows 7.
Instructions to Turn Off UAC for Windows 8 and 8.1
Step 1 : You press the key combination Windows + F to open the Search dialog of Windows 8, 8.1
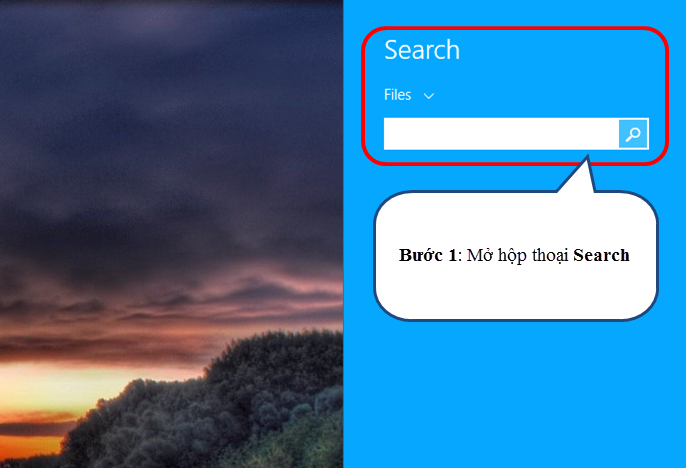
Step 2 : Next select Files and select Everywhere as shown below
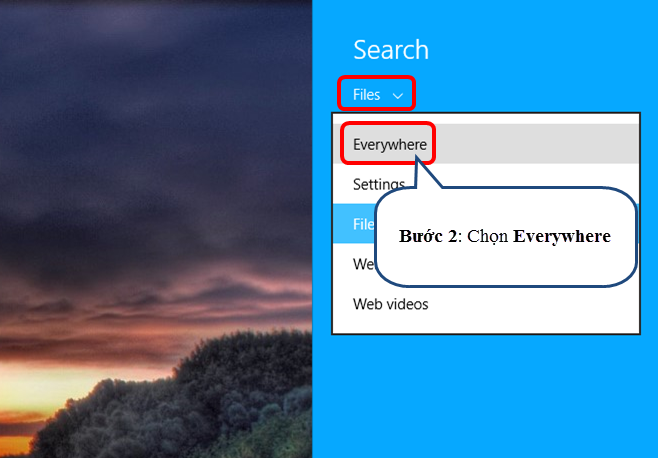
Step 3 : In the search bar, type UAC and press the Enter button.
The search bar now displays optional information, select Change User Account Control settings.
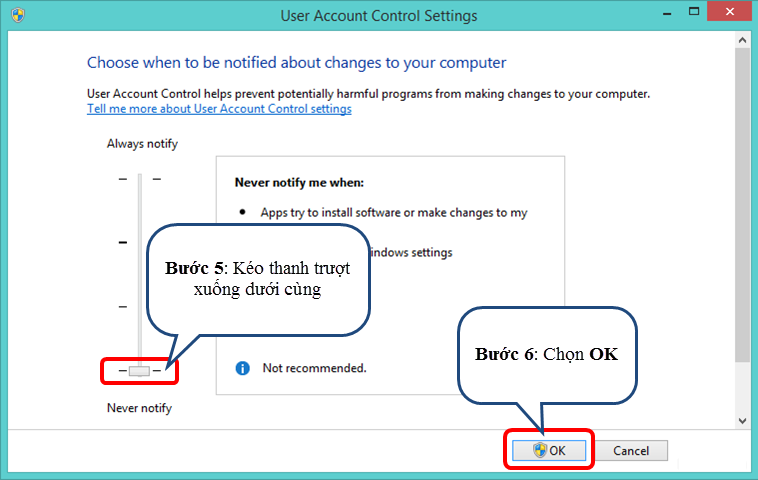
In the Change User Account Control settings window, scroll down to Never notify level and select ok to complete the process of turning off UAC.
ShareitFAQ
What is the easiest way to Disable User Account Control (UAC) on Windows?
Start with the requirements in this guide, then follow each step in order. Check the result after every major change so problems are easier to identify.
Can beginners follow these instructions?
Yes. The process is organized into practical steps, and you can repeat any step before moving forward.
What should I check if the method does not work?
Confirm your software or device version, permissions, settings, file format, and internet connection when the task depends on online services.
Related Articles
 Disable User Account Control (UAC) on Windows 7, 8, and3 minutes read
 4 Ways to Turn Off User Account Control (UAC) on Windows 117 minutes read
 How to Turn Off Notifications of User Account Control in Windows?3 minutes read
 UAC: What It Is and How to Enable / Disable It on Windows 10, 8, 77 minutes read
 Instructions to Disable Root Account on Linux4 minutes read
 Instructions on How to Turn UAC on and Off on Windows 105 minutes read
Reader Comments 0
Sign in with email or Google to join the discussion.