Instructions for installing Windows XP with USB step by step from A to Z
Currently Windows XP is no longer used much because it is too old, but for those of you who own a computer with a weak configuration, you can only install Windows XP. So in this article TipsMake.com will guide you how.
Currently Windows XP is no longer used much because it is too old, but for those of you who own a computer with a weak configuration, you can only install Windows XP. Therefore, in this article, TipsMake.com will guide you how to install windows XP step by step from A to Z in detail, please follow along.

1. Prepare before installing windows
To install Windows 10 with USB, you must first prepare the following:
- A USB with 4Gb capacity or higher.
- ISO file of Windows XP installer
- USB creation software for installing Windows Rufus (Download link: https://rufus.akeo.ie/)
2. Create a USB to install windows XP
Step 1 : You attach the USB to the computer and open the Rufus software.
Then select the items as shown below, where:
1-Select the USB connected to the computer
2- Select the ISO file Windows XP in the computer (prepared in part 1)
3-Name the USB if desired
4-Select the USB format as NTFS
5-Click Start to start creating USB to install windows.

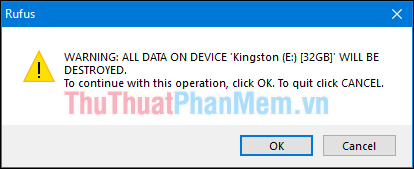
Step 2 : If a message appears, click OK
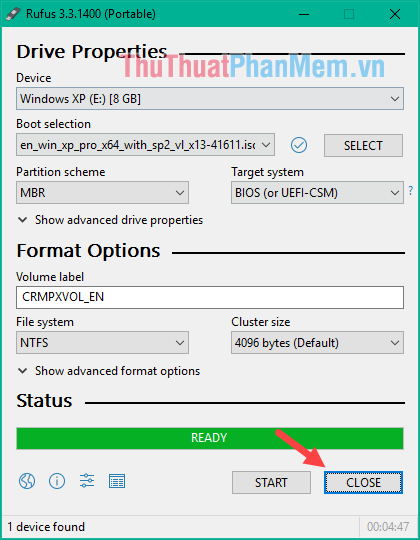
Step 3 : Wait a while for the process of creating USB to install Windows is completed.
When creating a USB to install windows successfully, click Close to exit the program. And prepare to install windows.
3. Steps to install Windows XP
Step 1 : You attach the Windows installation USB created in the previous step to the computer (power off), then turn on the computer to the BIOS and select boot from USB. To enter the BIOS you do the following:
Desktop computers : Depending on the different types of main but most to enter the BIOS press Delete , on the Boot menu press Esc or F11 , F12 .
Sony Vaio Laptop : Turn off the power, then press the Assist button and then press F2 to enter the BIOS . To enter Recovery, press F10 .
Laptop HP:
- Enter BIOS and press F10
- Go to Boot menu and press F9
Lenovo Laptop:
- Enter BIOS and press F1
- Go to Boot menu and press F12
Dell Laptop:
- Go to BIOS and press F2
- Go to Boot menu and press F12
Acer Laptop:
- Go to BIOS and press F2
- Go to Boot menu and press F12
Asus Laptop:
- Go to BIOS and press F2
- Go to Boot menu and press Esc
After choosing to boot into USB, wait a bit for the computer to boot into the Windows XP installation interface.
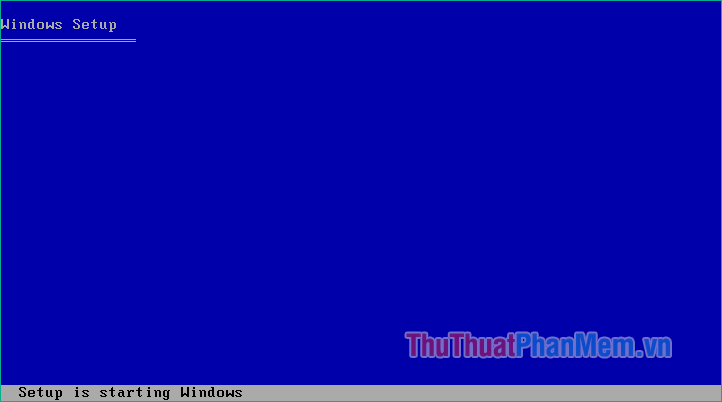
Step 2 : In this window, press Enter:

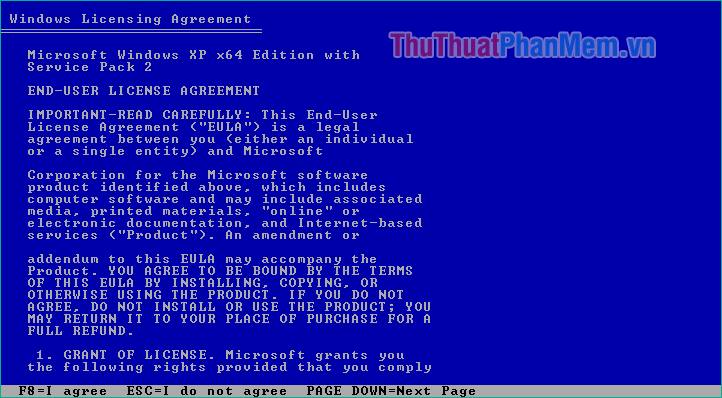
Step 3 : Press F8 to continue:
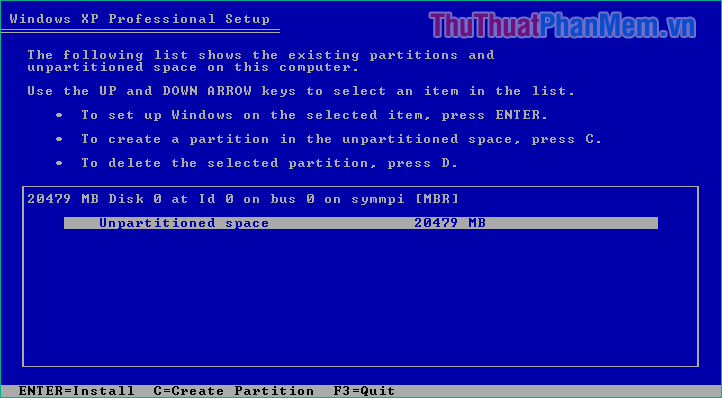
Step 4 : Here we select the hard drive partition and then press Enter to install windows
Step 5 : Continue to press Enter:

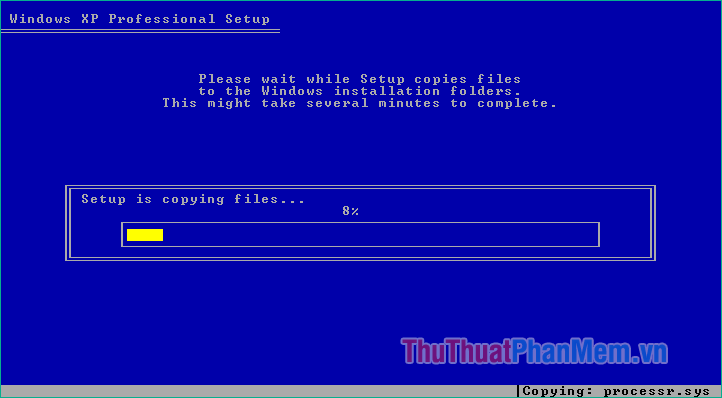
Now we wait for the installation to take place:
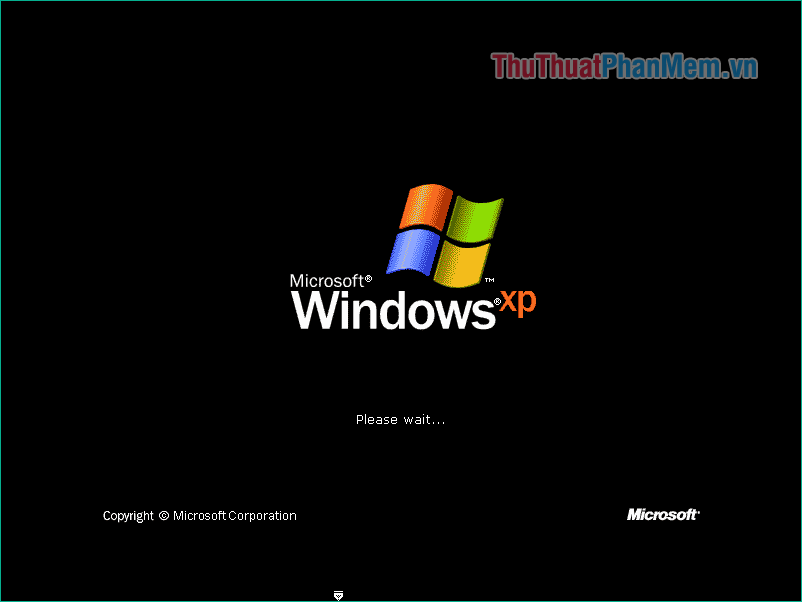
Step 6 : After a few minutes the computer will restart and the window like the image below will appear, please wait a bit more:

After a while a new window appears, click Next:
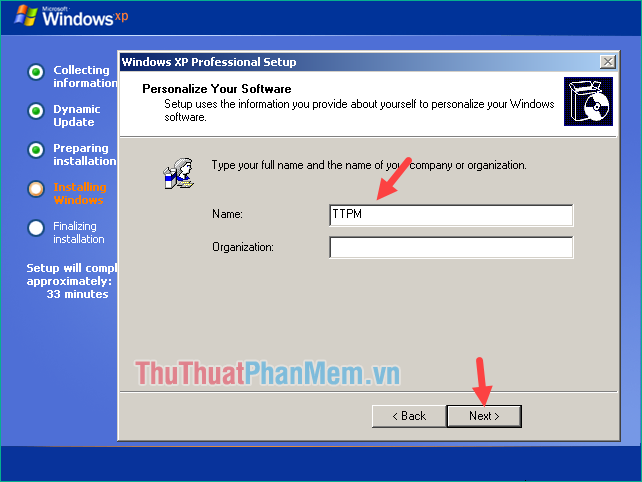
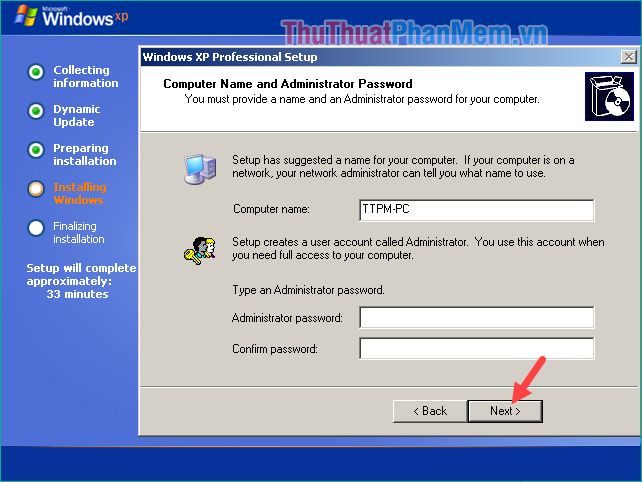
Step 7: Enter the name for the computer and then click Next:
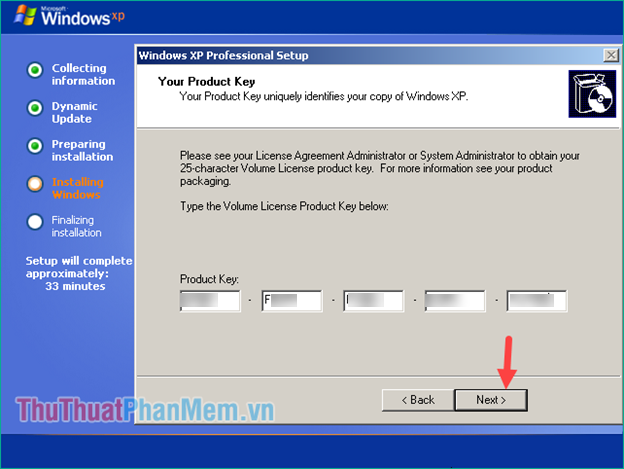
Step 8: Enter the installation key and then click Next :
Step 9 : Here you can enter the password for the computer, if not needed, leave it blank and click Next:
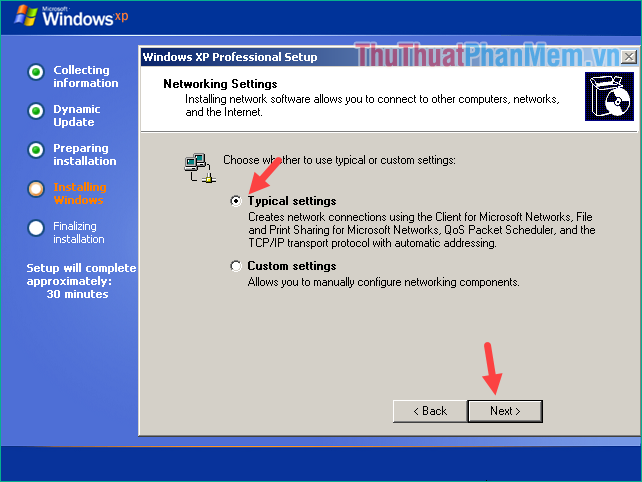
Step 10 : Select Typical Setting then click Next
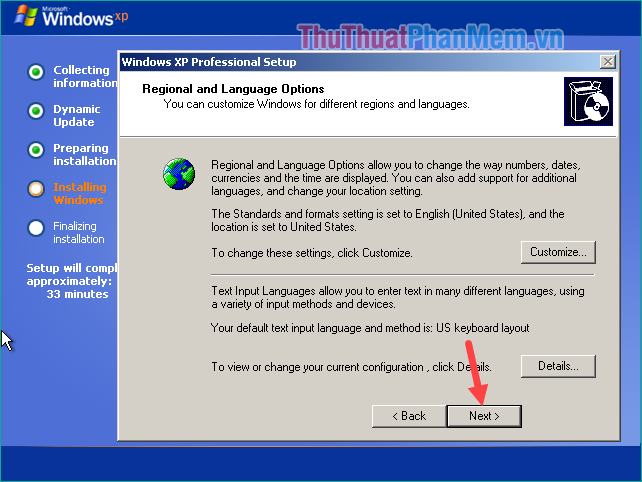
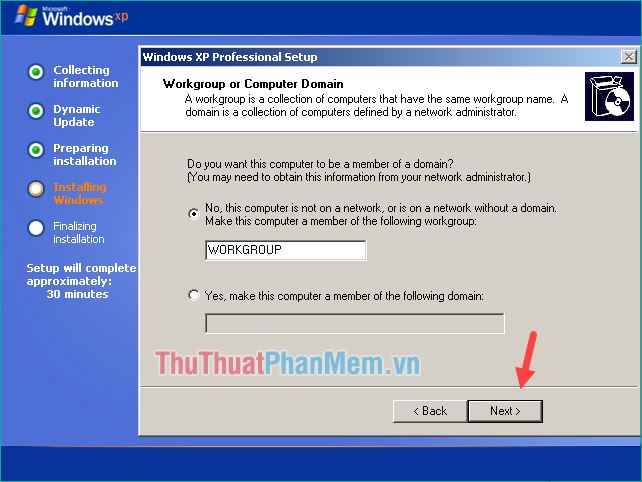
Step 11 : Leave the default and click Next :
Step 12: Continue to wait a few minutes more then the computer will restart, when a message appears, click OK

Wait for the computer to boot:
Step 13: In the new window, click Next :

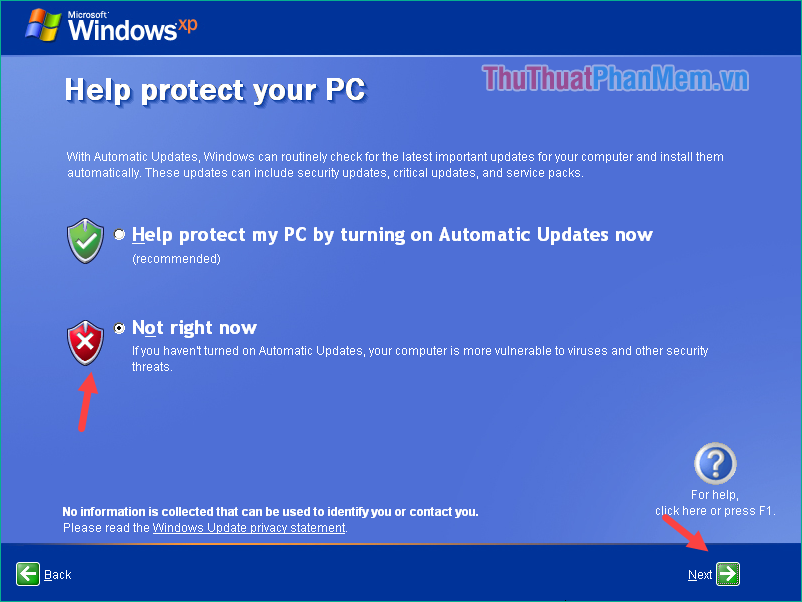
Select Not right now then click Next :
Click Skip to skip:

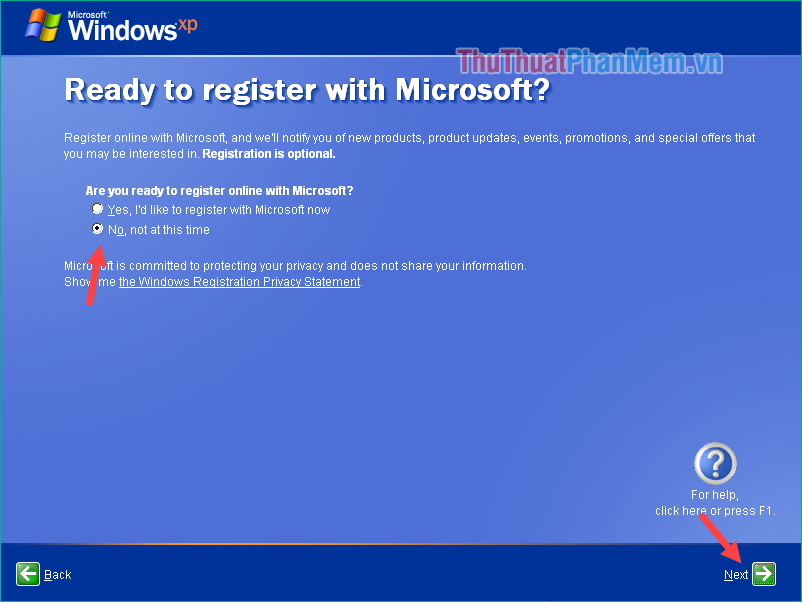
Select No then click Next :
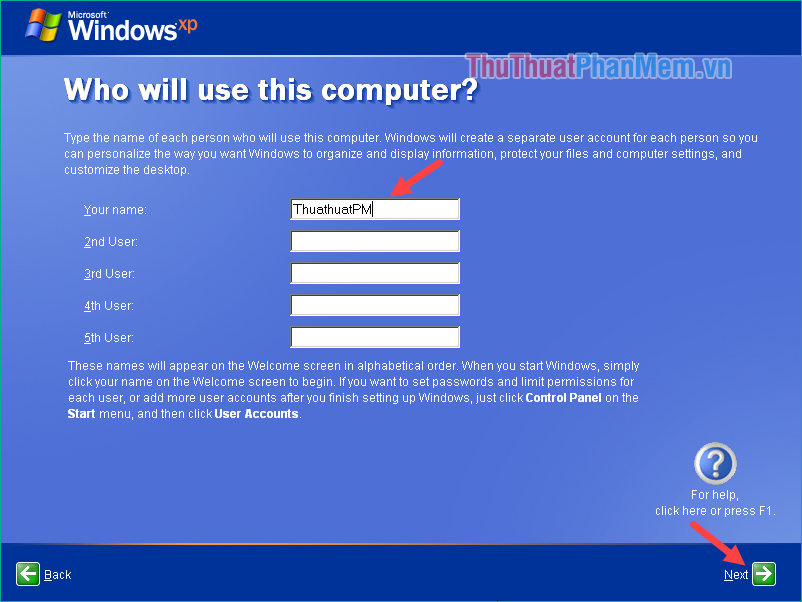
Enter the User name then click Next :
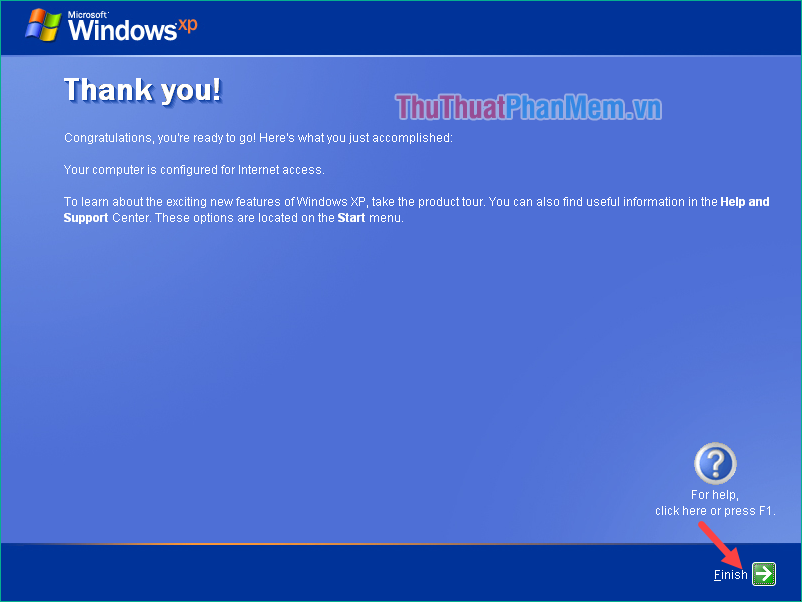
Finally click Finish to finish the process of installing windows:
Wait a moment to boot into windows, when the computer has been on the Desktop means we have successfully installed:

Above are all the steps to install windows XP that TipsMake.com guided you, hope you will find the article useful. Good luck!