Table of Contents
How to Create a New User on Windows 10 Using Computer Management is easier to understand when the core ideas are paired with practical examples. The sections below explain the topic clearly, highlight useful steps, and point out details that can prevent common errors.
In the previous article, we showed you how to set PC Name for Windows 10. Similarly, without using a Microsoft account, users can still create an account on Windows 10 or create an account. User
The creation time is quite fast, there are not many complicated operations so you can create many different Users to protect the data in the computer when using. Follow the Network Administration steps below to choose how to create a user without a Microsoft account through Computer Management or Control Panel .
- Instructions for dividing hard drives right in Windows 10
- Ways to turn off your computer on Windows 10
- How to limit the time to use Local accounts on Windows 10
Instructions to create User through Computer Management
Step 1:
Right-click the Start window icon and select Computer Management.

Step 2:
Go to Local Users and Groups , select User . Right-click the User and select New User .

Step 3:
Enter the account name at User name, password at Password. Click Create to create the User.
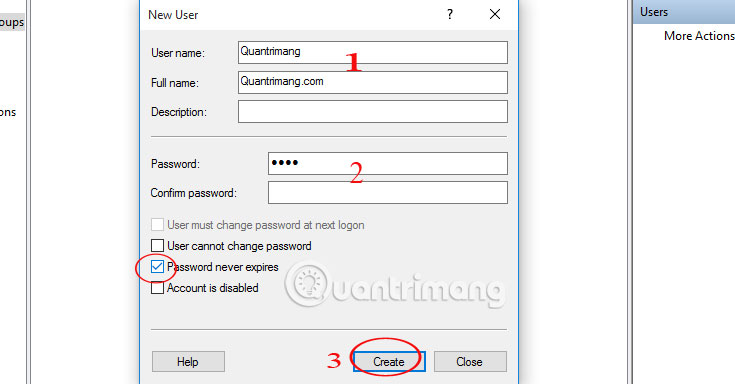
Note , during installation you should check the Password never expires box to change your password if you want, or change it after using it for a long time to increase security.
So you have completed the step of creating a new User on Windows 10 without a Microsoft account.
Instructions for creating User on Windows 10 via Control Panel
In addition to creating a new account on Windows 10 with Computer Management that we have guided above, you can go through Control Panel to create a new Local account to use.
Step 1:
Enter in the search box the keyword add user and then click Add, edit, or remove other users .

Or go to the link after Start Menu> Settings> Accounts> Family & other users .
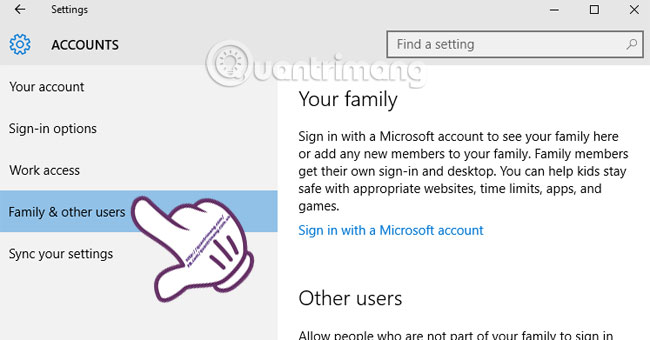
Step 2:
The appearance of the Accounts setup window appears. We click the Add someone else section to this PC .
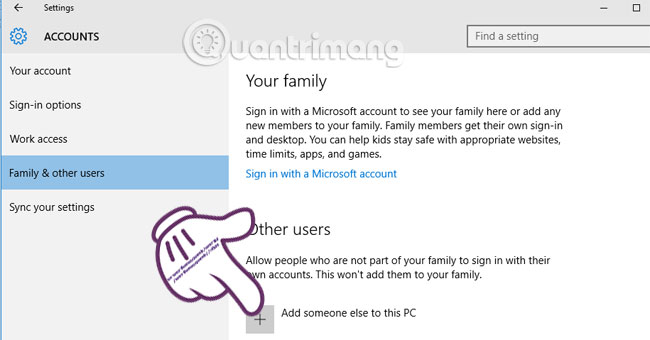
Step 3:
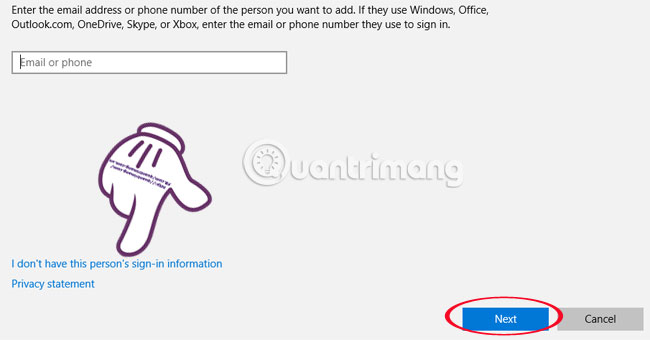
The Sign dialog box appears. You will see Windows asking about Microsoft accounts like Windows, Office, Outlook.com, OneDrive, Skype or Xbox.
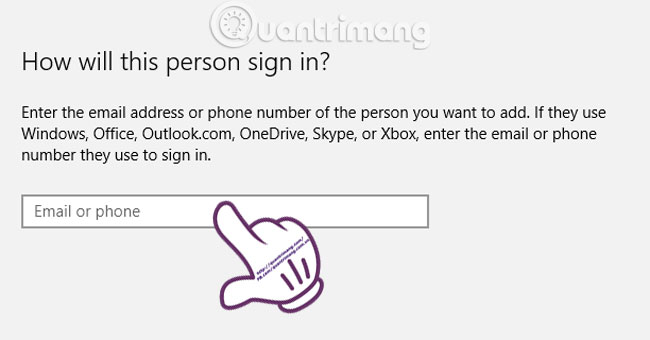
Since we created a new User, you will click on I don't have this person sign-in information section and click Next to continue.
Step 4:
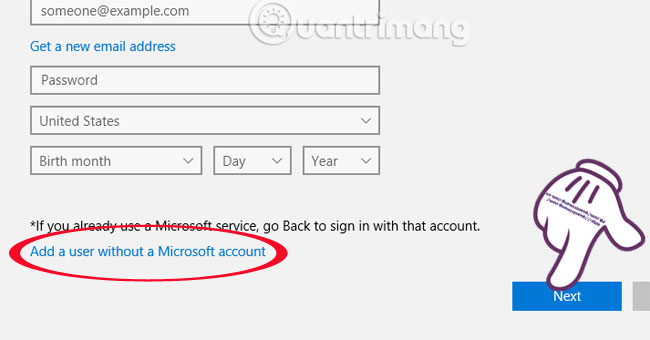
Appears a complete information sheet to create a new Microsoft account. We will not enter anything in this section, but click Add a user without a Microsoft account , then Next to continue.
Step 5:
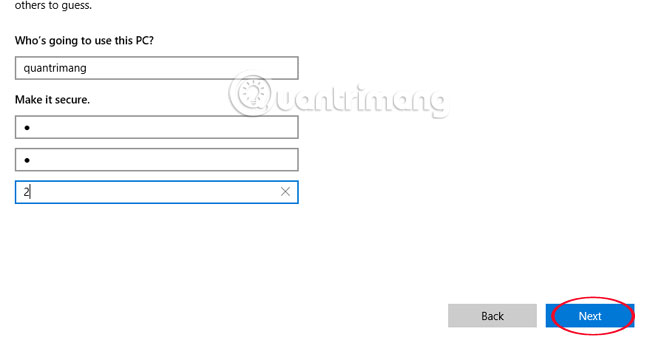
The interface for filling information appears. Users need to enter new account information, passwords, special password protection characters (if you forget the password you can use Password hint to retrieve it). Click Next to continue.
Step 6:
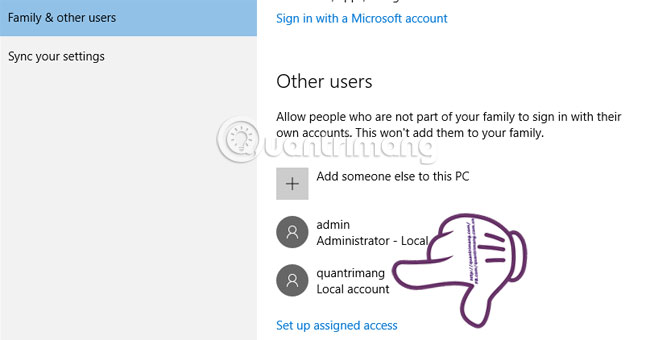
Soon, the account you just created will appear in Other Users with Local Account.
Step 7:
When clicking on this new User, two optional items appear: Remove (Delete) and Change account type (change information).
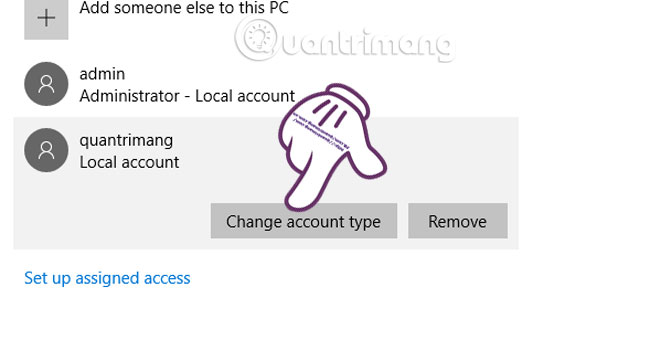
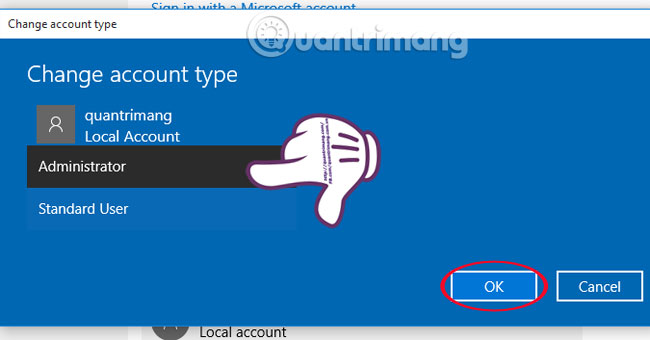
When you click Change account type, you can change the account title to Administrator . Click OK to reset
FAQ
What should you know about instructions to create User through Computer Management Step 1?
Right-click the Start window icon and select Computer Management.
What should you know about step 2?
Go to Local Users and Groups, select User. Right-click the User and select New User.
What should you know about step 3?
Enter the account name at User name, password at Password. Click Create to create the User.
Related Articles
 Instructions to Disable Control Panel on Windows 74 minutes read
 How to Add Disk Management to Control Panel in Windows 10/8/73 minutes read
 How to Add Control Panel to Power User Menu (Windows + X) on4 minutes read
 Learn Control Panel in Win. XP: Tips and Examples5 minutes read
 How to Add Services to Control Panel in Windows 7, 8 and 103 minutes read
 Menu: Quickly Open the Control Panel Tools3 minutes read
Reader Comments 0
Sign in with email or Google to join the discussion.