Table of Contents
This guide provides a practical overview of Instructions on How to Install Windows 10 with USB Step by Step, including its main features, benefits, limitations, and important considerations.
1. Prepare before installing windows.
To install Windows 10 with USB, you must first prepare the following:
- A USB with 4Gb capacity or higher.
- ISO file of Windows 10 installer
- USB creation software for installing Windows Rufus (Download link: https://rufus. akeo. ie/)
2. Create a USB to install windows 10
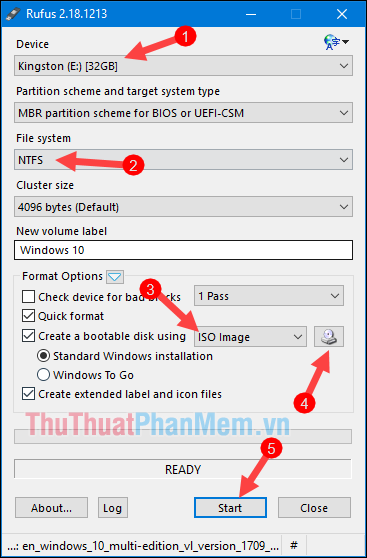
Step 1 : You attach the USB to the computer and open the Rufus software.
Then select the items as shown below, where:
1-Select the USB connected to the computer
2-Select the USB format as NTFS
3-Select the file format to install windows as ISO
4-Select the Windows 10 ISO file in your computer (prepared in part 1)
5-Click Start to start creating USB to install windows.
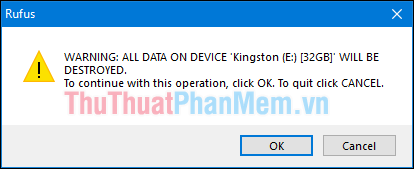
Step 2 : If a message appears, click OK
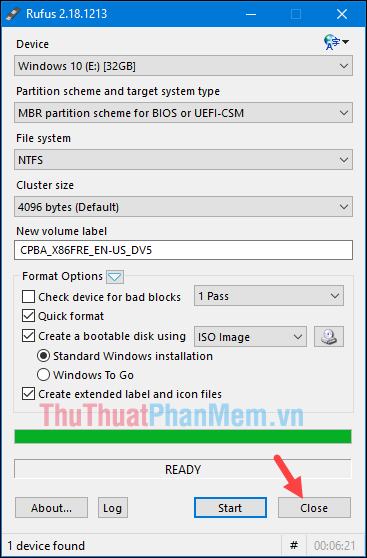
Step 3 : Wait a while for the process of creating USB to install Windows is completed.
When creating a USB to install windows successfully, click Close to exit the program. And prepare to install windows.
3. Steps to install Windows 10
Step 1 : You attach the Windows installation USB created in the previous step to the computer (power off), then turn on the computer to the BIOS and select boot from USB. To enter the BIOS you do the following:
Desktop computers : Depending on the different types of main but most to enter the BIOS press Delete , on the Boot menu press Esc or F11 , F12 .
Sony Vaio Laptop : Turn off the power, then press the Assist button and then press F2 to enter the BIOS . To enter Recovery, press F10 .
Laptop HP:
- Enter BIOS and press F10
- Go to Boot menu and press F9
Lenovo Laptop:
- Enter BIOS and press F1
- Go to Boot menu and press F12
Dell Laptop:
- Go to BIOS and press F2
- Go to Boot menu and press F12
Acer Laptop:
- Go to BIOS and press F2
- Go to Boot menu and press F12
Asus Laptop:
- Go to BIOS and press F2
- Go to Boot menu and press Esc
After choosing to boot into USB, wait for a while for the computer to boot into the Windows 10 installation interface.
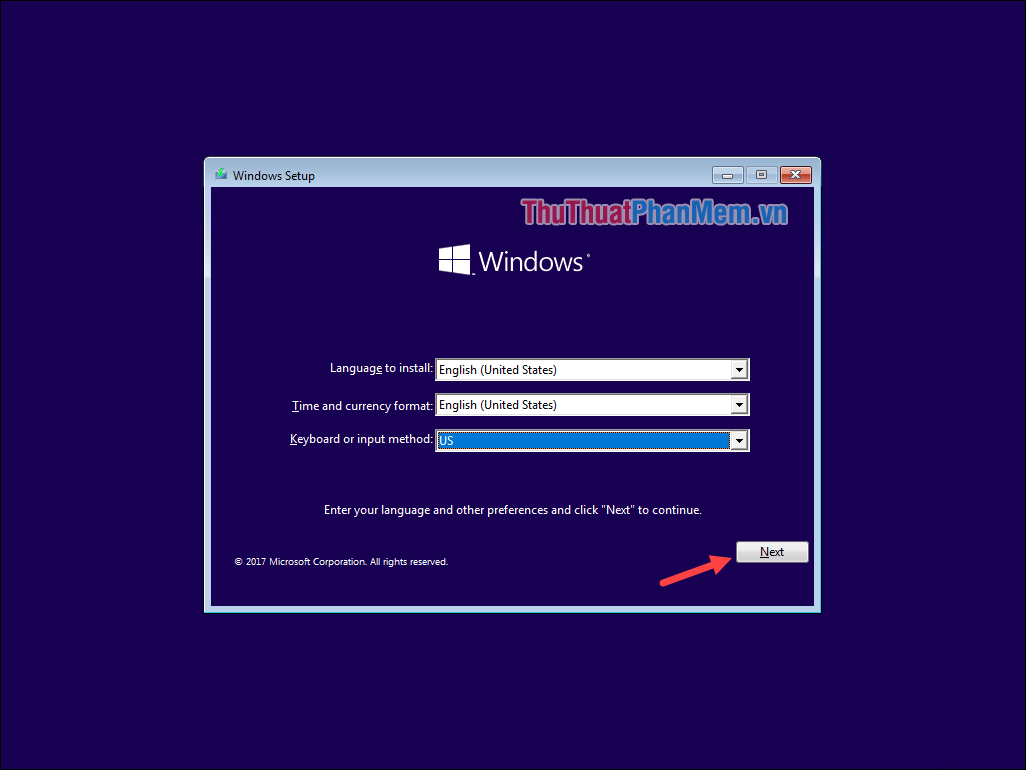
Step 2 : At the installation interface windows 10 you select the items as shown below and click Next .
Step 3 : Select Install now.

Step 4 : Choose one of the versions of windows 10 then click Next .

Step 5: Check the box then click Next .

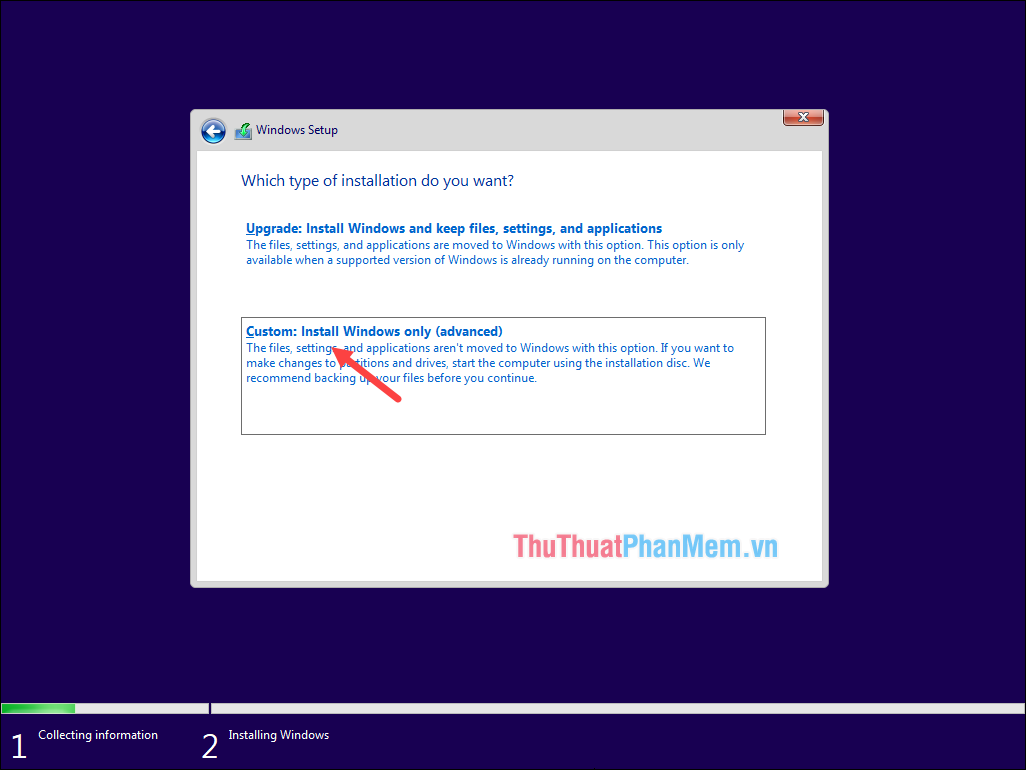
Step 6 : Select Custom: Install windows only
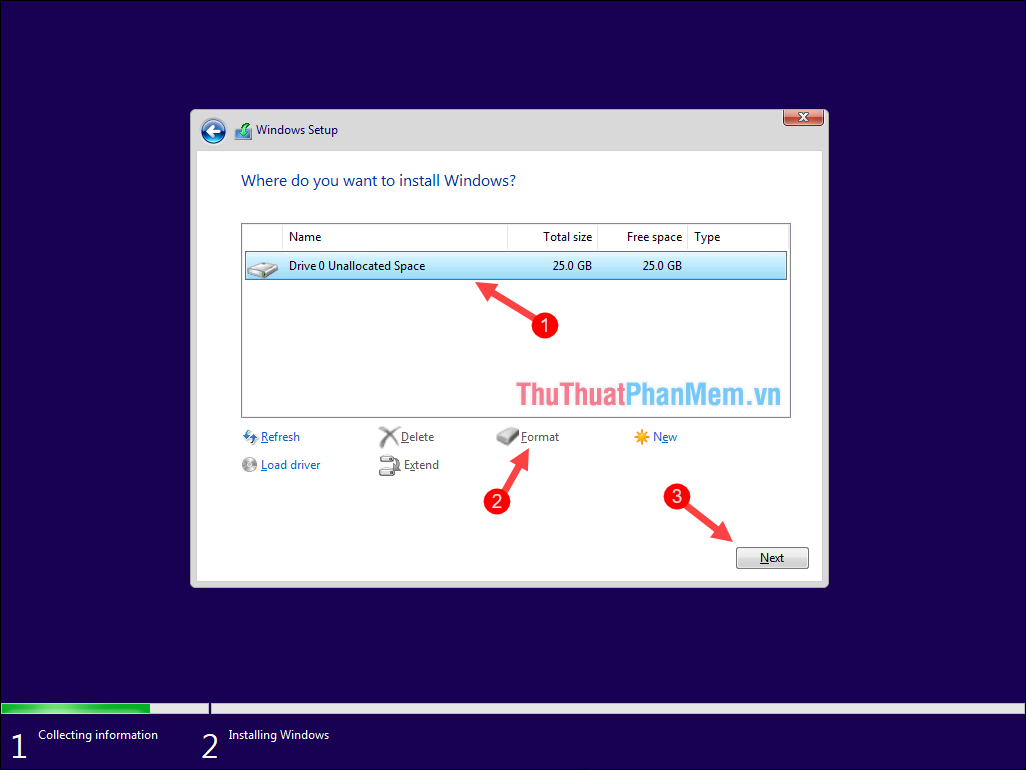
Step 7 : Select the drive to install Windows, normally the computer will be divided into many different drives (the drive where the Windows installation of the Type column will be listed as System). Here I installed on the virtual machine, so there will be only 1 drive. You select the drive then press Fomat to delete all the old data and finally click Next .
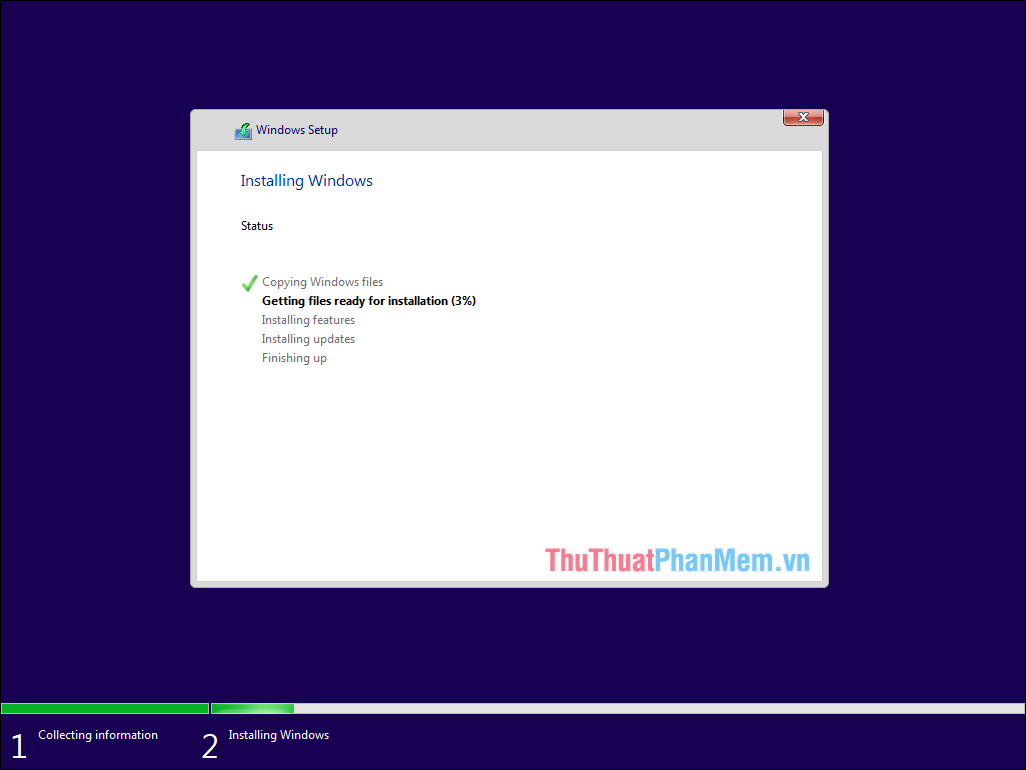
Step 8 : The process of installing Windows starts, you wait about 10-15p depending on the speed of each computer.
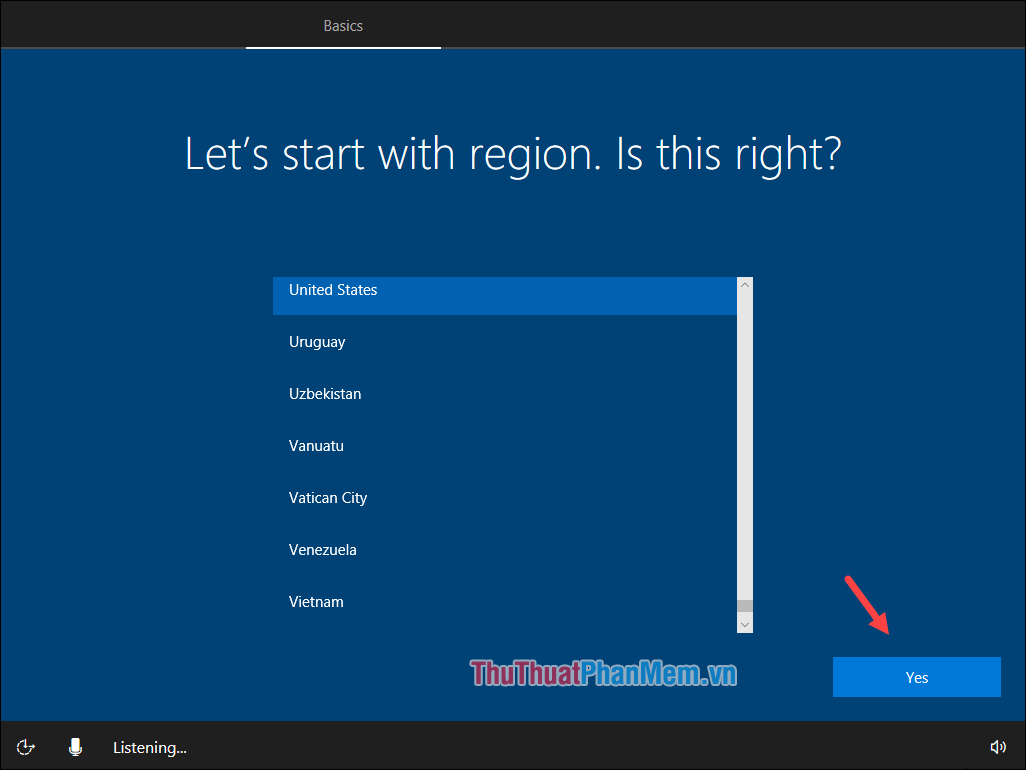
Step 9 : After the installation process is complete the computer will automatically restart, you wait a few more minutes. When the computer boots into the screen as below, select your country and click Yes.
Step 10: Choose your keyboard language and then click Yes.
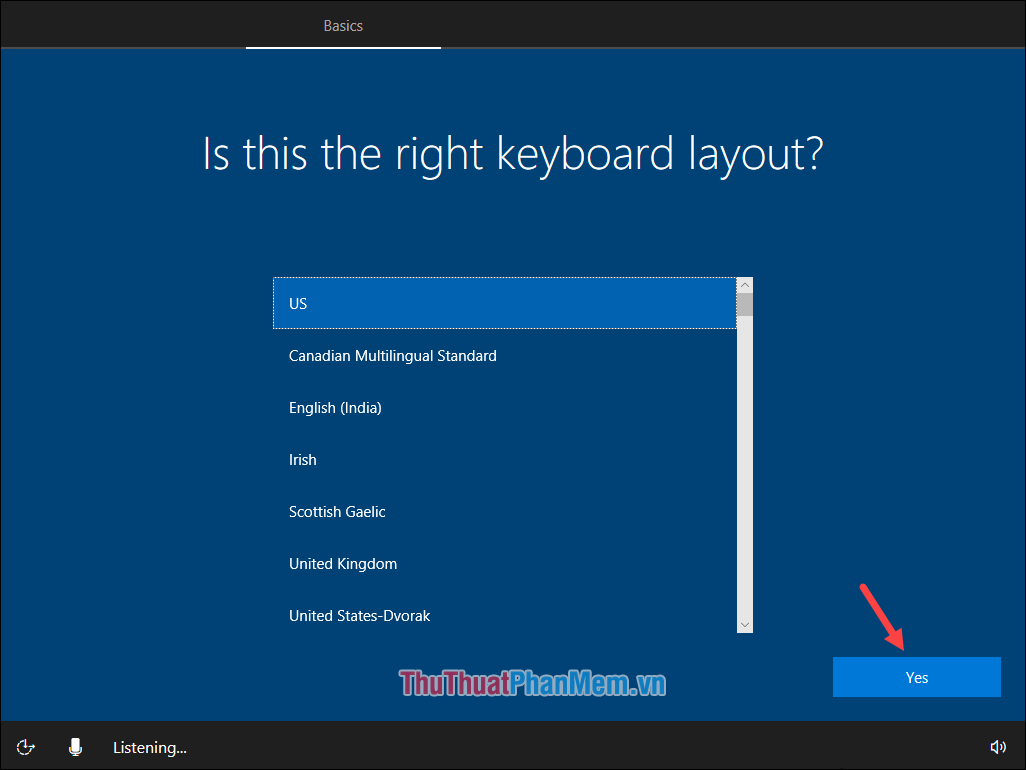
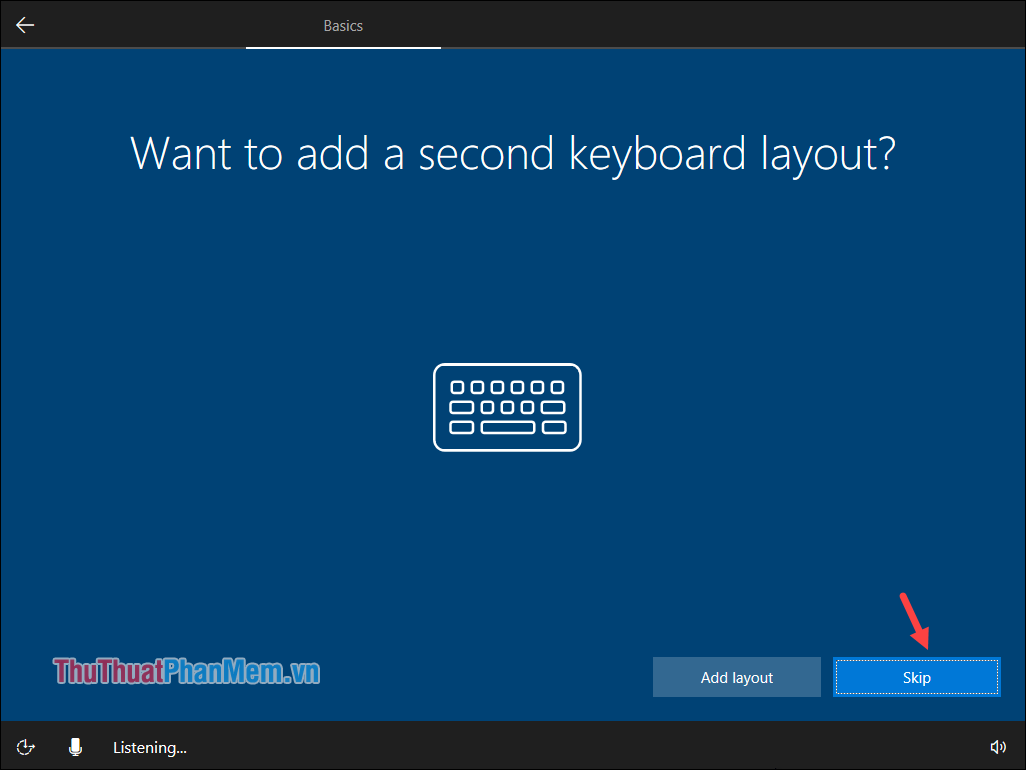
Step 11 : Click Skip
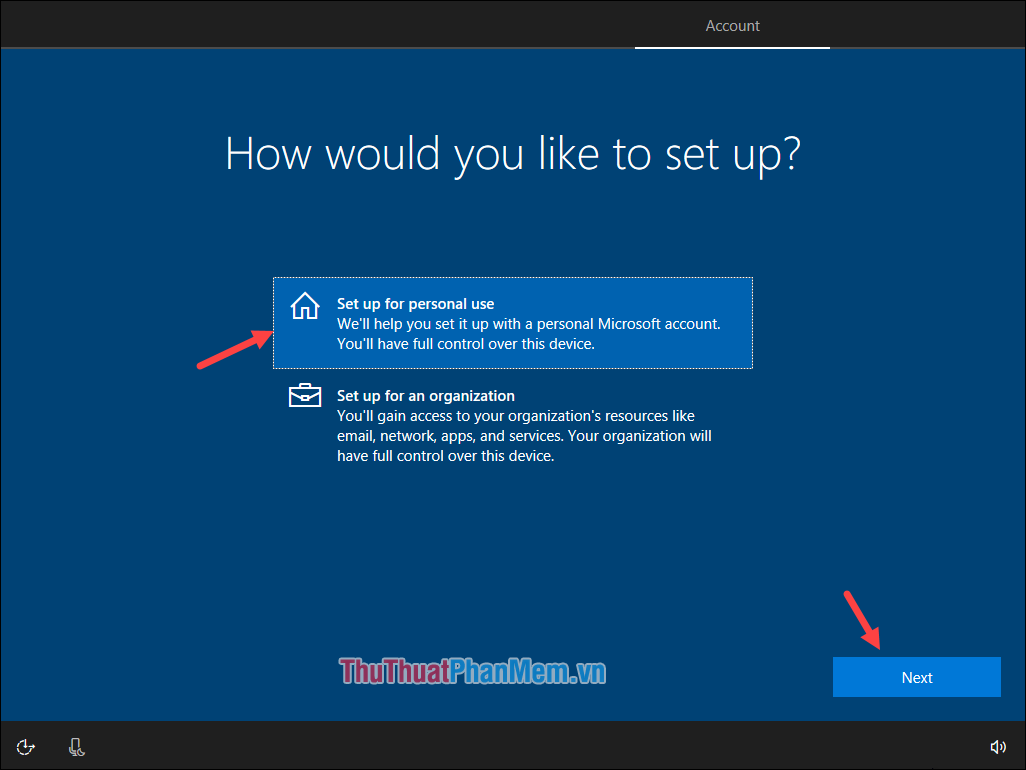
Step 12 : Select Set up for personal use then click Next .
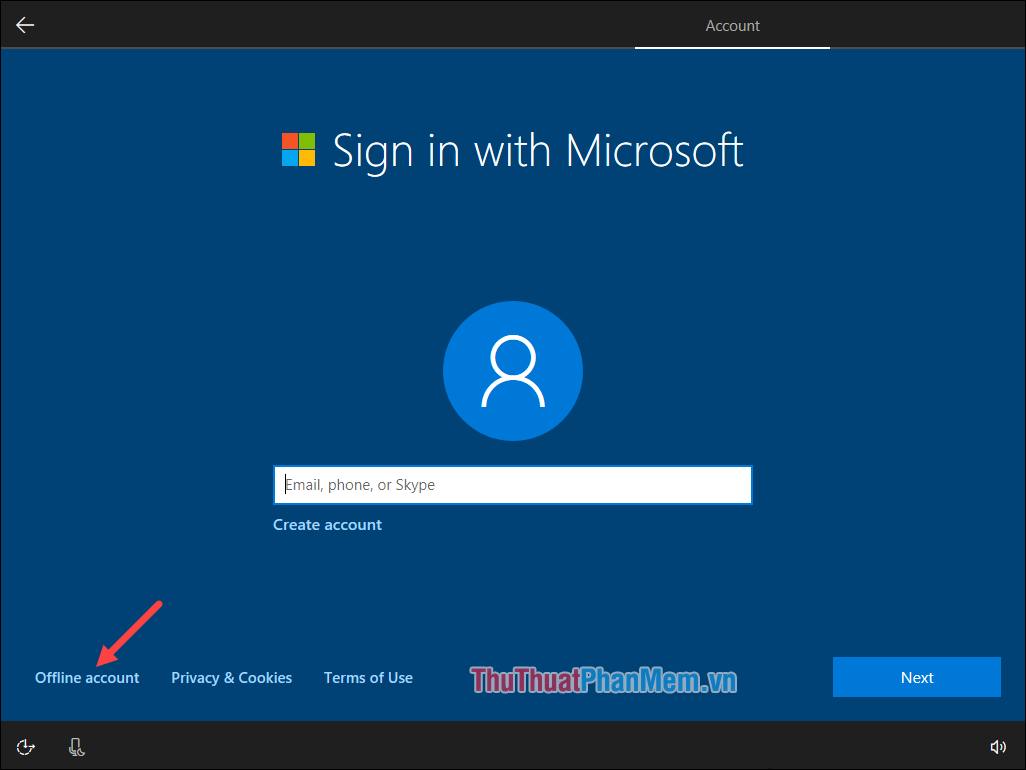
Step 13 : At this step, if you have a Microsoft account, enter it in the box and click Next , otherwise choose Offline account. It is best that you choose Offline account because Microsoft account can be entered after installing win.
Step 14 : Click Yes
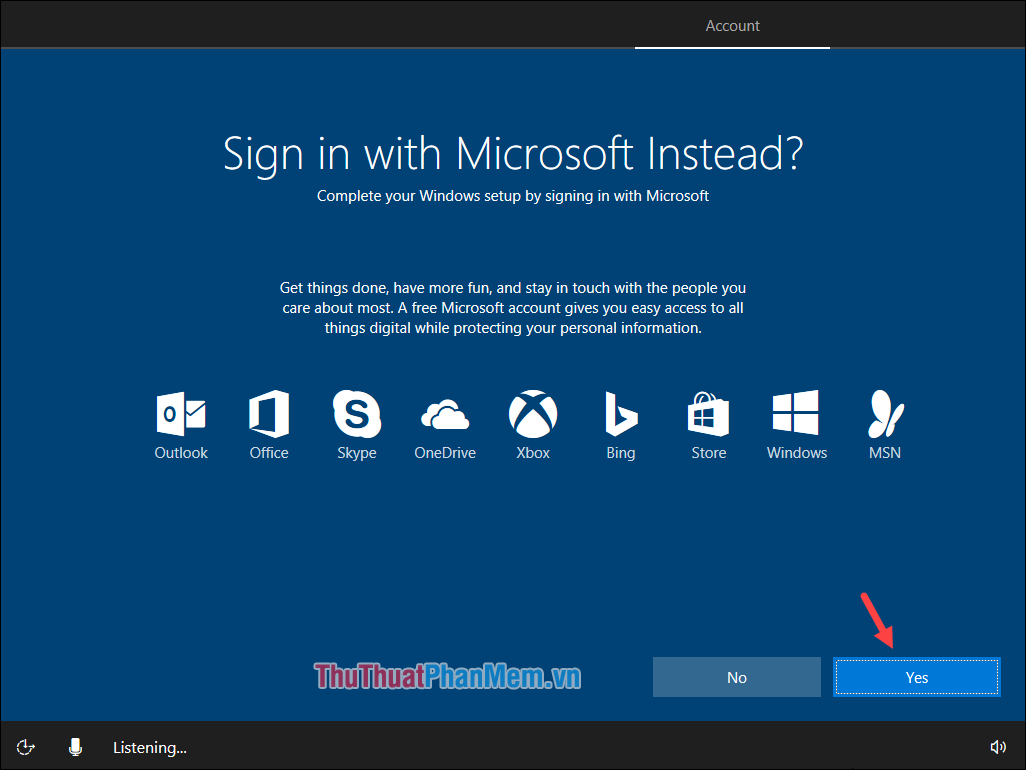
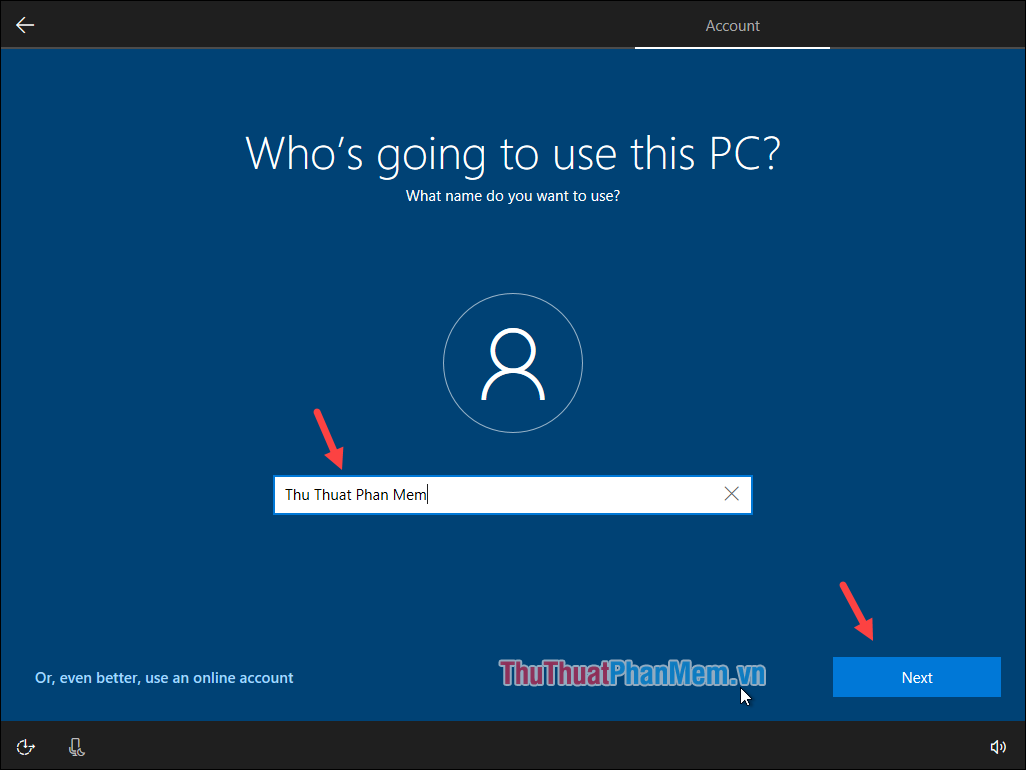
Step 15 : Enter the computer name in the box and click Next .
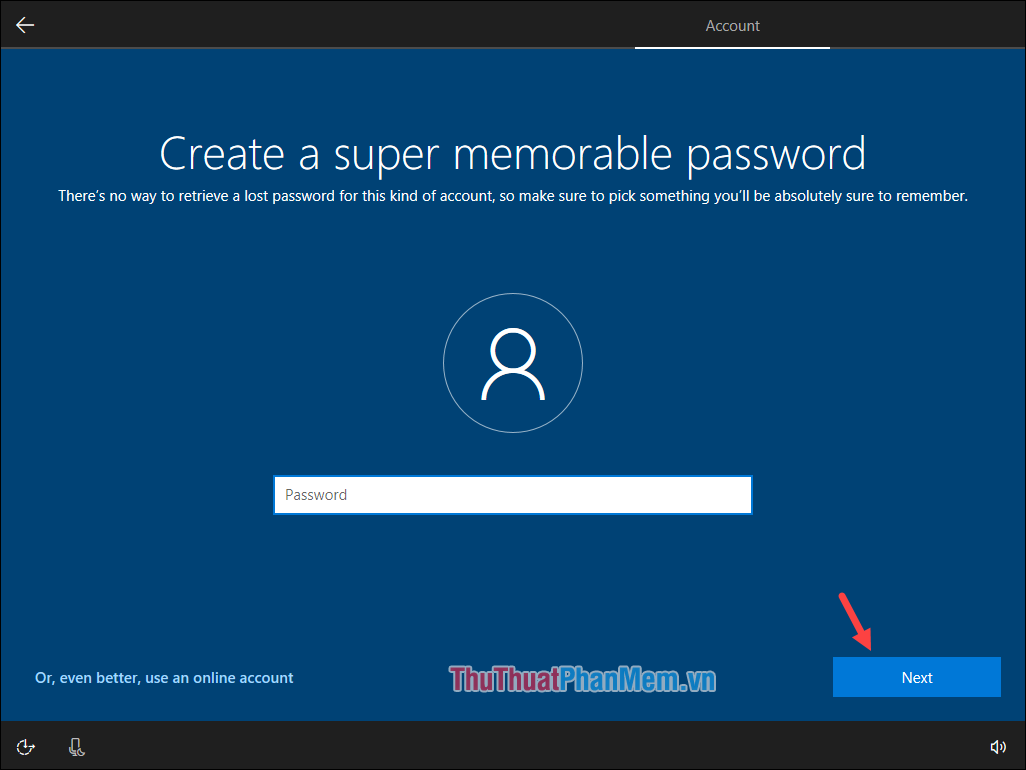
Step 16: If you want to set a password for the computer, enter it in the box and click Next, if you do not want to set a password, leave it blank and click Next .
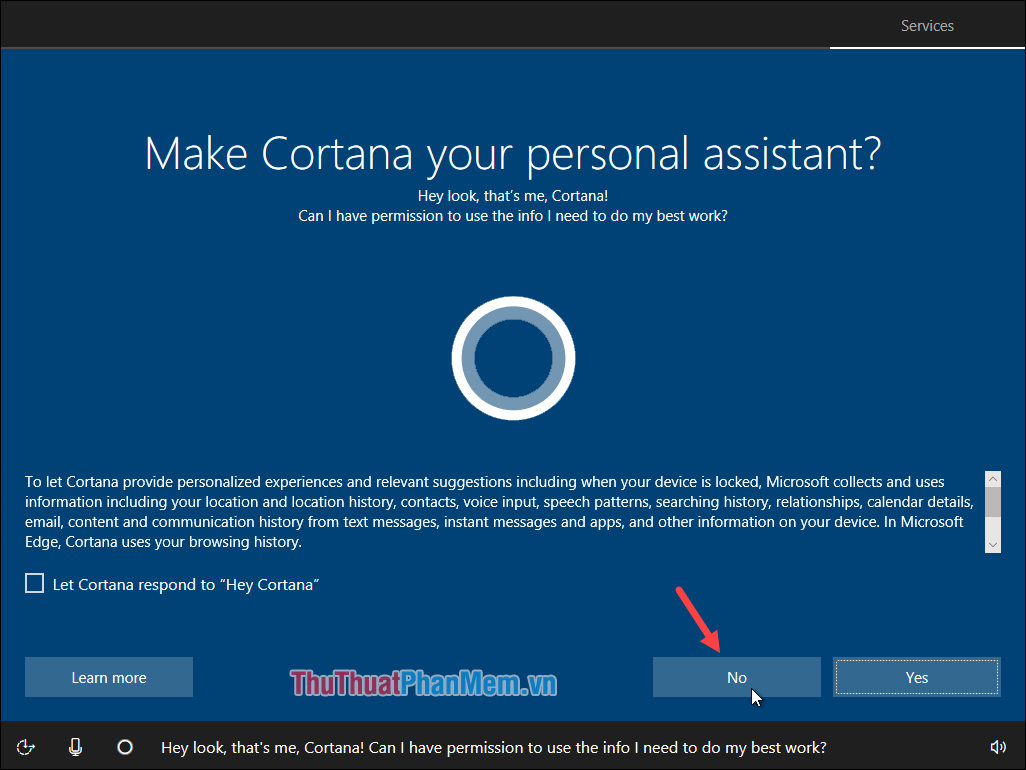
Step 17 : Here windows asks if you want to use the virtual assistant Cotana, I should not use No.
Step 18 : In this step you can turn off all the items and click Accept.
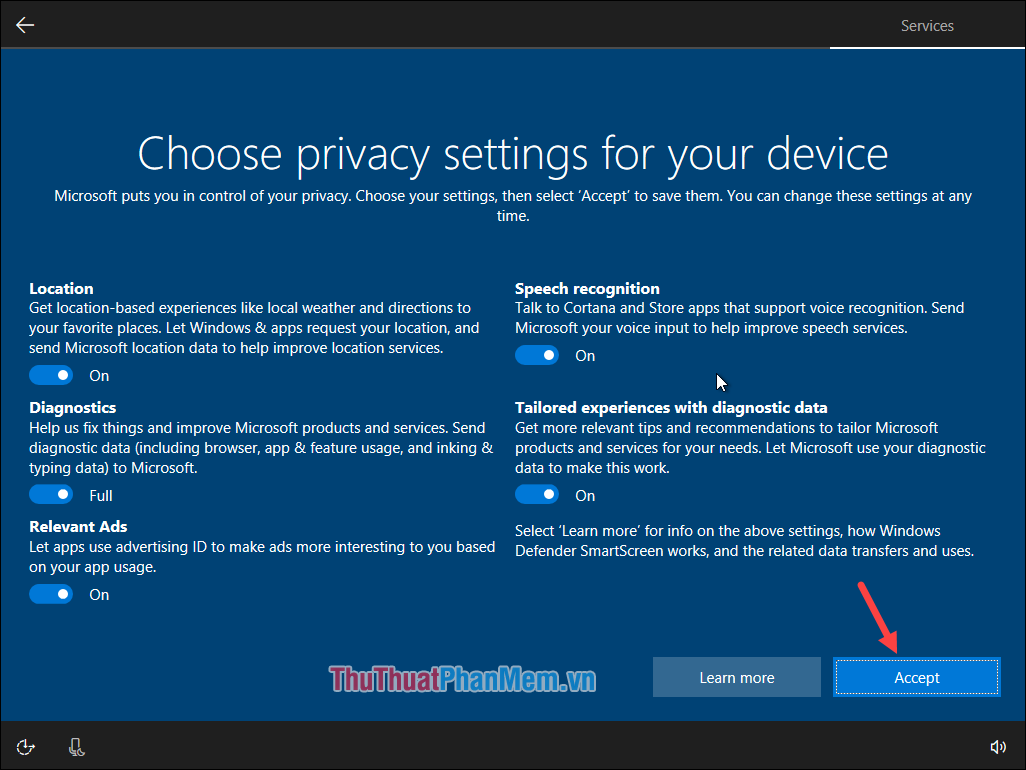
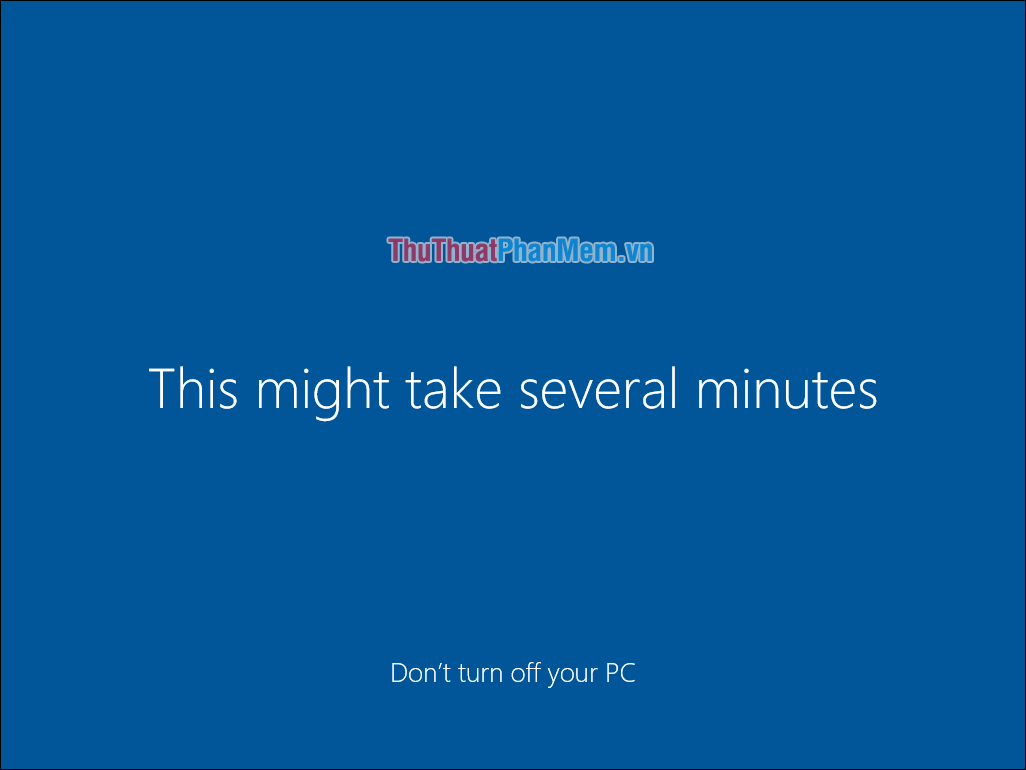
Step 19 : Wait a few minutes to complete the installation of windows.
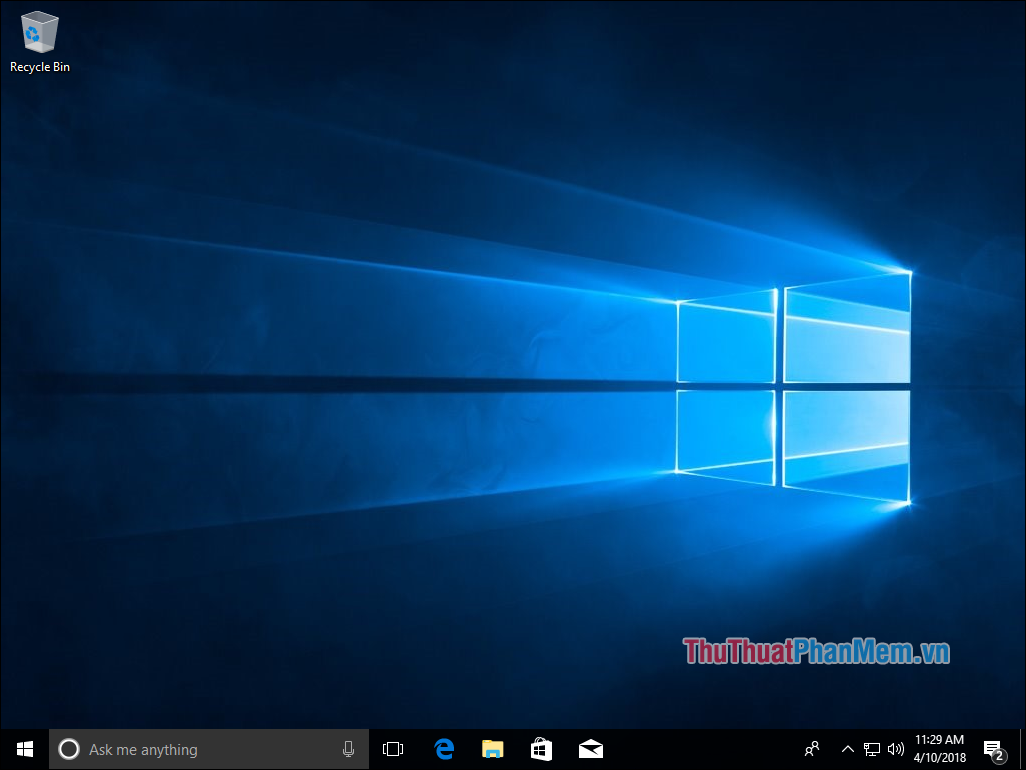
And so we have successfully installed windows 10, the computer has booted to the Desktop.
Above Thuthuatphanmem. vn has detailed instructions for installing Windows 10 with USB, you can see that installing Windows is not as difficult as we usually think. Hope the article will be helpful to you. Good luck!
FAQ
What should I know about Instructions on How to Install Windows 10 with USB Step by Step?
Focus on the key features, requirements, limitations, and practical use cases explained in this guide.
How do I get the best results with Instructions on How to Install Windows 10 with USB Step by Step?
Follow the recommended steps, use current software or information, confirm compatibility, and review settings before major changes.
Are there any risks or limitations?
Potential limitations depend on compatibility, data quality, cost, privacy, support, and how the product or method is used.
Related Articles
 Instructions for Installing Windows XP with USB Step by Step from a to Z5 minutes read
 Golang: How to Install Go on Windows6 minutes read
 How to Install Mysql on Windows 11 Computers9 minutes read
 How to Installing Windows Server 2012 Step by Step6 minutes read
 How to Install Windows XP Service Pack 3 (SP3) Easily and Quickly5 minutes read
 How to Download and Install the Latest ETABS3 minutes read
Reader Comments 0
Sign in with email or Google to join the discussion.