Table of Contents
This practical guide explains how to delete Header and Footer in Word - Header and Footer in a clear sequence, including preparation, key settings, common mistakes, and troubleshooting steps.
What This Guide Covers
- Quick start Guide
- Video on how to delete Header and Footer in Word
- Detailed instructions
This operation is considered basic content when editing content on Word. We can create different Header and Footer in Word, insert additional lines for Header and Footer. So what if you don't want to use Header and Footer for Word documents? The article below will guide you how to delete Header and Footer in Word.
Quick start Guide
Manually delete Header & Footer in Word, click Insert > Header & Footer > Header > Remove Header , do the same with the footer, select Insert > Header & Footer > Footer > Remove Footer.
Quickly delete Header and Footer in Word, select File > Info > Check for Issues > Inspect Document , check Headers, Footers, and Watermarks , select Inspect > Remove All .
Video on how to delete Header and Footer in Word
Detailed instructions
Method 1: Manually delete Header & Footer in Word
Step 1:
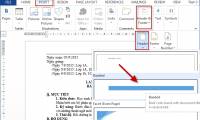
In the document you want to delete Header and Footer, click Insert on the ribbon bar. Next, find the Header & Footer section and click on Header to delete the header.

Step 2:
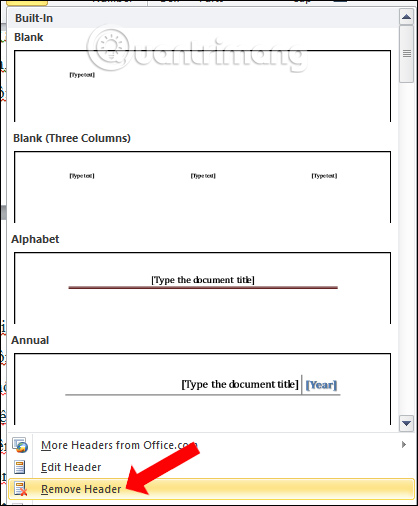
In the displayed list, click Remove Header to delete the inserted header.
Step 3:
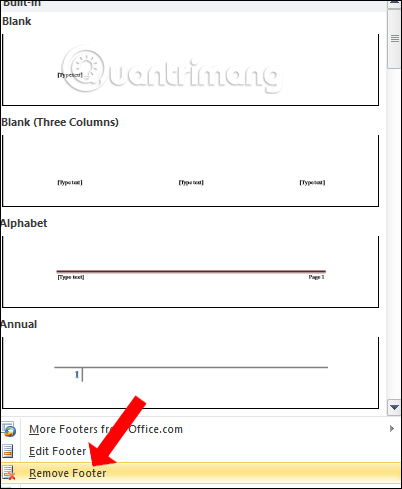
You also do the same with Footer to delete the content inserted at the bottom of the page. Click Remove Footer in the list.
Method 2: Quickly delete Header and Footer in Word
Step 1:
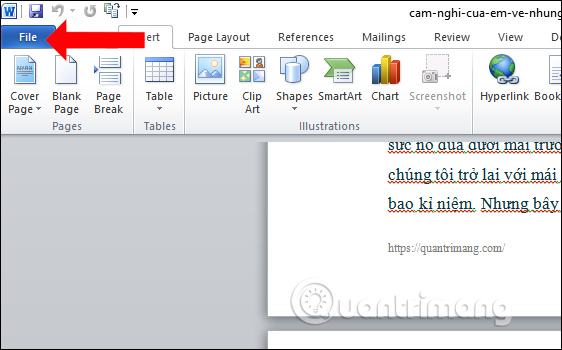
In the Word interface, click the File button or the Office icon with the Word 2007 document.
Step 2:
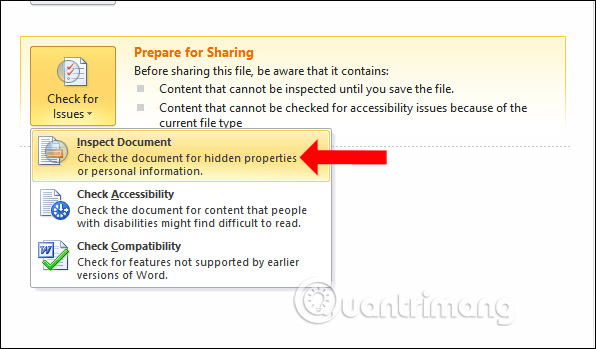
In the new interface, click on Info , then look at the content next to it, click on Check for Issues .
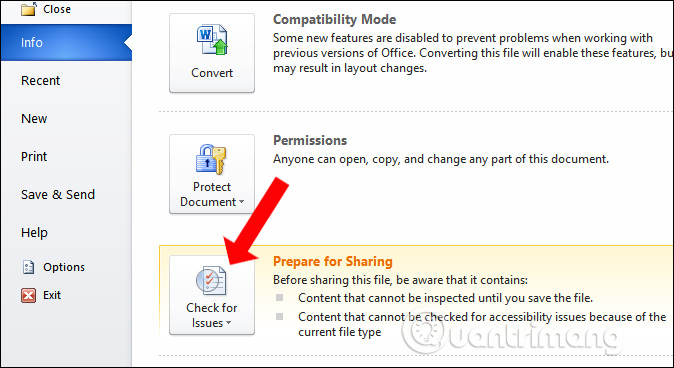
Click on the Inspect Document content .
Step 3:
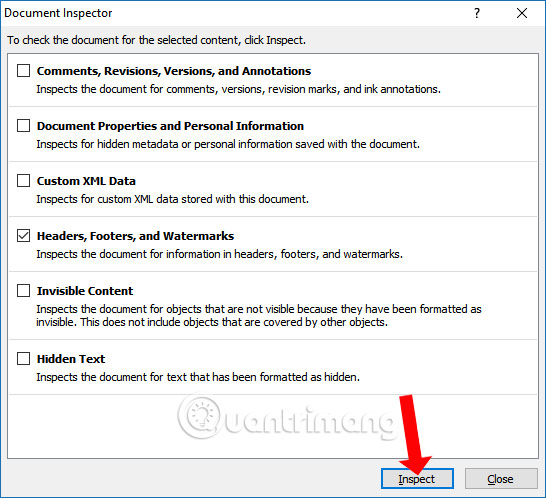
Displays the Document Inspector panel interface. Here, users should check the Headers, Footers, and Watermarks content then click on Inspect below.
Step 4:
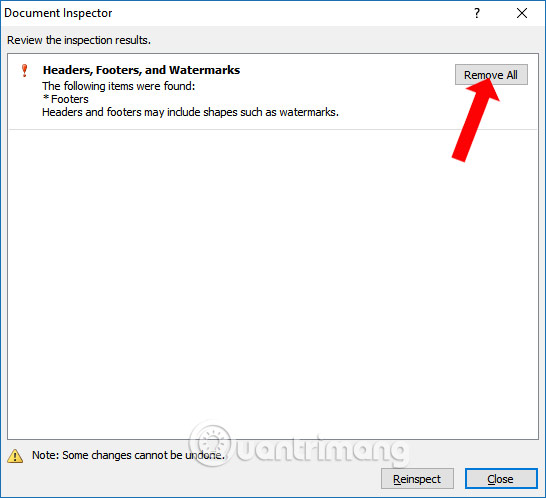
This tool will check all Headers and Footers in Word. Start by click Remove All to delete all Header and Footer content inserted in the content.
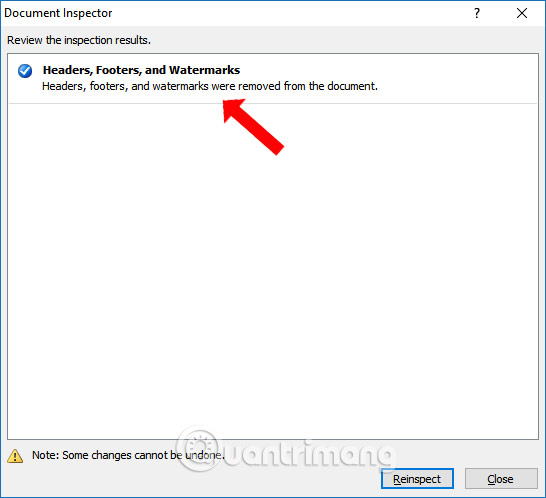
When deleted successfully, the notification interface will be displayed as shown below.
So you have 2 ways to delete Header and Footer in Word. The first way is simpler, but users need to access each Header and Footer section to delete each content separately. With the second method, we will quickly delete all the first titles and insert the last page content, or insert a watermark in Word.
*What is Header & Footer in Word?
Header is the text placed at the top of the page, while footer is placed at the bottom of the page. Typically, these areas are used to insert document information, such as the name of the document, chapter titles, page numbers, creation date, and the like. You can also insert special fields in the header and footer.
The header is located in the margin area at the top of the page. Footer is located at the bottom margin of the page. Information in the header and footer is repeated on each page and thus allows the reader to easily navigate the document. This is especially useful for information such as page numbering. If section breaks are used in your document, you can change the header and footer for each section. This can be useful in a document with chapters, allowing you to insert the name of each chapter into the relevant header or footer.
Each and every document contains header and footer areas, but these areas are only visible when they contain information. To enter information into the header or footer, you need to enable it. You can double-click the header or footer areas to edit them. Headers and footers are only visible in Print Layout and Print Preview views .
To indicate when headers and footers are inactive, the information contained in them will appear gray or blurred. To indicate when the header and footer are active, a blue dash will appear on the edge of the margin and a small Header or Footer tab will appear on the left side.
Wishing you success!
Final Thoughts
Use the instructions and checks above in order, verify the result after each major step, and keep a backup whenever the process changes important files or system settings.
FAQ
What should I check before starting?
Confirm that your device or software version matches the instructions, save important data, and note the original settings before making changes.
What should I do if the steps do not work?
Restart the app or device, install available updates, review any error message, and repeat the steps carefully in the same order.
Can I undo the changes?
Many changes can be reversed, but the exact method depends on the feature. A backup or restore point gives you the safest way to recover.
Related Articles
 How to Delete Header and Footer in Word4 minutes read
 How to Insert Images into Header, Footer on Word: Insert Header5 minutes read
 How to Create Different Header, Footer on Word5 minutes read
 How to Create Header and Footer in Word3 minutes read
 Microsoft Word: How to Create Page Title (Header) and Footer5 minutes read
 How to Insert Header and Footer on PowerPoint When Printing3 minutes read
Reader Comments 0
Sign in with email or Google to join the discussion.