Table of Contents
The following guide provides a clear overview of Microsoft Word, with the most relevant background, details, and practical takeaways.
More reference: How to create an automatic table of contents
1. Create Header, Basic Footer
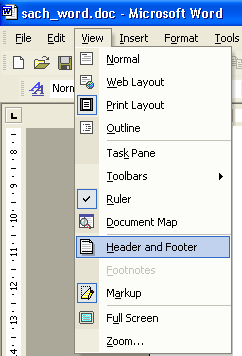
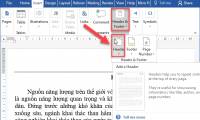
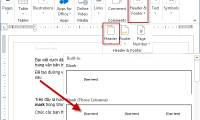
Go to View> Header and Footer:
The Header and Footer tool bar appears:

Enter the content of the page title and footer. The function details for the Header and Footer toolbar are as follows:
Insert Auto Text: Insert Content Automatically
- PAGE -: - Insert the page number
- Author, Page #, Date: Insert the computer name, page number, date (taken by the date displayed on the computer).
- Confidential, Page #, Date: Insert Confidential, page number, date.
- Created by: Display 'Created by: computer name'
- Created on: Display 'Created on: date, month, year, hour' (computer setup date)
- Filename: File name
- Filename and path: Path of file and file name
- Last Printed: Displays 'Last printed date, month, year, hour'.(printer setup date)
- Last saved by: Display 'Last saved by name set when installing Windows',
- Page x of y: The xth page of the total number of pages of the file.
- Insert page number
- Insert the total number of pages of the file

- Self-page numbering starts as you like.
- Insert the date, month and year (based on the current date on the computer)
- Insert the current time on the computer
- Format header size and footer and page margins
- Hide / show file contents when creating header content & footer
- Same as previous: Displays the content of the header & footer like the previous file
- Move between Header and Footer
- Turn to the page before the current page
- Display the page after the current page
- Set up some other features for the Header and Footer toolbar.
If you want to have a dash LINE with Header & Footer content, use the drawing bar of MS Word as Drawing as usual, draw a horizontal LINE at the appropriate position (for example):
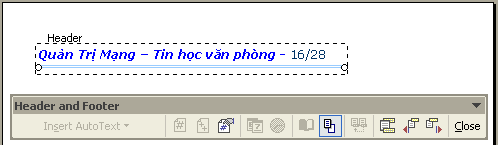
Close: Exit the screen to create the header & footer. After creating the header content & footer you can double-click the page content screen to exit.
2. Create Header & Footer for Different Odd and Even Pages:
If you want to enter Header & Footer content of even pages, different odd pages:
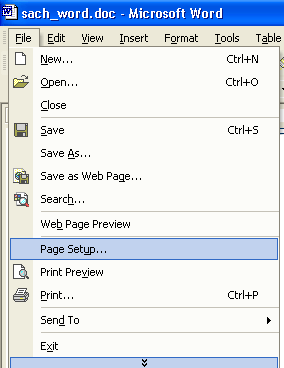
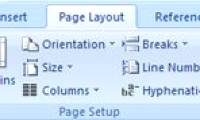
1. Go to File> Page Setup
The Page Setup dialog box appears> select the Layout tab:
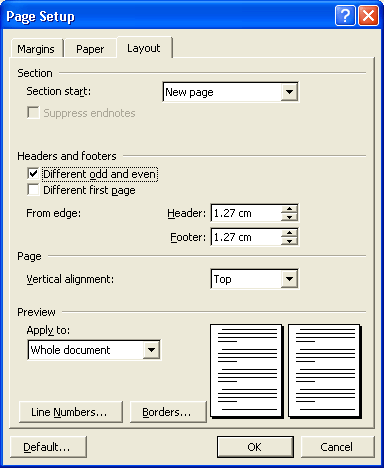
2. At Headers and Footers:
- Different odd and even: Select the Header & Footer content of even and odd pages.
- Different first page: Select the first Header & Footer content entry of the file other than every page.
3. Then re-enter the Header & Footer content of the even page, the individual odd page.
- Word 2013 Complete Guide (Part 14): Page title, footer and page numbering
- How to insert page numbers in Excel
- Complete guide for Word 2016 (Part 15): Page numbering
- Create a list of tables in Word automatically
Good luck!
FAQ
What happened in Microsoft Word: How to Create Page Title (Header) and Footer?
The following guide provides a clear overview of Microsoft Word, with the most relevant background, details, and practical takeaways.
What factors influenced Microsoft Word?
More reference: How to create an automatic table of contents 1.
What was the practical impact on users?
Create Header, Basic Footer Go to View> Header and Footer: The Header and Footer tool bar appears: Enter the content of the page title and footer.
Related Articles
 Word 2013 Complete Guide (Part 14): Page Title, Footer and Page11 minutes read
 Complete Guide for Word 2016 (Part 14): Page Title (Header) and6 minutes read
 How to Create Different Header, Footer on Word5 minutes read
 How to Create a Page Header (Header) and Footer (Footer) in Word3 minutes read
 Create Header and Footer for Text Page in Word4 minutes read
 MS Word - Lesson 11: Format the Page: Microsoft Word 20074 minutes read
Reader Comments 0
Sign in with email or Google to join the discussion.