How to insert Header, Footer in Google Docs
Instead of having to enter reference information directly into the content, we can enter information in the Header, Footer. Then the reader can know more information such as page number, author name, year of publication without the writer needing to write in the main content.
Most documents support us to insert Header, Footer such as Insert Header, Footer into Word or Insert Header, Footer in Excel. If we use online documents such as Google Docs, we can also insert Header, Footer into the document. Google Docs also has the option to insert Header, Footer differently in each section. The following article will guide you how to insert Header, Footer in Google Docs.
- How to insert images into Header, Footer in Word
- How to add lines for Header, Footer in Word
- How to create Header, Footer different in Word
- How to insert Header and Footer in PowerPoint when printing
Instructions for inserting Header, Footer in Docs
Step 1:
Open the Docs you need to process, then click Insert , choose Header and Footer . Then select the location you want to insert information.

Step 2:
By default, when inserting Header, Footer into Docs, it will display the page number. You can still change the content according to the requirements of the document.

Step 3:
This title can change the format such as font style, font size, or display position.

Step 4:
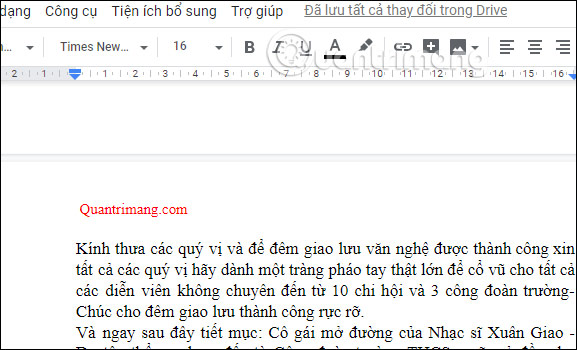
When you have finished editing the title and removing the mouse button, all pages display the header in the image as shown below. If you want to edit the title, click on the content.
Step 5:
To create a header on the first page is different from the title of the rest of the pages , users check the First page box in the title bar at the top of the page.

Now you just need to enter a new title for the first page. Then the format for the first title will not affect the titles on the remaining pages.

Step 6:
To change the margins of the header or footer, click the option and then click Format header in the title bar when you click to edit.

Now display the alignment table for us to adjust the margins for the header . Change the margins, then click Apply to change the new margin for the title.

Step 7:
If we want to create titles on different pages, we need to create different sections first . We click at the bottom of the page to break into a section, then click Insert , select Interrupts and select Interrupts section (next page) .
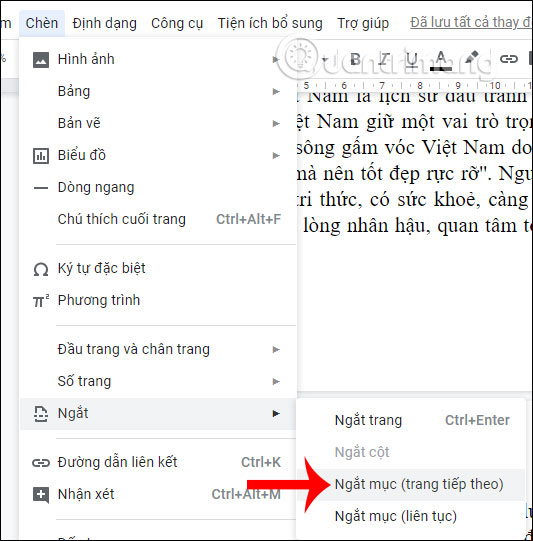
Now click on the second section page and uncheck the Link to the previous section to break the two sections together.
Now you just need to enter a title for each section. If you want the page to share a header similar to the rest of the page, then proceed to the page break above.

So you know how to insert Header, Footer in Google Docs with different cases, the title for the first page is different from the other pages or the title for each page group. Basically, inserting Header, Footer in Google Docs is quite similar when done in Word.
I wish you successful implementation!