Table of Contents
This practical guide explains how to create Curved Fonts on Word - Artistic Curved Fonts in a clear sequence, including preparation, key settings, common mistakes, and troubleshooting steps.
What This Guide Covers
- How to create curved fonts on Word 2019 and later
- Step 1:
- Step 2:
This is a tool that gathers many artistic fonts from 3D fonts to shadow fonts,. for users to freely choose for their Word documents. The article below will guide you to create curved fonts on Word.
How to create curved fonts on Word 2019 and later
Step 1:
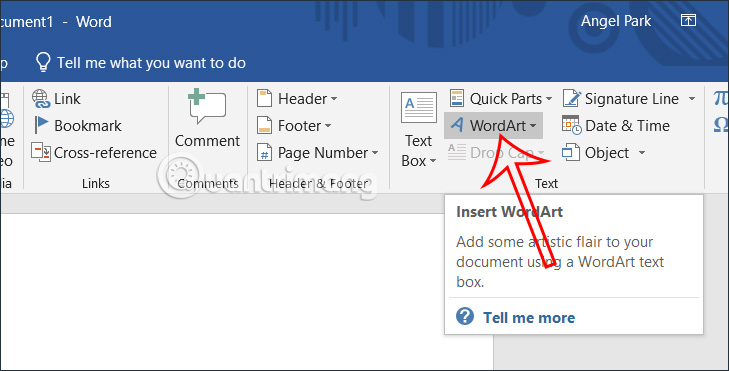
At the interface in Word, click Insert and then select WordArt to find artistic letter samples.
Step 2:
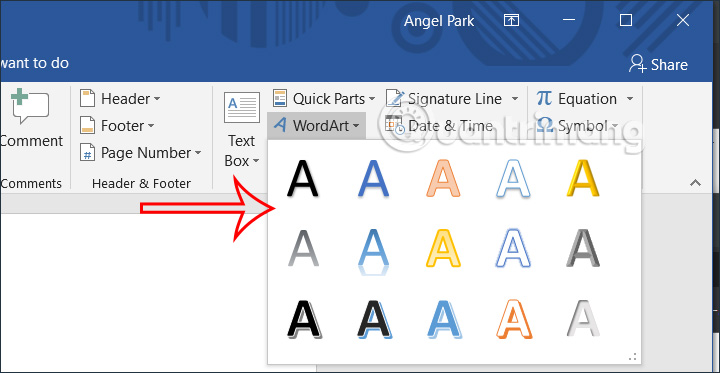
At this point, users will see many different artistic fonts. We choose the font style with the effect we want to use for the Word document.
Step 3:
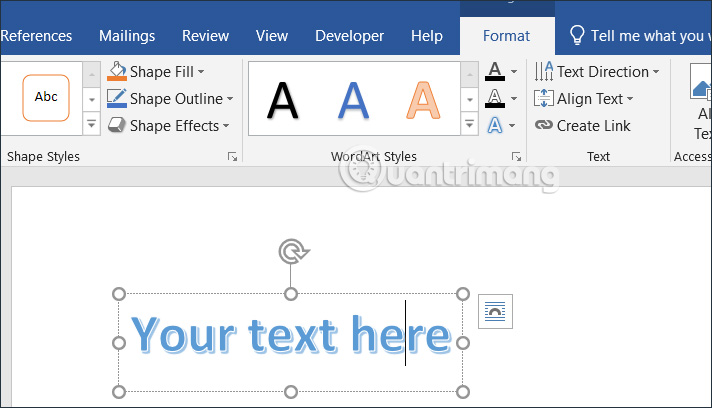
Now you will enter content into this frame with the artistic effect for the text we have chosen. We choose the font size and font style for the content as usual.
Step 4:
To create curved text in Word , highlight the text and then click the Format tab above to adjust the format of the text. Then the user clicks on the Text Effects icon as shown below.
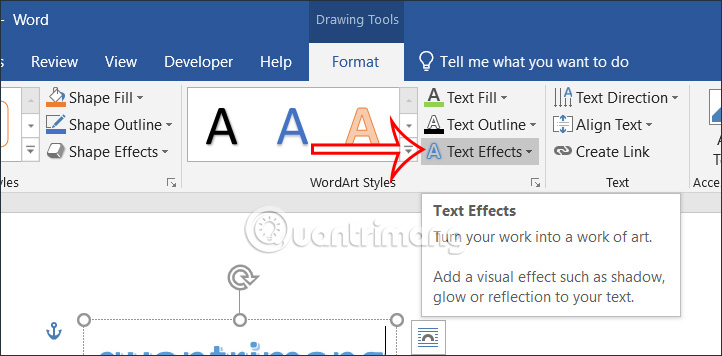
Now displaying the options for the text, click on the Transform style and then select the text curvature style we want to use. We hover over each bend type and will see how the text displays with that bend option.

Step 5:
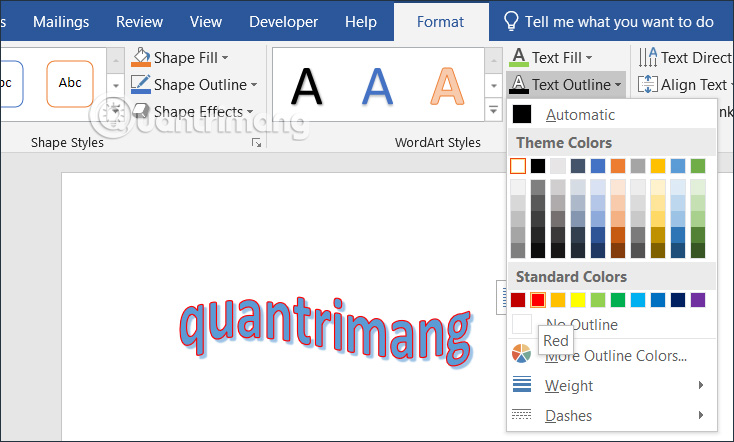
In addition, you can also edit the text color at Text Fill, add text borders at Text Outline to change this font style.
Instructions for creating curvy text on Word 2013 and below
Step 1:
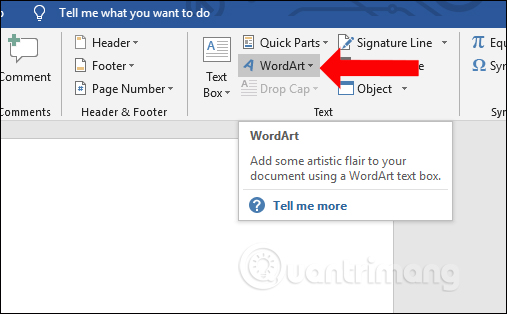
Click on Insert and then select WordArt to write artistic words.
Step 2:
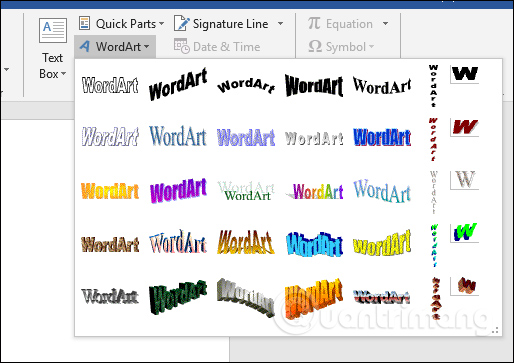
In the list displayed, select the artistic lettering style you want to use. Then write the text into Word content.
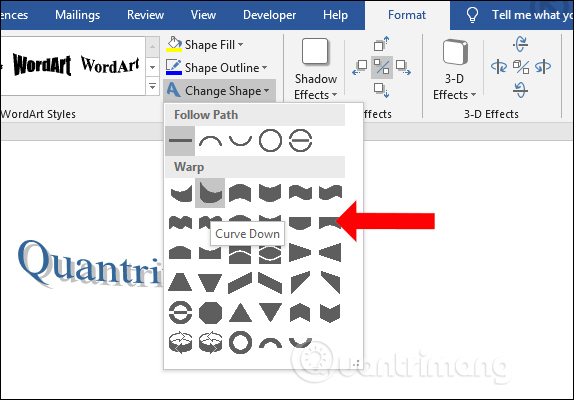
Click on the Format button and then select Change Shape . Here we will see many styles of letters with different curves or shapes. People look for wavy typefaces to use for content.
Step 3:
The resulting text will be shaped like an arc as shown below.
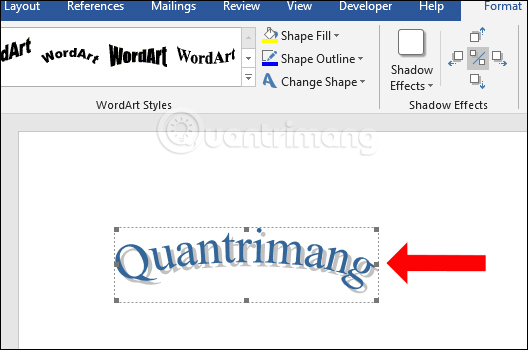
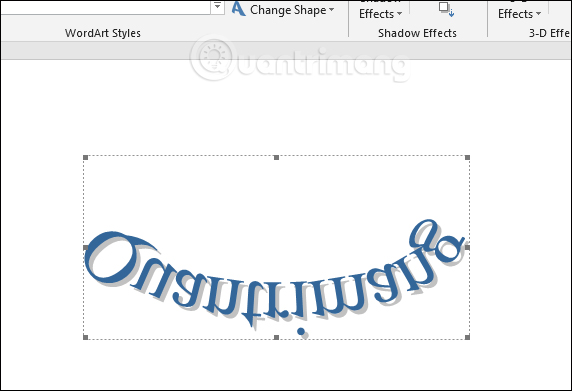
We can click on the dots in the center of the vertical edges to adjust the arc of the text, or flip the text upside down when clicking on the dots in the center of the horizontal edge and then drag it down as shown.
Step 4:
In case the user wants to return to the first typeface without adding the curling effect, click on the text again and select Change Shape and then select the Plain Text horizontal text effect .
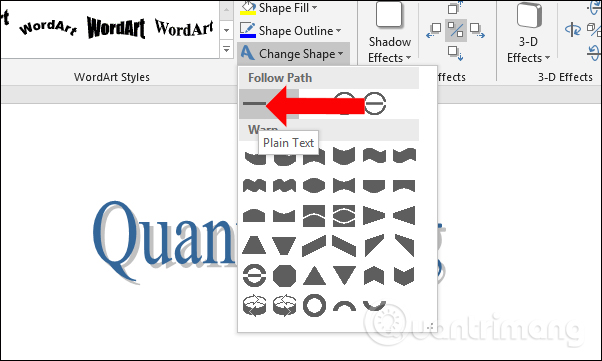
So in addition to using Word Art to write artistic text, we can also use the Change Shape section to change the frame for the text, with many different font styles such as rotating, curving, wavy font,.
Video tutorial on creating curved fonts on Word
Final Thoughts
Use the instructions and checks above in order, verify the result after each major step, and keep a backup whenever the process changes important files or system settings.
FAQ
What should I check before starting?
Confirm that your device or software version matches the instructions, save important data, and note the original settings before making changes.
What should I do if the steps do not work?
Restart the app or device, install available updates, review any error message, and repeat the steps carefully in the same order.
Can I undo the changes?
Many changes can be reversed, but the exact method depends on the feature. A backup or restore point gives you the safest way to recover.
Related Articles
 Photoshop CS: Curved Image on the Background3 minutes read
 How to Create Curved Typefaces in Word: How to Create Wordart4 minutes read
 How to Create Word Art in Word: Step-by-Step Guide3 minutes read
 Top 5 Best Curved Screens4 minutes read
 Guide Font Formatting, Change Stretch and Create Artistic Text in7 minutes read
 How to Download Fonts7 minutes read
Reader Comments 0
Sign in with email or Google to join the discussion.