How to create light for text on Photoshop
The light for the word will create a beautiful effect for the word. And you can create right on Photoshop.
Creating text effects such as shading, incorporating images into words, creating light for words always brings attractive effects to viewers. There are many tools on Photoshop to create new, unique effects for text. By creating a light for the text on the image, you will do it right on Photohsop with very simple steps. The following article will guide you how to create light rays in Photoshop.
- Tutorial for creating 3D photo effects in Photoshop (Part 1)
- How to use Photoshop CS6 (Part 4): Create a fading effect
- Instructions on how to create 3D effects and objects in Photoshop
Tutorial to create light for text on Photoshop
Step 1:
Users create image files with a resolution of 600 x 250 or more depending on you.
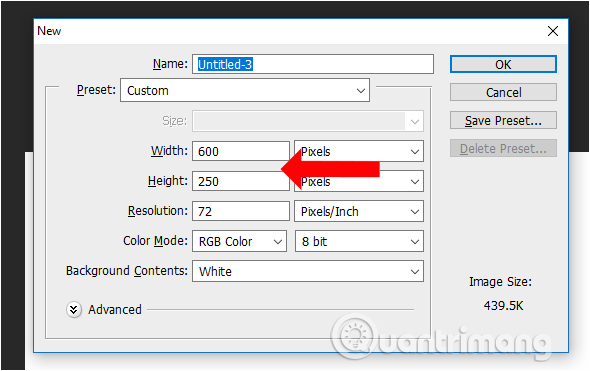
We will let the background be black or gray, but choose a dark color so that the text effect is more prominent after the text effect has been created.

Step 2:
Click the T icon in the toolbar on the left of the screen and select the font color as yellow and enter the text. Use the font color code # F4FC0E. Can adjust font format if needed.

Step 3:
Next click on the text layer to the right of the interface and press Ctrl + J to duplicate this text layer. The new text layer will have more copy letters as shown below.
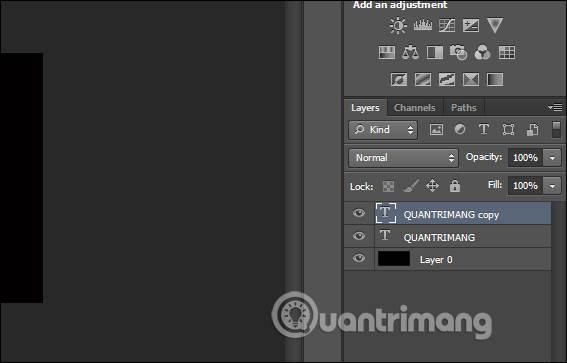
Step 4:
In the original text layer, right-click on the layer and select Rasterize Type to lose this text layer and switch to another format.
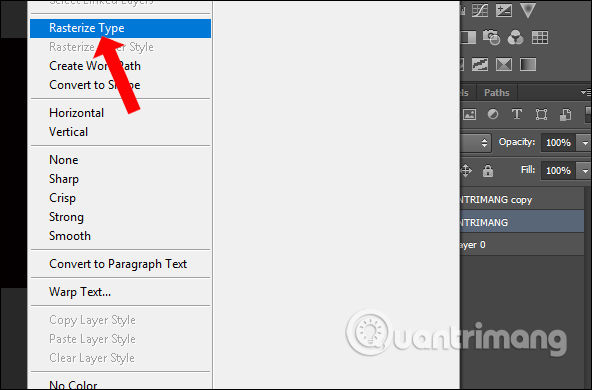
Step 5:
Users click on the Filter filter above the toolbar and select Blur . Display the list next to the Radial Blur entry .
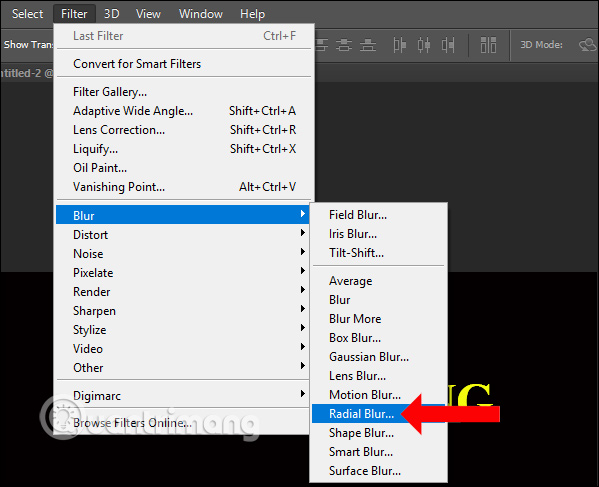
Step 6:
Display the tool panel to customize the effect. Here the user adjusts the items according to the list below and press Ok to create the effect.
- Amount: select 100.
- Blur Method: select Zoom.
- Quality: choose Good.
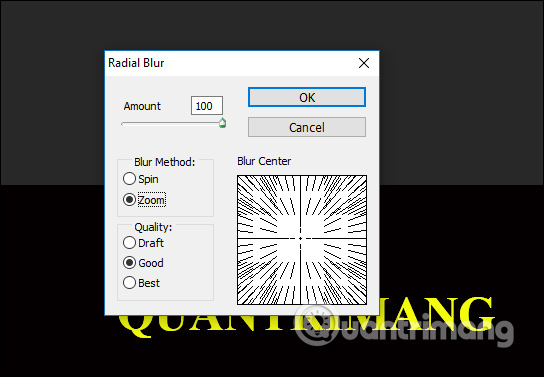
The resulting text is created with a light ray effect as shown below.
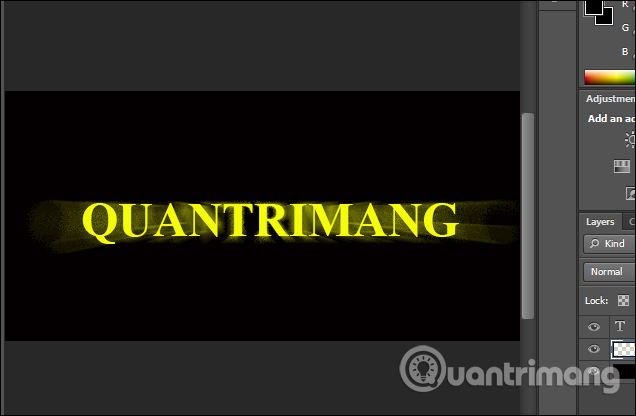
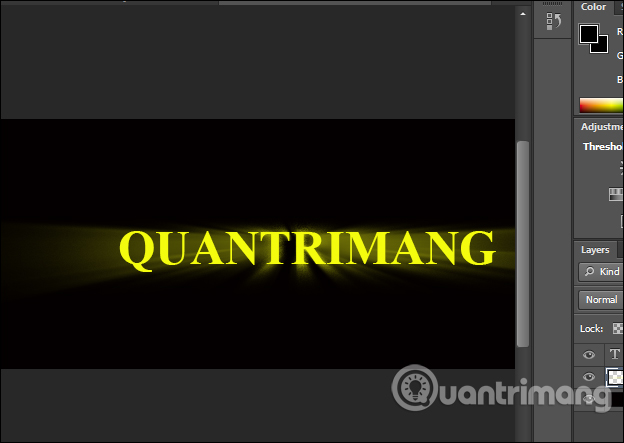
In case we want the light rays to expand further, increase the area of the light ray, just do the filter correction again as above until the effect is optional.
Step 7:
Go back to the layer layer and double click on the copy text layer, or right-click and choose Blending Options .

Step 8:
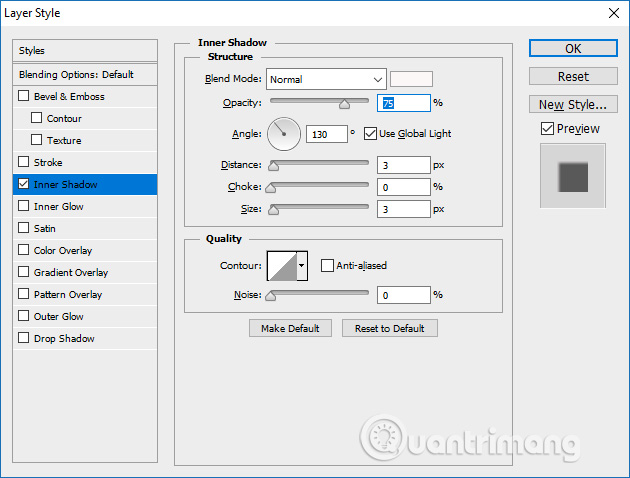
In the new interface, click on Inner Shadow and change the parameters as shown below.
- Blend mode: select Normal and leave white.
- Opacity: adjusted down to 75%.
- Angle: use 130 degree angle and select to use Global Light.
- Distance: adjust to 3 px.
- Choke: set to 0%.
- Size: adjust to 3 px.
Finally click OK to save.
Immediately the text effect will be created as shown below. The text will have a white border to highlight the light ray effect.
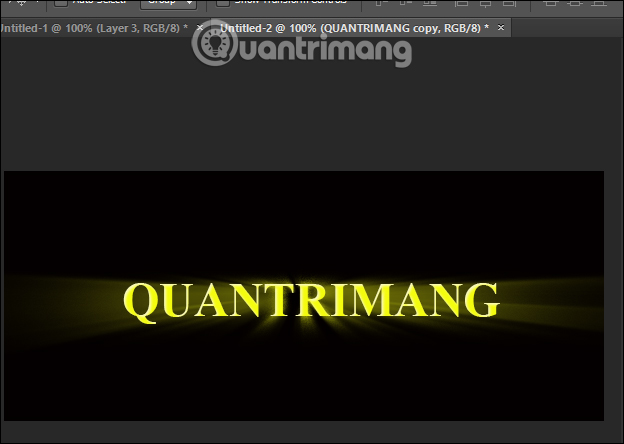
So how to create light effects for text on Photoshop is very simple. We proceed to create a light ray effect when using the Filter filter and add a white border to make the text more famous. You can also change the text background to a different color depending on the need for text making in Photoshop.
See more:
- How to color images in Photoshop
- How to create wall paintings in Photoshop
- How to combine photos in Photoshop from 2 different images
I wish you all success!


 How to Make It Look Like You Are Hacking
  How to Redline a Document in Microsoft Word
  4 best Pastebin alternatives for sharing code and text
  How to Truncate Text in Excel
  How to Change from Lowercase to Uppercase in Excel
  How to write text in Paint