Table of Contents
This updated guide examines How to Create Heart Beat Effect Text on Photoshop and organizes the essential facts, background, and practical takeaways in clear American English.
How to create Photoshop heart beat text
Step 1:
First, you create a new frame to enter text lines depending on the length of the text. Continue to click on the Gradient tool and choose the 4th color type as shown below.
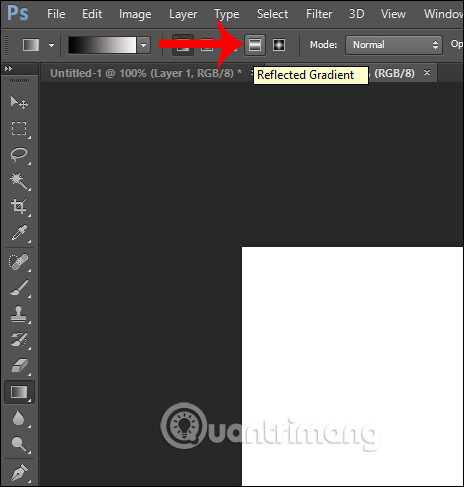
Step 2:
Next, click on the color bar next to select the color you want to use. At the color bar you will adjust 3 different color landmarks .
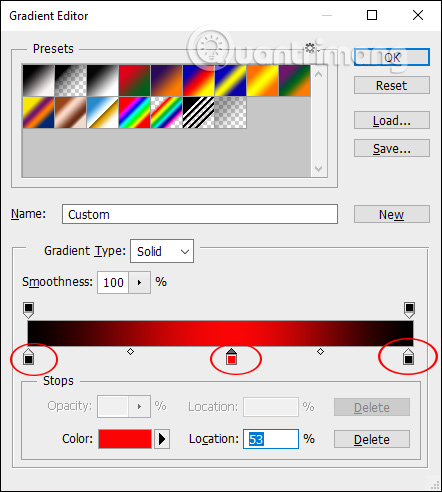
Once you've chosen the red color of your choice, click on the text box, then drag a straight line down . The result of the text box is colored as below.

Step 3:
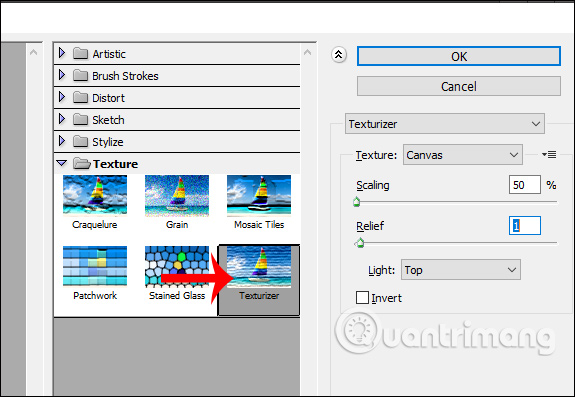
Click on Filter and select Filter Gallery .

Display the new interface, click on Texture> Texturizer and enter parameters as shown below.
Step 4:
Click on the letter T and write the text you want in the red frame, the text will use white. After that, hold Ctrl and double-click the text layer to highlight it.
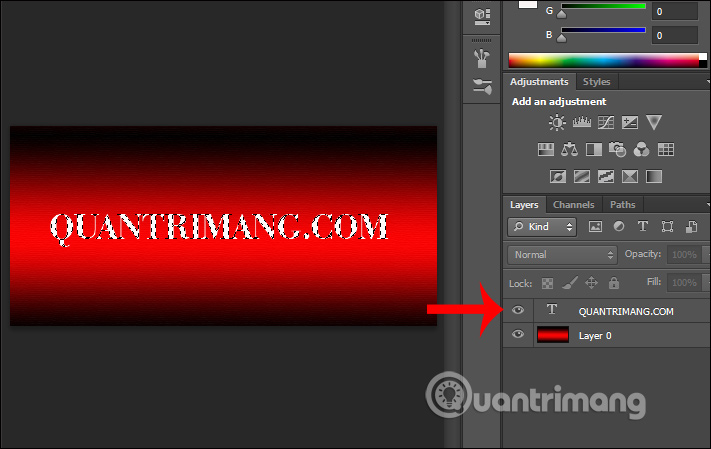
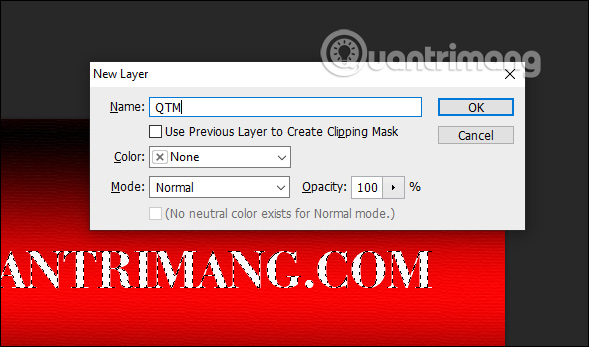
Press Ctrl + Shift + N to create a new text layer, name the layer.
Step 5:
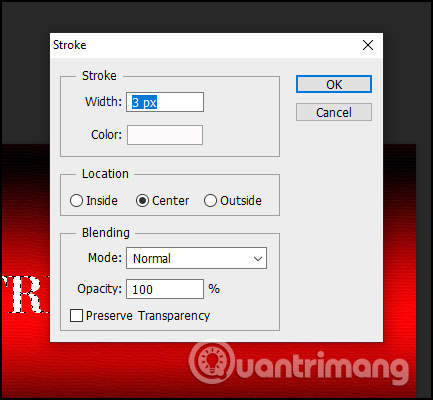
Click Edit and then select Stroke , adjust Width to 3 px with white .
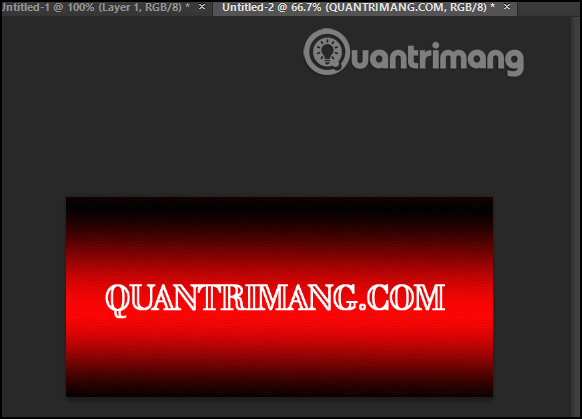
Then click the eye icon at the old text layer to hide them. Next press Ctrl + D to remove all selections. At this time, the word appears as shown below.
Step 6:
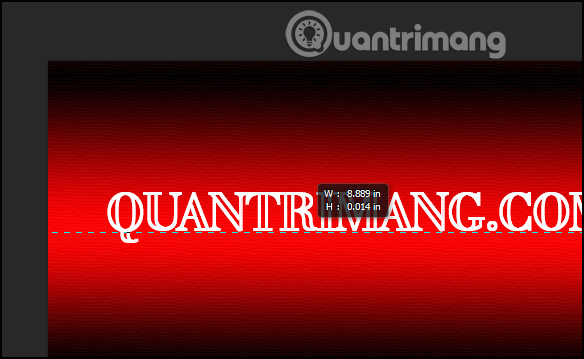
Click the Marquee Tool and select Single Row to draw a line below the text as shown.
Continue to create the Stroke by clicking Edit, select Stroke , and select Width with 3px as in step 5. Press Ctrl + D to remove the operation.
Step 7:
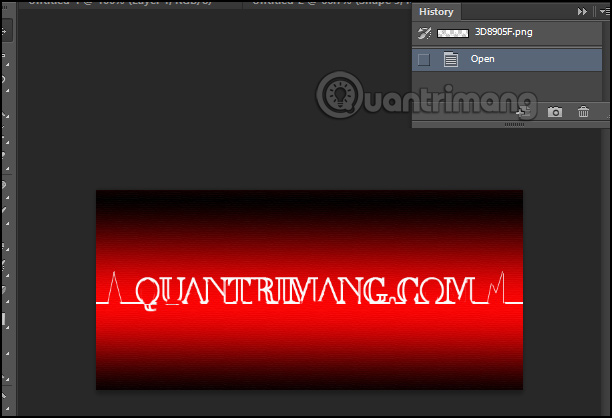
Use the Eraser Tool toerase some strokes of the text to create typography. Note you will delete at the bottom of the word. This operation is relatively time consuming and careful . Finally, click the Line Tool to draw zigzag lines like the image below.
FAQ
What is How to Create Heart Beat Effect Text on Photoshop about?
It provides a structured overview of photoshop beats effects, explains the main context, and highlights practical takeaways for readers.
Why does this topic matter?
Understanding the main concepts helps readers evaluate the issue, avoid common mistakes, and make better-informed decisions.
How should readers use this information?
Use the guidance as a practical starting point, confirm details that may have changed, and follow current product, safety, or security recommendations.
Related Articles
 How to Create Translucent Text in Photoshop3 minutes read
 How to Create Spray Paint Effect in Photoshop18 minutes read
 Create Surreal Fire Fire Effect in Photoshop11 minutes read
 How to Create a Word Cut Effect on Photoshop12 minutes read
 How to Create a 7-color Text Effect in Photoshop3 minutes read
 How to Create Translucent, Translucent Text Effects in Photoshop3 minutes read
Reader Comments 0
Sign in with email or Google to join the discussion.