How to Remove Text on Photos with Photoshop
Don't you want to use some pretty photo just for the text? Don't worry, Photoshop has some great features to help you erase text. You don't have to be a professional graphic designer to do this. When it comes to image editing, the Photoshop program is relatively user-friendly, even if you're new to it..
Erase text with Rasterize function
Understand that images are composed of many separate layers (layers) containing colors, effects, designs, and text. All of these layers create the finished image in Photoshop. These layers not only make up the final JPEG file, but also give you the finished PSD file. If you are new to the program, PSD stands for 'Photoshop documents'.
Layers may or may not be visible on the image. You can also perform a rasterize step to delete part of the layers. When you do the rasterize step, the image is converted to a graphic that you can work on.
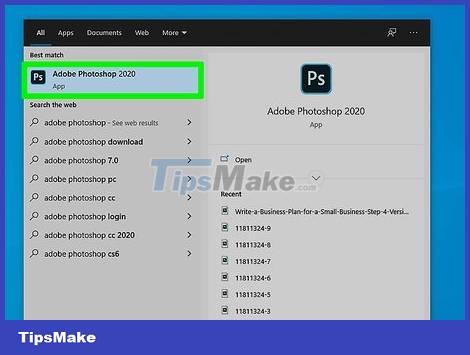
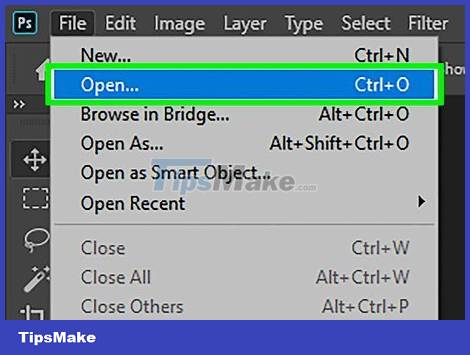
Open Photoshop from the Start menu. On the displayed interface, you will select File in the menu. Click Open in the menu that appears. Find and open the image in the Open window.
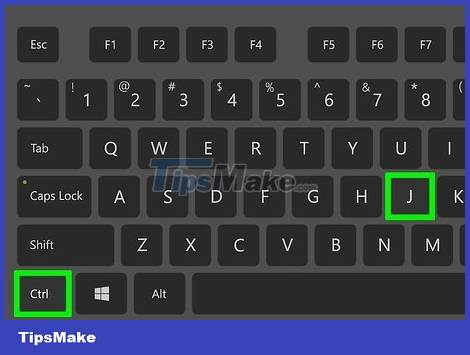
Press Command+J (on Mac) or Ctrl+J (on Windows) to make a copy of the image. That way, you won't make any changes to the original image. The Layers pane now has two layers with the same image. The original image remains securely on the Background layer, and the edit you're about to make will show up in the duplicate on Layer 1 above.
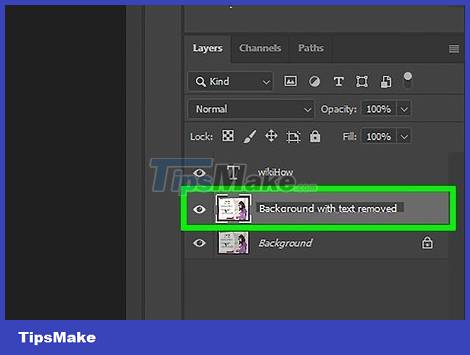
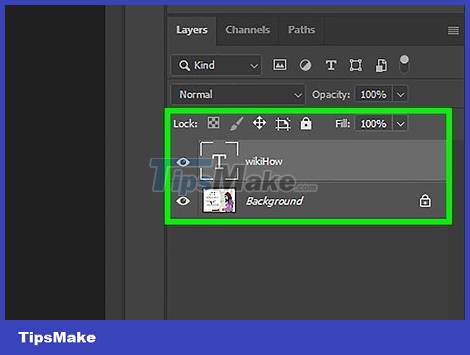
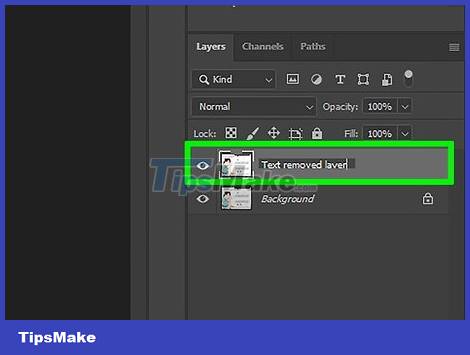
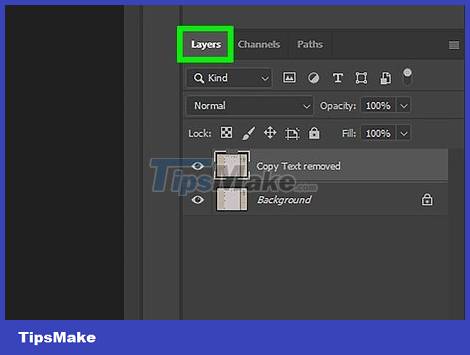
Name the copy. Rename is a useful thing. Otherwise, you could easily mistake the copy for the original. After renaming, you will be able to distinguish the images; however, if you still want to use the old name, enter 'DELETE ONLY'.
To do this, simply right-click on Layer 1. The Rename option will show up. Please change the name. Press Return (on Mac) and Enter (on Windows) to accept the name change.
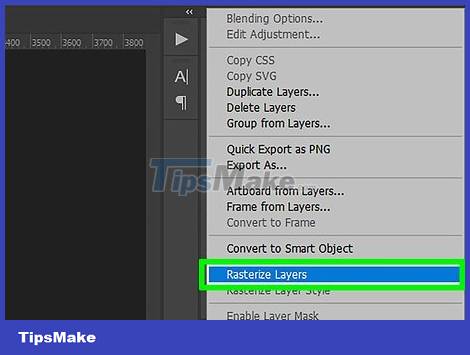
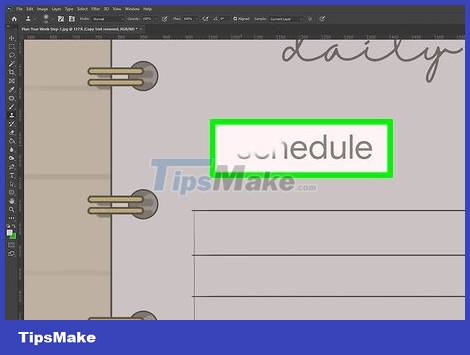
Select the Layers tab in the toolbar to the right of the interface. In the toolbox, you will right click on the layer and select Rasterize layer. Select the Lasso tool on the toolbar. Select the part of the photo that you want to delete. Press Delete. Select File and Save in the toolbar to save the changes you just made.
Of all the tools in Photoshop, perhaps the Lasso tool is the easiest to understand. After selecting this tool, the cursor will show a noose icon, and you just need to click somewhere along the edge of the text to be deleted. Continue holding the mouse button and drag to draw a border around the text. When finished, you will press Delete to delete the text.
To better understand a layer, you can view it as an image placed on top of another image. Imagine you have a piece of paper colored in red. Next, you take a piece of transparent glossy paper and draw a yellow circle on it, then place it on top of the paper. Now, take another piece of glossy paper and write in blue text, then place it on the yellow circle. After all, you have a red wallpaper with 2 layers of yellow and blue on top. Each such layer is referred to as a layer. This is what layers mean in Photoshop. Specifically, these are all the separate parts that make up the whole.
Erase text with Content-Aware Fill

Open the image in Photoshop. Press Command+J (on Mac) or Ctrl+J (on Windows) to make a copy of the image. That way, you won't make any changes to the original image. The Layers pane now has two layers with the same image. The original image remains securely on the Background layer, and the edit you're about to make will show up in the duplicate on Layer 1 above.
Name the copy. Rename is a useful thing. Otherwise, you could easily mistake the copy for the original. After renaming, you will be able to distinguish the images; however, if you still want to use the old name, enter 'DELETE ONLY'.
To do this, simply right-click on Layer 1. The Rename option will show up. Please change the name. Press Return (on Mac) and Enter (on Windows) to accept the name change.

Select the Lasso tool in the toolbar on the left side of the screen. Click near the edge of the text. Drag that tool until you've created a rough outline around the text. Remember to leave a frame with thin lines around the text. This helps Photoshop do a good job of filling in the background after you delete the text.
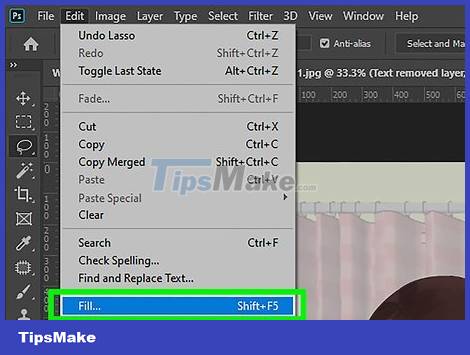
Click Edit and choose Fill from the menu that appears. Or, you can just press Shift+F5. The Fill box will appear on the screen. Select Content-Aware in the menu next to Use. Click OK. Wait for Photoshop to fill in the blank after the text has been erased.

Press CTRL-D to deselect the image when the fill operation is complete. This helps you to see the image clearly. Save the edited photo. When you master the operation, deleting text with this feature only takes a few seconds.
Erase text with Clone Stamp
Open the image in Photoshop. Press Command+J (on Mac) or Ctrl+J (on Windows) to make a copy of the image. That way, you won't make any changes to the original image. The Layers pane now has two layers with the same image. The original image remains securely on the Background layer, and the edit you're about to make will show up in the duplicate on Layer 1 above.

Name the copy. Rename is a useful thing. Otherwise, you could easily mistake the copy for the original. After renaming, you will be able to distinguish the images; however, if you still want to use the old name, enter 'DELETE ONLY'.
To do this, simply right-click on Layer 1. The Rename option will show up. Please change the name. Press Return (on Mac) and Enter (on Windows) to accept the name change.

Click Clone Stamp on the tools panel. Or, you would press CTRL-S. Choose a soft-bristled brush with parameters between 10% and 30% (for most applications). Let's start with 95% transparency. You can make customizations as needed.
Click the Layers pane. Select the original layer in the Layers pane. Drag the original layer to the Create a New Layer button, which is the icon to the left of the trash can. Or, you would press CTRL+J to create a new layer.

Place the cursor on the point as close to the text as possible. Press the Alt key and left-click the selection. This is the point called the source. Basically, you would select "paint" from this point and paint over the text.

Be careful not to get too close to the text, as the source will move as you paint over the text. If you get too close, you just copy the point to be deleted. If the source is too far away from the text, the background color will not be suitable to cover where the text used to be. You will see distortion as you paint over the image.

Open the Options menu and choose Aligned. This operation continuously samples pixels without losing the current sample point. Every time you stop painting, deselect Aligned before you start it again. Reset this selection after you select the new sample point.
Release the Alt key and move the mouse over the text you want to hide. Left click to paint the source over the text. Note the brightness of the background image. Make sure the points that you paint are highlighted in the same direction as the image.

Fill in small portions. You should not drag the mouse over the text in big strokes. This ensures your edits look sharp instead of smudged. Continue working until the editing is complete.