Table of Contents
This guide explains how to create Translucent, Translucent Text Effects in Photoshop, with clear steps, practical tips, and important checks before you begin.
Step 1: Open your background image in Photoshop and click on the New Layer icon (or Shift + Ctrl + N ) to create a new Layer tab.

Layer tab after creation.

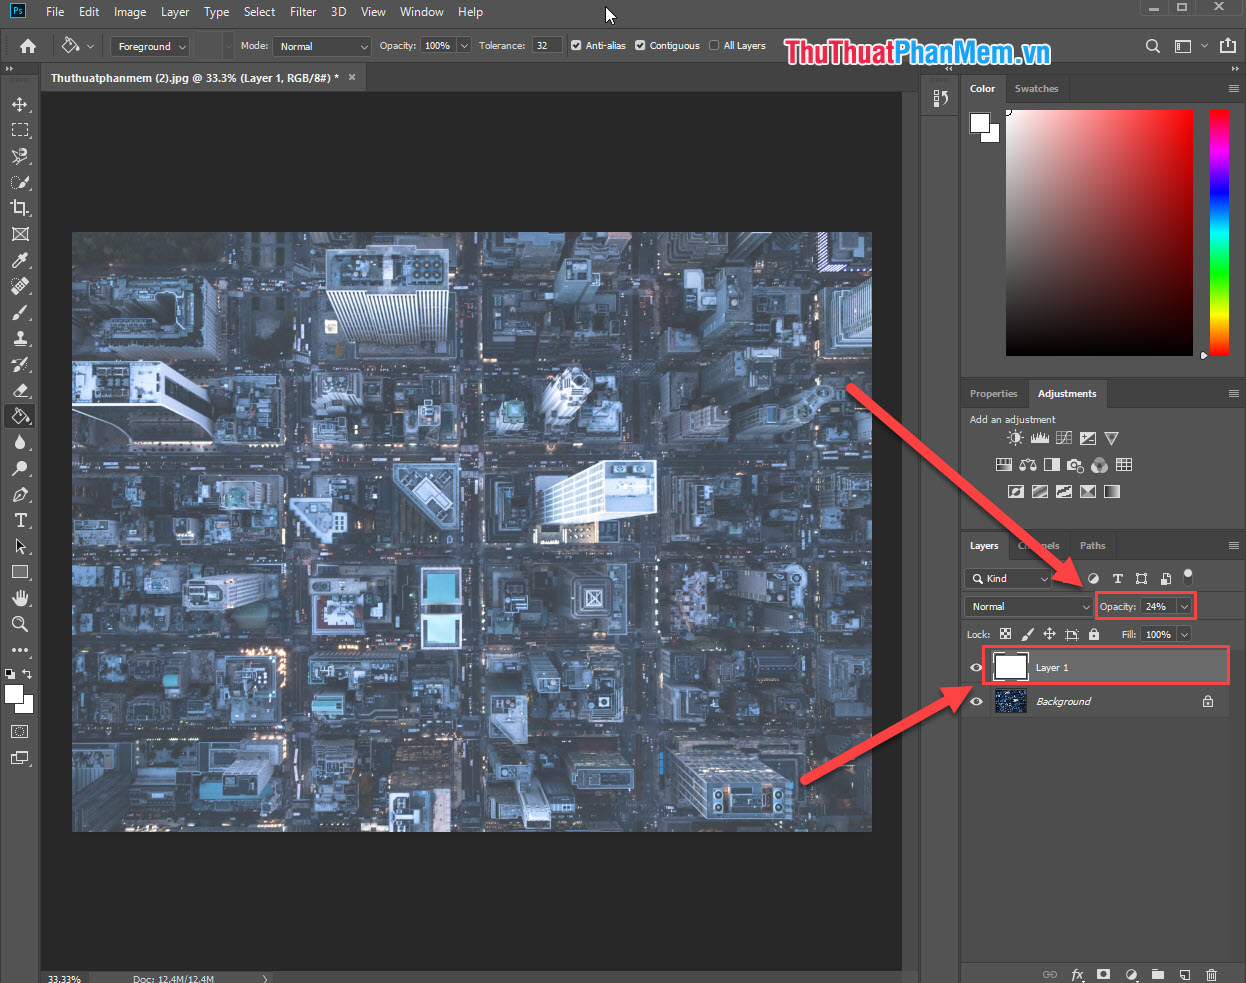
Step 2: In this step, you apply any color to your Layer Card. Select the Paint Bucket Tool (G) to select the fill color.

Step 3: You proceed to select the color that you want to pour on the image. That will be the background color of the text on the image.

Step 4: After choosing the color, we proceed to pour will be as shown.

Step 5: At this time Layer 1 is at 100% Opacity so the white color will cover our entire background. You proceed to reduce the Opacity to about 20-30%.
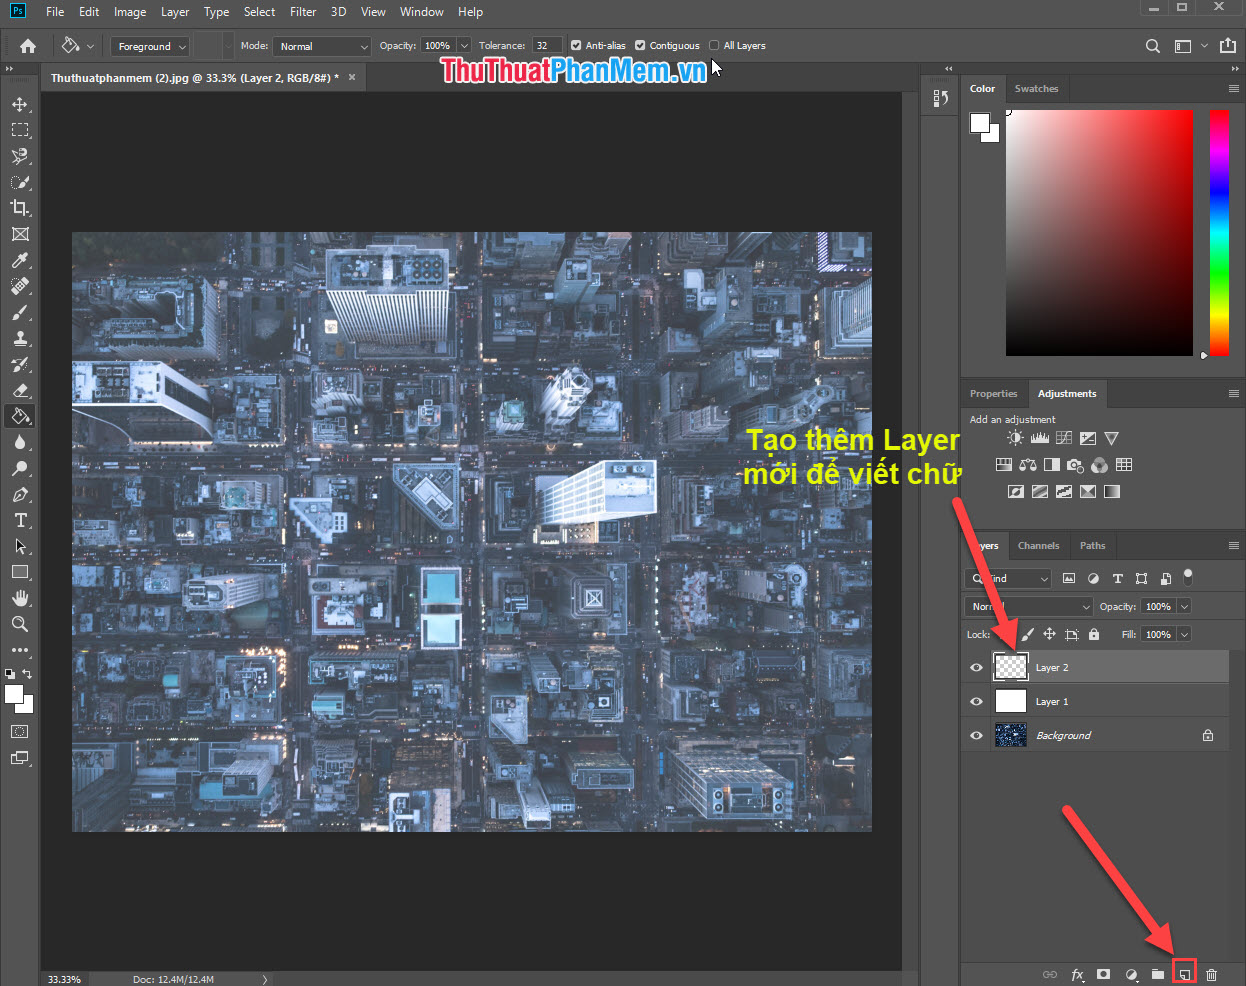
Step 6: Next, you create a new Layer icon through New Layer or Shift + Ctrl + N . This layer we will use to write text.
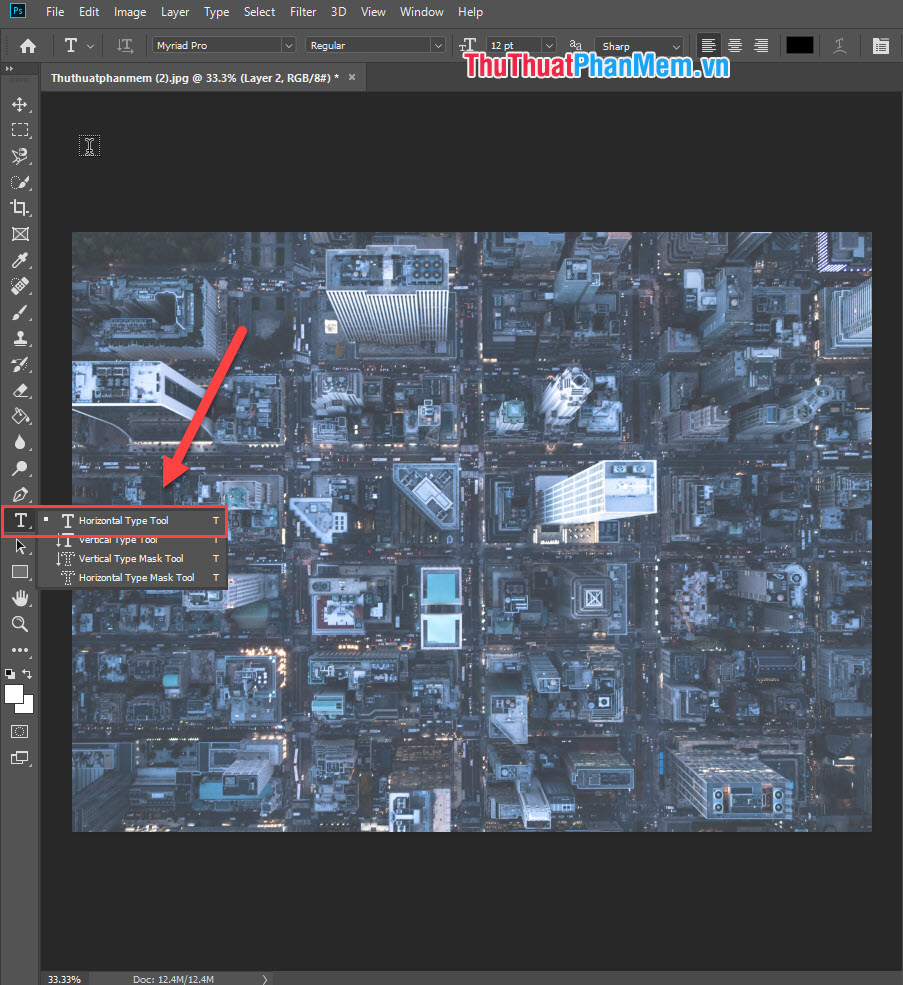
Step 7: Select the Text: Horizontal Type Tool and write the text.
Note:
- Choose a font with a large font thickness. The bigger the font thickness, the better. Thin text will not look good
- Leave any text color regardless of color.
Step 8: After creating the letters and aligning. Right-click on the Text Layer and choose Convert to Smart Object .

Step 9: At this point your Layer will no longer be the Text Layer , but convert to a normal Layer .
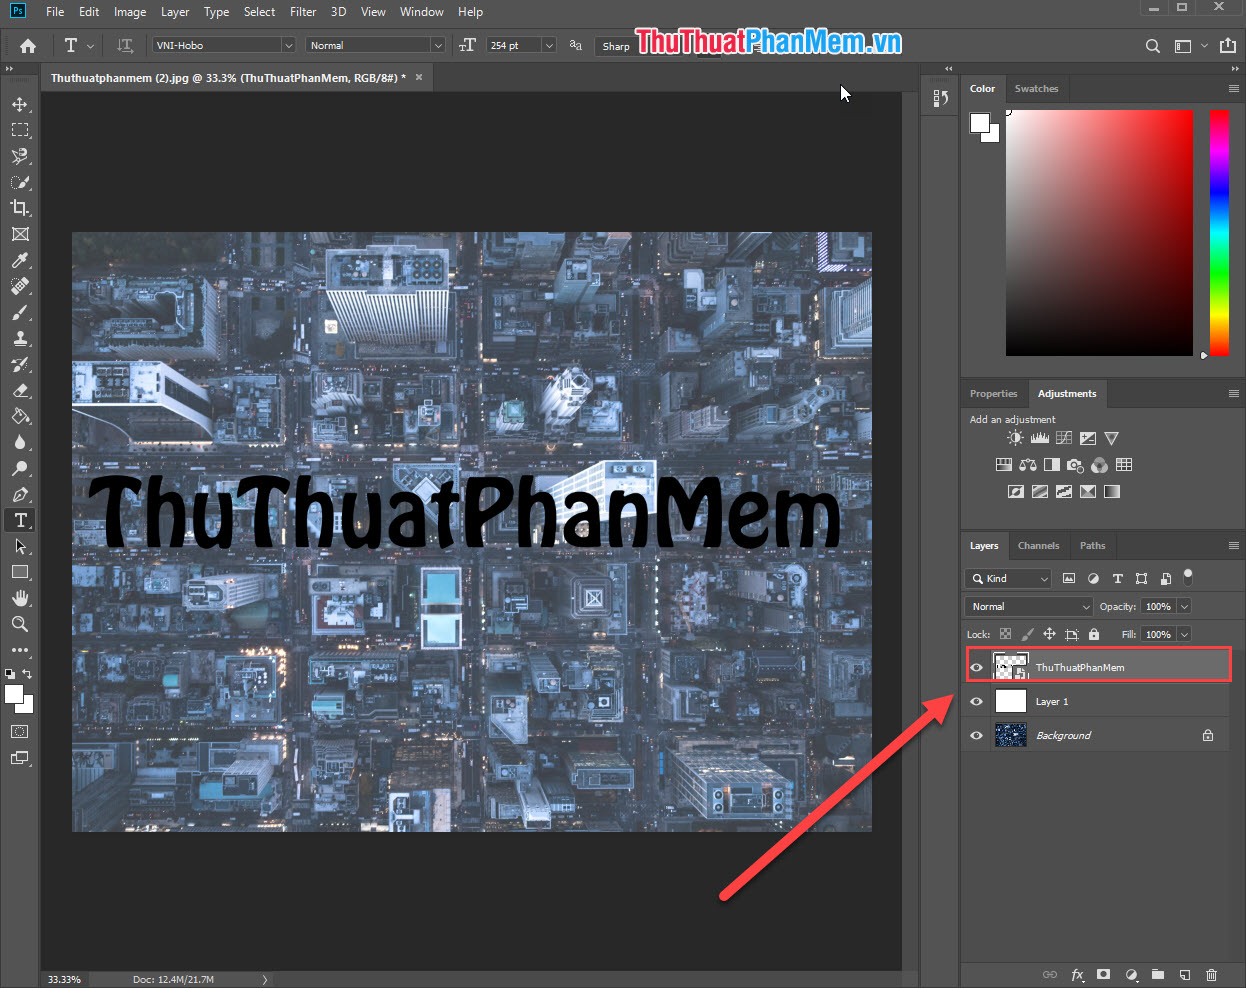
Step 10: Continue to Right-click the layer we just converted and choose Create Clipping Mask.

Step 11: Now our Layer tab will have the arrow icon perpendicular downwards is complete.
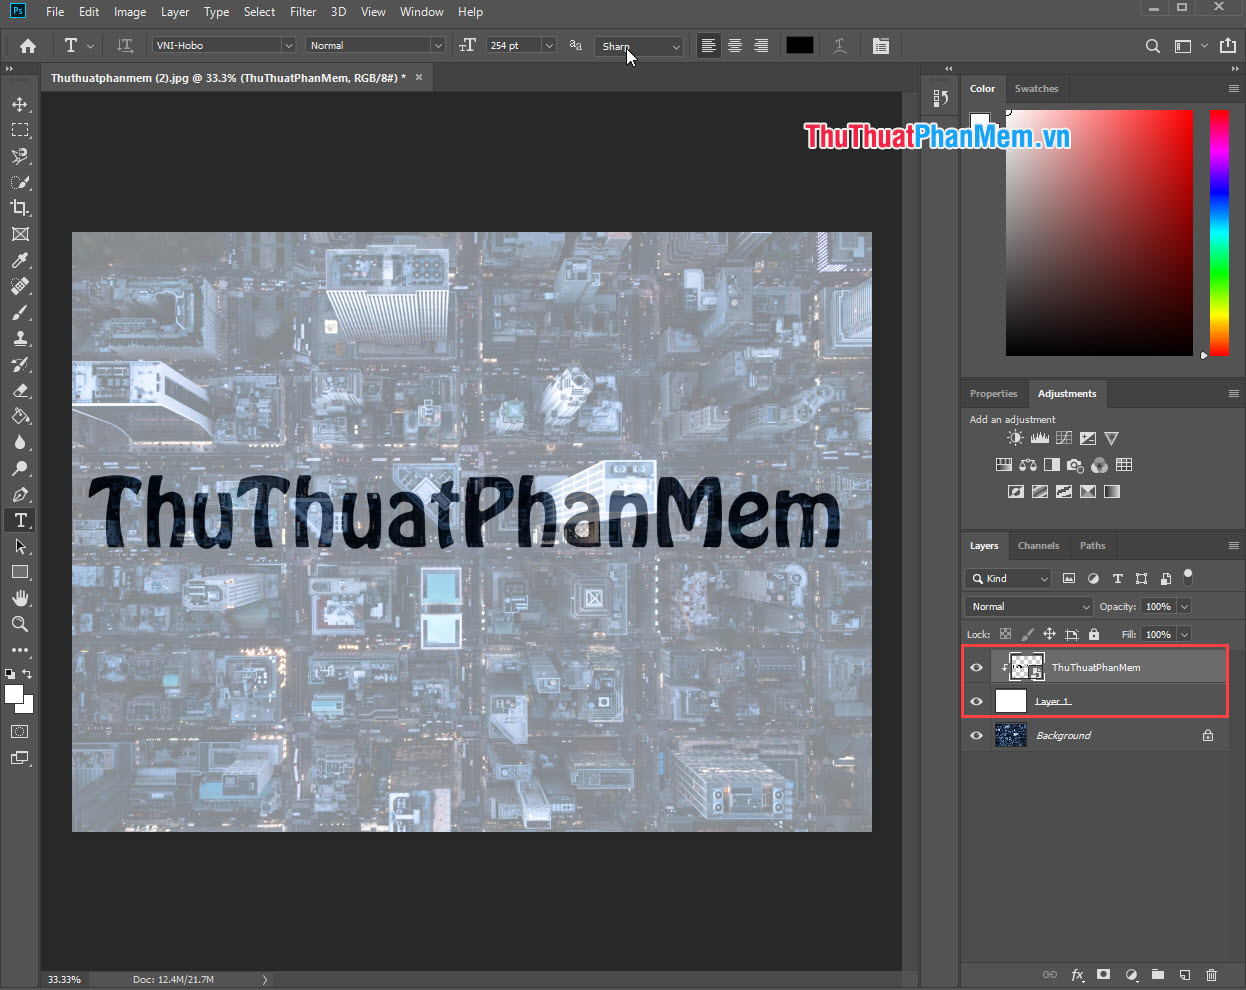
Step 12: At this point, your words are transparent. If you want to blur text or bold, we adjust the Opacity so that reasonable.
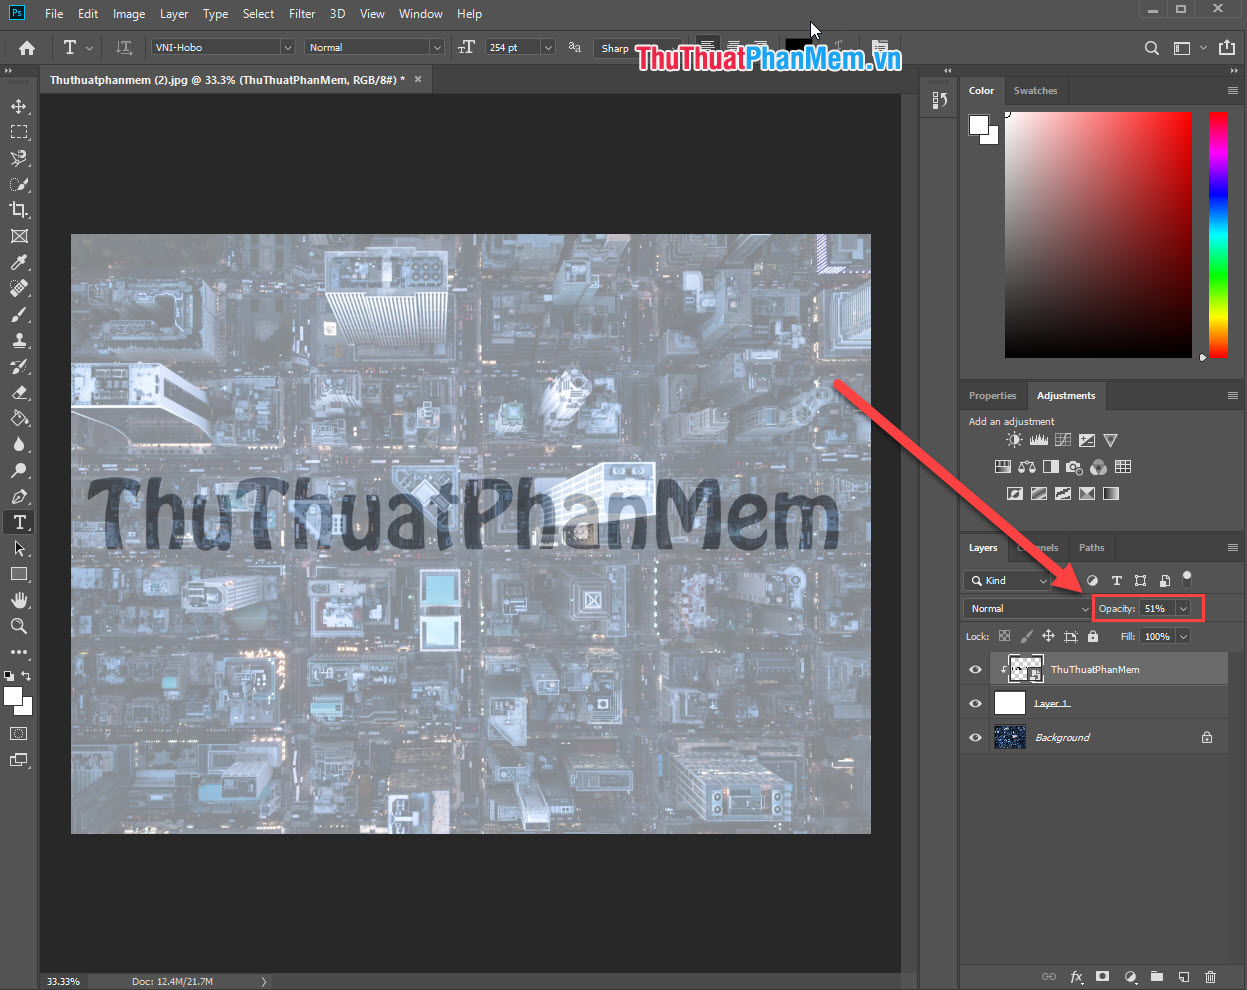
In the end, this is the result after we finish.

Thus, the Software Tips guide you on how to create blur effect, transparency in Photoshop beautiful and fastest. Good luck!
FAQ
What should I know about Create Translucent, Translucent Text Effects in Photoshop?
Focus on the key features, requirements, limitations, and practical use cases explained in this guide.
How do I get the best results with Create Translucent, Translucent Text Effects in Photoshop?
Follow the recommended steps, use current software or information, confirm compatibility, and review settings before major changes.
Are there any risks or limitations?
Potential limitations depend on compatibility, data quality, cost, privacy, support, and how the product or method is used.
Related Articles
 How to Create Translucent Text in Photoshop3 minutes read
 Create Light Effects and Shadows in Photoshop8 minutes read
 How to Create Spray Paint Effect in Photoshop18 minutes read
 Create Surreal Fire Fire Effect in Photoshop11 minutes read
 How to Create a 7-color Text Effect in Photoshop3 minutes read
 How to Create a Word Cut Effect on Photoshop12 minutes read
Reader Comments 0
Sign in with email or Google to join the discussion.