Table of Contents
This updated guide examines How to Create Text Borders in Photoshop and organizes the essential facts, background, and practical takeaways in clear American English.
When adding colored borders, the text is more prominent than you to the regular font style. If adding text to images in Photoshop with text borders also adds art and people pay more attention to the content. The following article will guide you how to create text borders in Photoshop.
- How to create sliced text effect on Photoshop
- How to create a rounded image on Photoshop
- How to integrate images into text in Photoshop
- How to write winding letters in Photoshop
Instructions for creating text borders in Photoshop
Step 1:
At the image we need to insert text, we click on the T icon to write text.

Next we enter the text we want to write in the image and choose the font style and size to match the image layout.

Step 2:
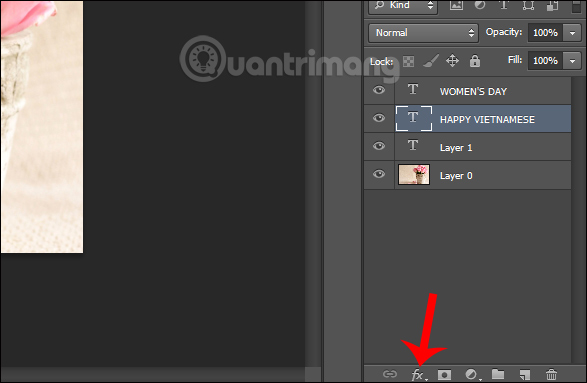
Next, click on the Text layer in the next layer column to edit the text. Click on the fx icon at the bottom of the interface to select the effect.

Display a list of options for text effects, click on Blending Options.
Step 3:
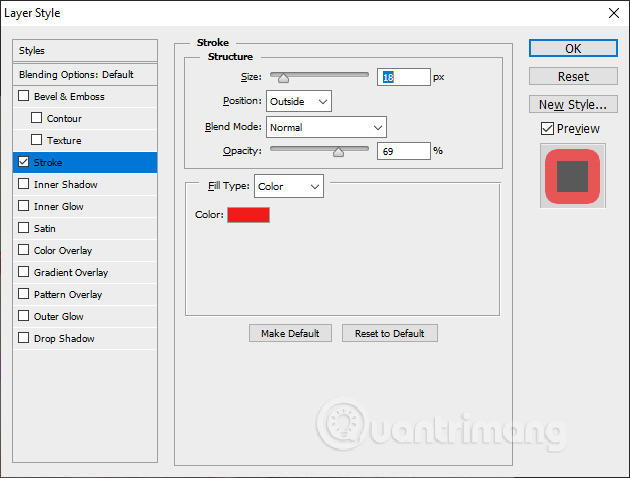
Display the new interface, click the Stroke tab in Blending Options and look to the right. In Structure we choose the size of the text border at Size , the position for the text border at Position , we can choose the position of the border to highlight the text in different ways, the blending mode in Blend Mode and the density Pale at Opacity .
Down below the Fill Type section, choose Color and choose the color of the text border.
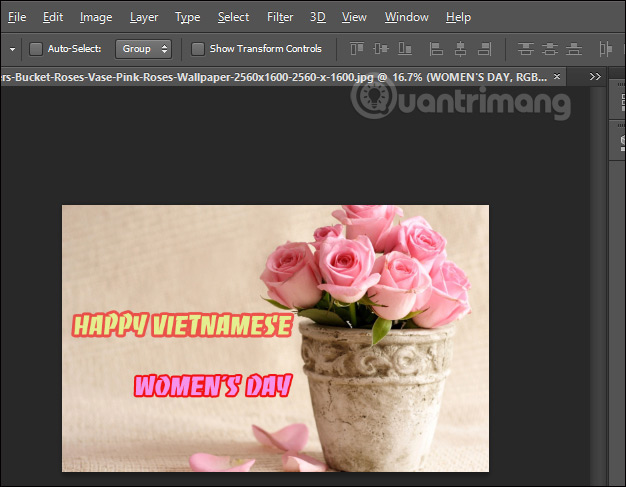
Users can change the different font styles for each content written on the image to create the most impressive image. The result of text border has been added quite eye-catching.
Step 4:
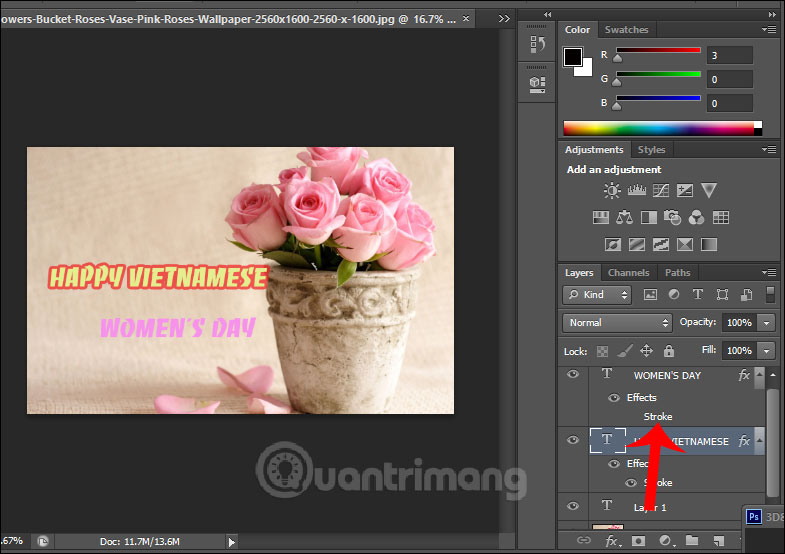
To check the text , you need to turn off the text effect , click the Stroke line at the text layer on the right to hide the stroke.
Step 5:
Besides adding borders, users can choose to add the wavy font style when clicking the curved T-shaped symbol as shown.
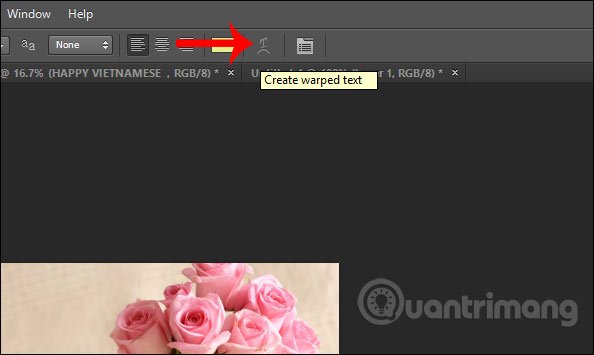
Now show many types of text bends for us to choose.
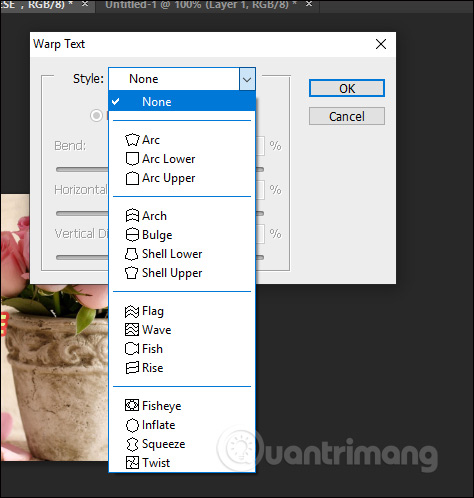
Each curved typeface has additional bars to adjust the curvature or inclination of the text, depending on the type of curved we choose.

Step 6:
Finally, after finishing all editing operations, users only need to click Save to save it.

Adding text borders in Photoshop is very simple with different options. Users can combine other simple text effects to increase accents and better decorate the image.
I wish you successful implementation!
FAQ
What is How to Create Text Borders in Photoshop about?
It provides a structured overview of add text borders in photoshop, explains the main context, and highlights practical takeaways for readers.
Why does this topic matter?
Understanding the main concepts helps readers evaluate the issue, avoid common mistakes, and make better-informed decisions.
How should readers use this information?
Use the guidance as a practical starting point, confirm details that may have changed, and follow current product, safety, or security recommendations.
Related Articles
 How to Create Beautiful Text Borders in Photoshop3 minutes read
 How to Create Borders in Photoshop4 minutes read
 4 Steps to Create Beautiful Text Borders in Photoshop7 minutes read
 How to Create a Blur Border in a Photoshop Image3 minutes read
 How to Quickly Create Borders in Word Documents6 minutes read
 Create Borders for Text Pages in Word4 minutes read
Reader Comments 0
Sign in with email or Google to join the discussion.