Create light effects and shadows in Photoshop
In addition to the text effects available in Photoshop software, you can also create a different style for yourself. Here TipsMake.com will guide and create a picture with text applied light effects and shadows.
In addition to the text effects available in Photoshop software, you can also create a different style for yourself.Here TipsMake.com will guide and create a picture with text applied light effects and shadows.
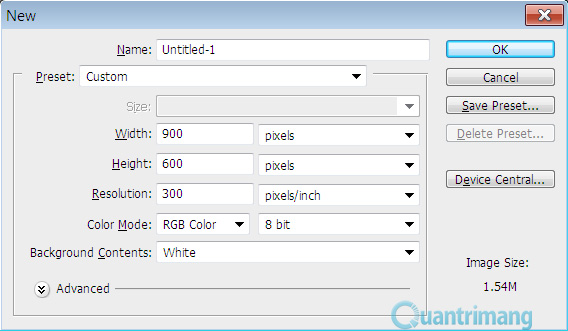
Step 1: Go to File > New menu, create an image file of 900 pixels wide, Vertical 600 pixels, Resolution (Resolution) 300 pixels / inch, Color mode (Color Mode) RGB Color 8 bit. Click OK .
Step 2: Select the Gradient Tool , set the color range to switch from # 434343 to # 1C1C1C in the direction from left to right.
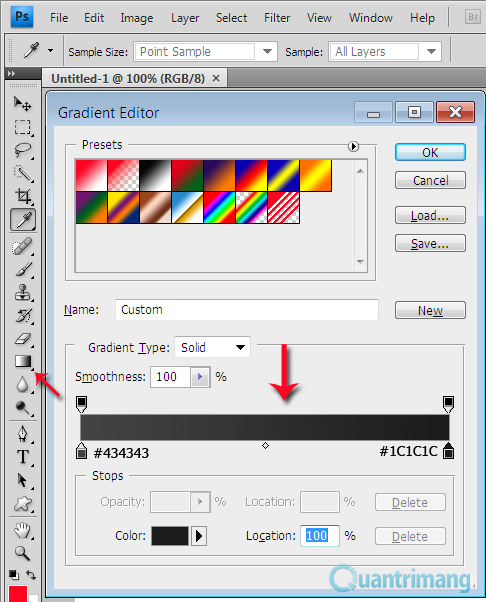
Then hold down and drag the mouse from the upper left corner to the lower right corner, you will have a slightly dark background, very suitable for later shading.

Step 3: Select the Type Tool , type the content you want to create the effect on the background, choose font Agency FB Bold large size to have the most obvious effect. Set the font color # C2C8D4 .

Step 4: Press Ctrl key, and click on the letter T corresponding to the text containing the text, the purpose is to create a selection around the text. Next, create a new layer (name it Layer 1 ) at the top, select the Gradient Tool with the color range switch from # 495A79 to transparent (from left to right), then hold down and drag the mouse. from the lower right to the upper left to create a color transition effect.

Step 5: Switch back to the default black / white colors by pressing the D key, create a new layer (named Shadow ) below the text containing the text. Next, press the Ctrl key, and click on the letter T symbol corresponding to the layer containing the same text, step 4. Select the Marquee Tool , press the right arrow key on the keyboard, press the nose key again. Name down, press Alt + Delete to fill the selection with black. Keep repeating the last action until you see the shadow effect underneath the text then press Ctrl + D.
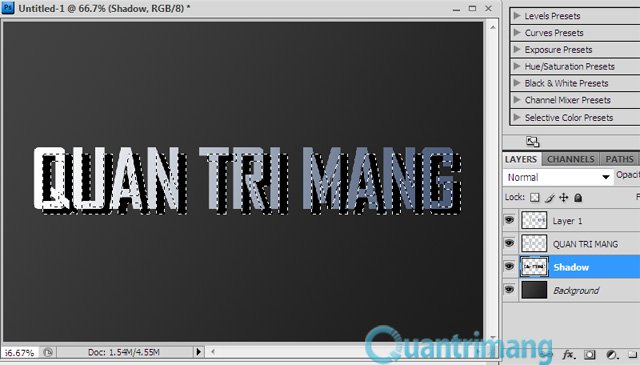
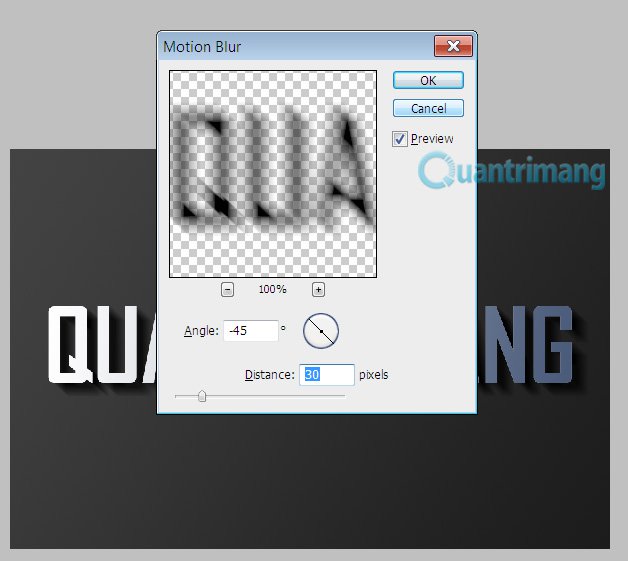
Step 6: Select Shadow layer, go to menu Filter > Blur > Motion Blur , set the parameters as shown below.
Step 7: Go back to the Layer panel, set the Multiply blending mode to the Shadow layer and transparency (Opacity) to about 40%. Next, select the Move Tool , combine Shift + right arrow key and Shift + down arrow key to move the 10 px drop shadow (only once, the shadow automatically moves correctly 10 px).
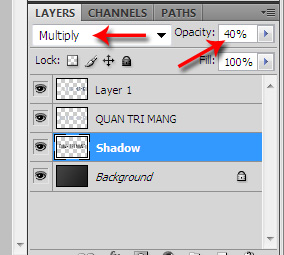
Step 8: If the shadow appears fuzzy on the left side of the text, use the Eraser Tool with a soft brush to erase them, because the light only shines from top to bottom, left to right so there is no shadow pour on the left letter. You also have to be very smart when handling shadows on each letter, to avoid affecting the shadows of other letters, so the effect is real.
Step 9: Press Ctrl + J to duplicate Shadow layer (new layer has the default name Shadow copy ). You also press the Shift key + right arrow key and Shift key + down arrow key to move the drop shadow similar to step 7 . Then go to menu Filter > Blur > Motion Blur , set the parameters as shown below.
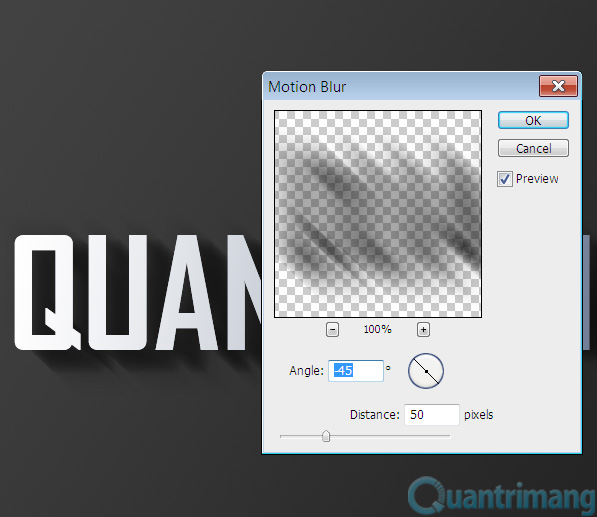
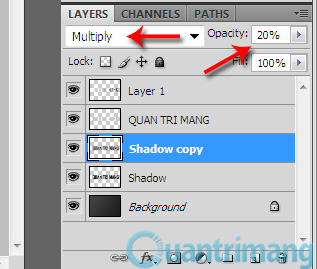
Step 10: Go back to the Layer panel, select the Shadow copy layer, set the blending mode to Multiply , the transparency (Opacity) to about 20%. So, you have finished creating the shadow for the text, the rest is just creating a light effect.
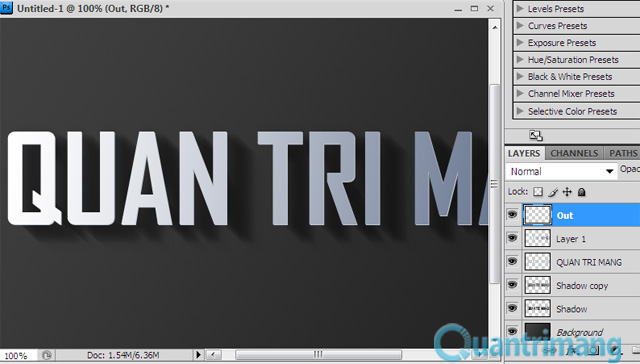
Step 11: Create a new layer named Out , place it on the top of the Layer palette. Press Ctrl , and click on the letter T corresponding to the layer containing the text, press Ctrl + Delete to fill the selection with white, then move the selection to 1px and down to 1px (manipulation) same step 5) and then press the Delete key. Reduce the transparency (Opacity) for layer Out to 80%, you will see the text effect appear.
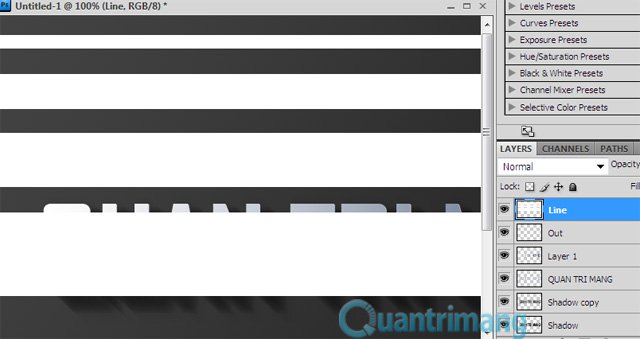
Step 12: On a new layer above all the remaining layers, name it Line . Select the Rectangular Marquee Tool , draw horizontal lines with the size gradually increasing from the top down and fill with white as shown below. When finished, press Ctrl + D to remove the selection.
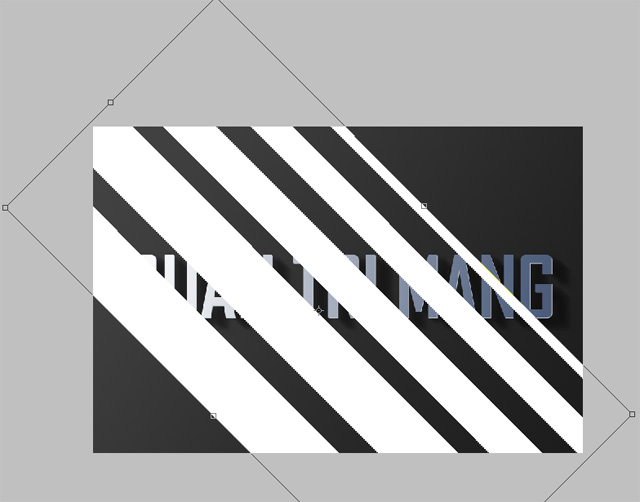
Step 13: Press Ctrl + T , rotate the horizontal lines in a direction about 45 degrees, from left to right, from top to bottom, parallel to the shadow. When you're done rotating, don't press Enter .
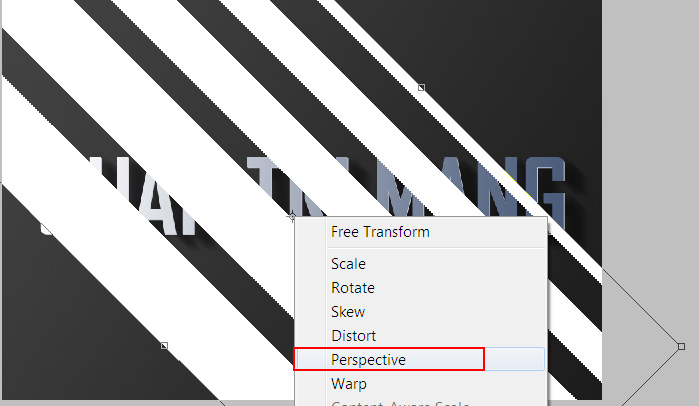
Step 14: Right click on the area between 8 anchor points, select Perspective .
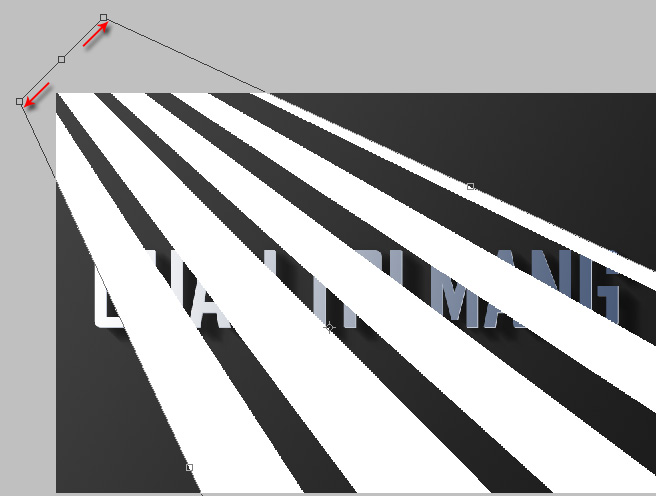
Step 15: Then continue dragging the two ends together, two ends apart from each other as shown below. Done, press Enter .
Step 16: Go to Filter > Blur > Gaussian Blur, set the Radius to 6px.
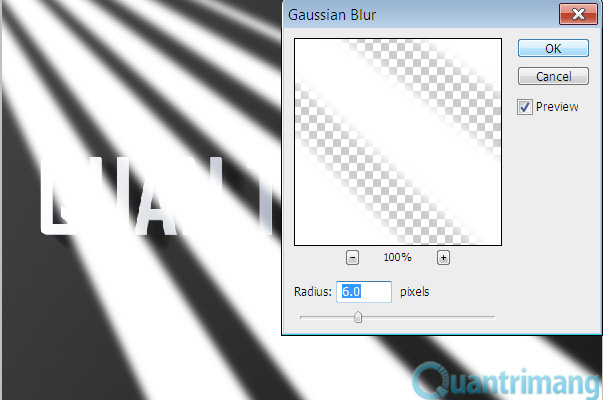
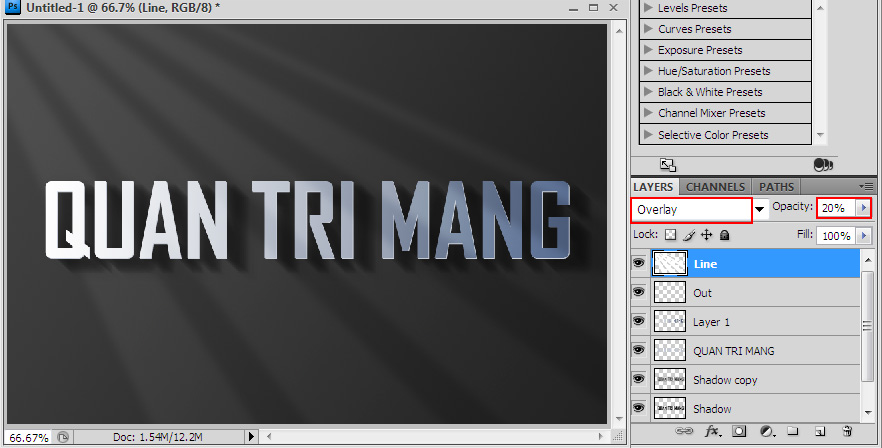
Step 17: Set the blending mode to Overlay for the Line layer, transparency (Opacity) about 20%. So you have created sunbeams on the background!
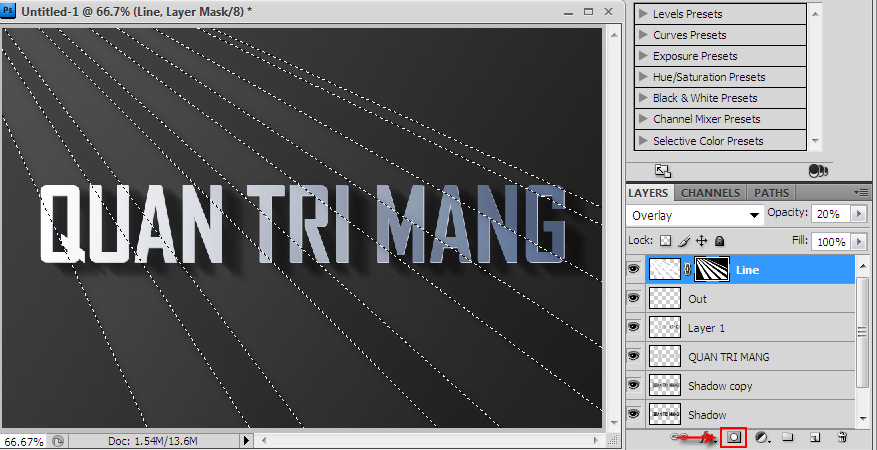
Step 18: To make the image more realistic and not covered by other elements, click the Add layer mask icon at the bottom of the Layer panel.
Step 19: Now, we will proceed to create a yellow light. Create a new layer above the Background layer, name it Blend , fill it with pink (# 9D506C) for this layer.
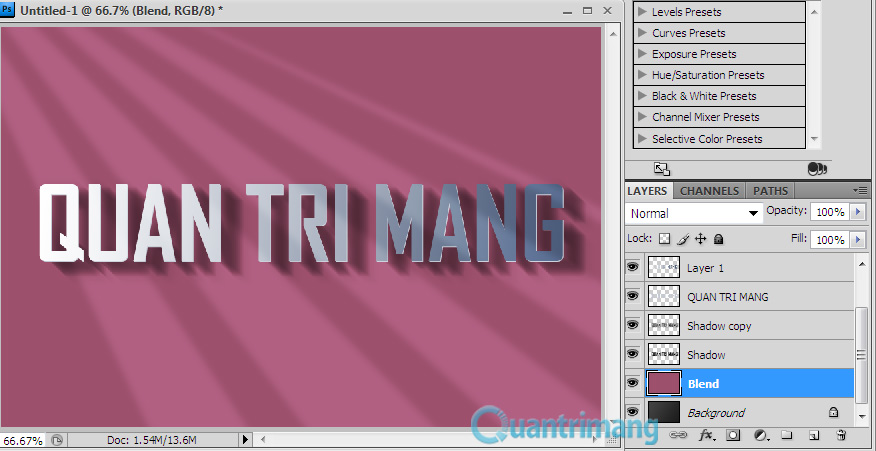
Step 20: Set the Color blending mode for the Blend layer, the transparency (Opacity) to about 20%.
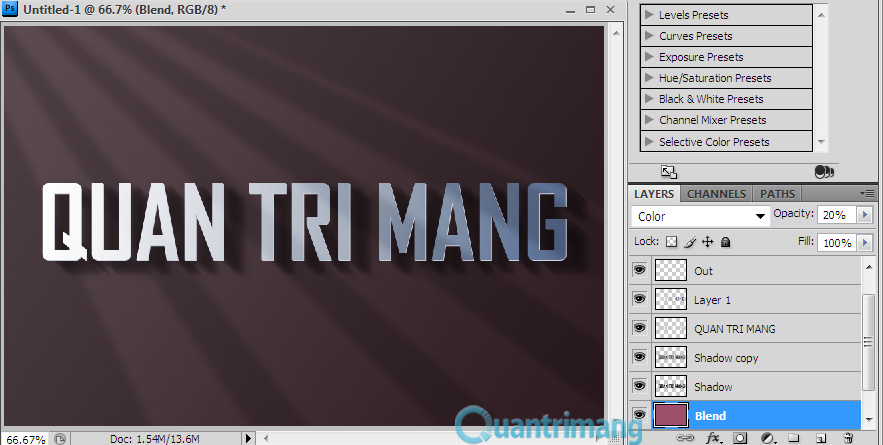
Step 21: Create a new layer above the Blend layer, name it Sun , fill the entire layer with white. Next, go to Filter > Render > Lighting Effects menu, set the parameters as shown below.

Step 22: Go back to the Layer panel, set the blending mode to Overlay for the Sun layer, transparency (Opacity) to about 40%.
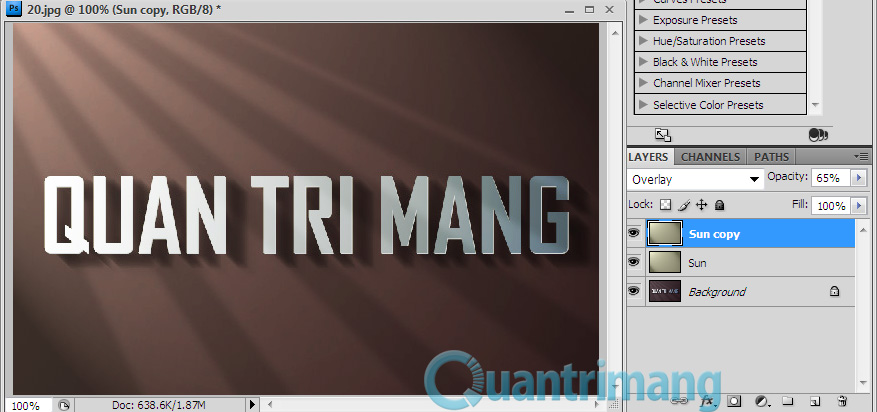
Step 23: Now, duplicate the Sun layer (the new layer has the default name of Sun copy , above the Sun layer), set the blending mode to Overlay for the Sun copy layer, the transparency (Opacity) is about 65%.
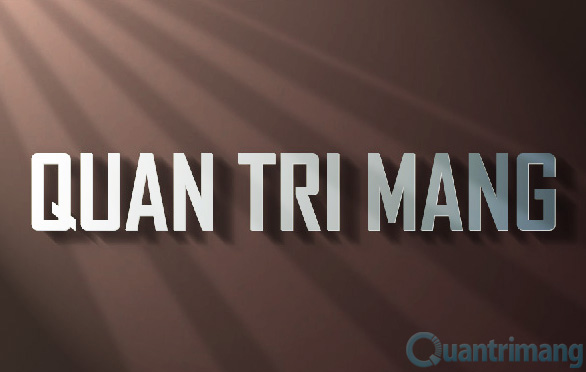
Completing 23 steps, you will get the result as shown below:


 How to create clipping mask in GIMP
  How to create spherical images in GIMP
  How to sign a document with GIMP
  How to create movie posters in GIMP
  How to Color Inside the Lines in FireAlpaca
  How to swap and combine faces in GIMP