How to Create Forms with Google Drive
Thanks to Google Drive's Forms feature and its relatively easy-to-see and easy-to-use interface, you can quickly create a Google Form for use on a variety of occasions, from information gathering to event preparation..
Go to Google Form
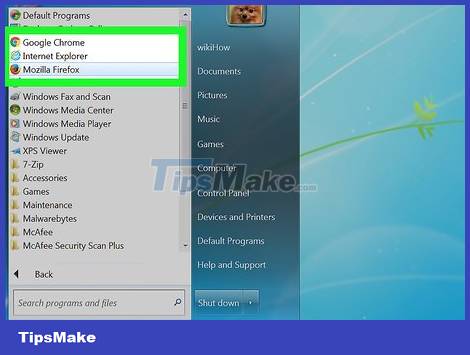
Open your favorite browser. You can access Google Forms via Google Drive. All Google Forms created are in Google Drive.
Go to your Gmail account. You should use a computer to create the form in the most effective way.
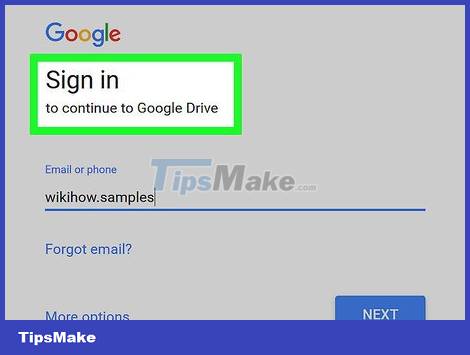
You will need to enter your email address and password if you are not logged in.
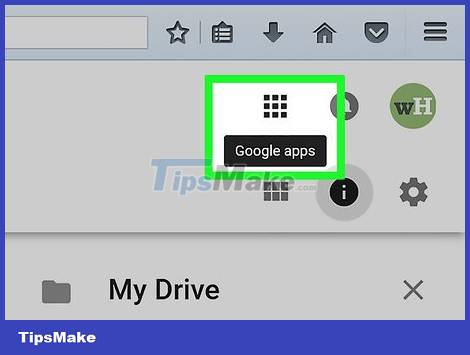
Click the Google apps menu. This menu is shaped like 9 dots in the upper right of the screen, in the left part of the Gmail account image.

Click the "Drive" option. This is the step to help open your Google Drive account.
Depending on the list of frequently used applications, you may see a "Forms" option here. Click that option if found to open Google Forms.

Click the "New" button. This button is at the top left of the Drive page, just above the "My Drive" option.

Hover over the "More" section and click "Google Forms". Here is the step to open a new untitled Google Form!
If you need to open a new form from the Google Forms homepage, click the "+" button on the left side of the form forms.
Design your Form
Think about the purpose of creating a Google Form. Knowing what information you need to collect and to what purpose helps you decide on formatting, form filling, and more.
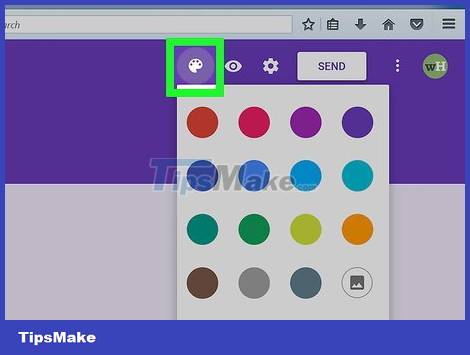
Change the color of the form. Click the palette icon to the left of the "Send" button and then select the desired color from the drop-down menu.
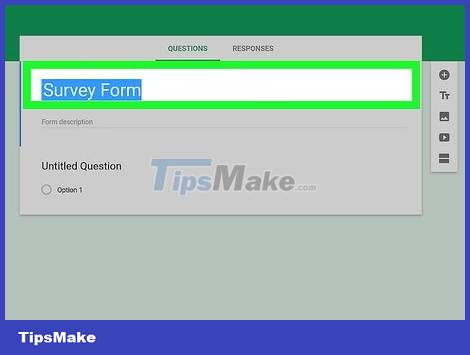
Set a title for the form. This option is at the top of the screen. You need to click "Untitled Form" or "Form Title" to type text.
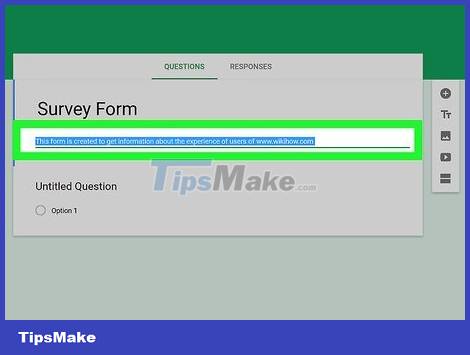
Add descriptive information to the form. The person filling out the form can see this information below the form title.
Directly enter this information below the title section.
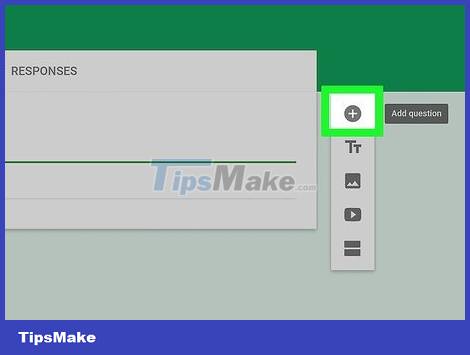
Add a question to the form. Questions are an important element when gathering information. The person filling out the form will answer the question according to your presentation. Here's how to add a question:
Click "+" in the menu on the right.
Type your question in the "Question" field.
Replace the line "Option 1" with the answer.
Click "Required" in the lower right corner so that the person filling out the form is required to answer that question.
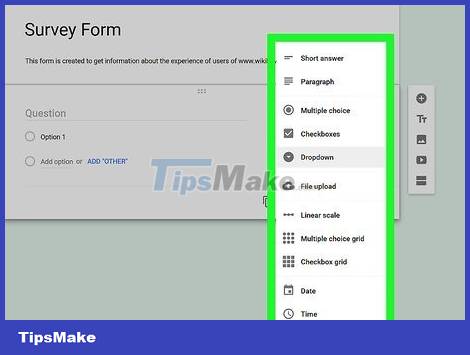
Select question type. There are many forms of displaying your question. Here's how to change the question type:
Click anywhere in the question.
Click the drop-down menu to the right of the question.
Select "Multiple Choice", "Checkboxes" or "Drop-Down". You can choose a longer answer, such as "Short answer" or "Paragraph".
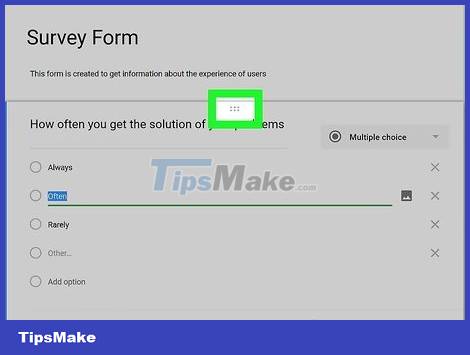
Rearrange the position of the questions if necessary. You can click the 6-dot icon at the top of the question, then drag it up or down and drop it to a new location.
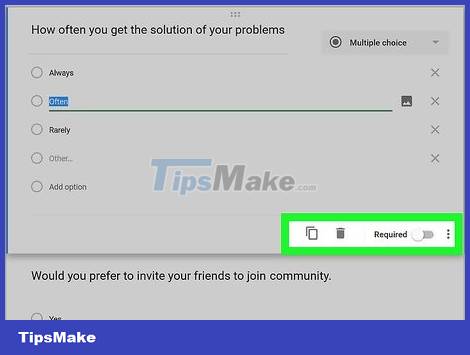
See other question options. You can do some more in your question:
Click the "Duplicate" button (two stacked cards) to create a duplicate of the current question.
Click the trash can icon to delete the current question.
Click the picture icon next to the question. Here's how to add photos. You need to hover near the question to see this option.
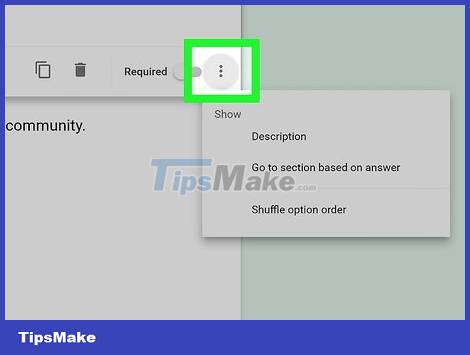
See additional options. Click the vertical 3-dot in the lower right corner of the current question:
"Description" - Adds additional information to the question.
"Go to section based on answer" - Link the question to the answer. You will do this in the drop-down menu next to the answer.
"Shuffle option order" - Swaps the answers of the current question.
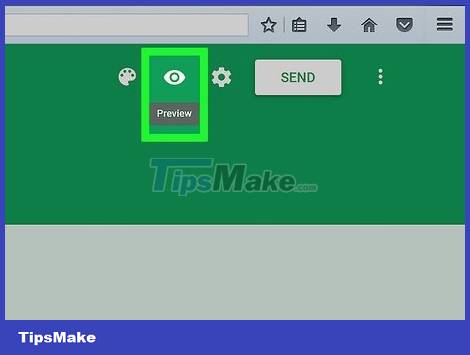
Click "Preview" to preview the Form. Preview is the eye-shaped icon in the upper-right corner of the screen's toolbar. After reviewing your form and making sure it's formatted correctly, you can proceed to submit your form!
Submit Google Form

Review simple form settings. You can click the gear icon in the upper right corner of the screen. Your form settings include the following:
"Requires Sign-In" - Requires the person filling out the form to sign in to Google, not anonymously. Click "Limit to 1 response" to enable this feature.
"Respondents can." - This section has two options, "Edit after submit" and "see summary charts and text responses". The person completing the form can change the answer and view information about the form after posting.
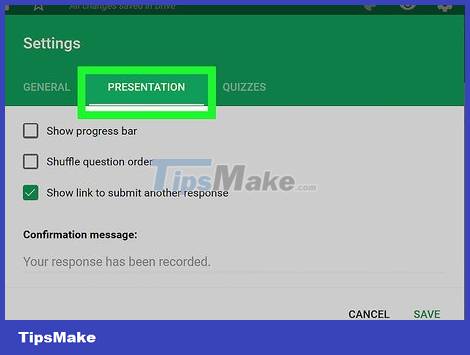
Review the Presentation settings. These settings are located in the Settings section. You can switch from "General" to "Presentation" by clicking the corresponding option at the top of the Settings window.
"Show progress bar" - Displays a bar showing the progress of the form filling.
"Shuffle question order" - Change the order of questions for each user.
"Show link to submit another response" - Create a link to re-fill the form. This is the appropriate option for invoice forms.
"Confirmation message" - Customize the message that appears after completing the form by entering text in the blank below.
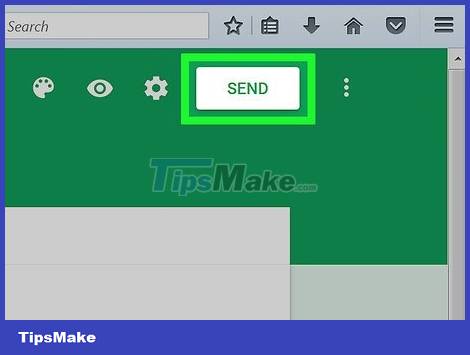
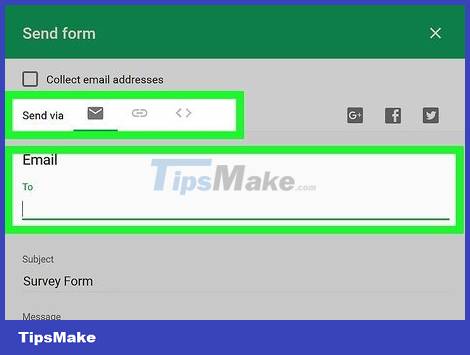
Click the "Send" button. This button is located in the upper right corner of the screen. If you click "Send", you will see a "Send form" menu that includes various sharing options. You can proceed to enter the information from the top down.
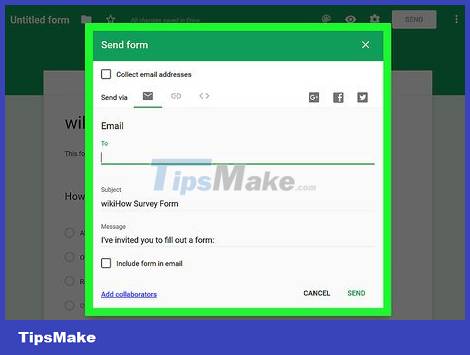
View sharing options. Depending on the purpose of the form, you can use several options such as:
Email - This option helps to send an email to the person filling out the form directly from the Form page.
Link - Option to generate a link to copy and paste.
Embed HTML - Use this option only when you intend to insert the form directly onto your web page.
Google+, Facebook or Twitter - These are all quick sharing options located in the upper right corner of the "Send form" menu.
Submit the form using the selected service. Since there are many different options, the process is also different as follows:
Email - Add a person to fill out the form in the "To" field, the subject in the "Subject" field and a brief message in the "Message" field. Click the "Include form in email" option to embed the form directly in the email.
Link - Right click or two-finger click on the link section and then click "Copy". You can paste this link in your email or favorite social networking site.
Embed - Right click or two-finger click on the HTML section and then click "Copy". You can paste this text into your web page's HTML processor. Note that you can edit the form's width and height values here.
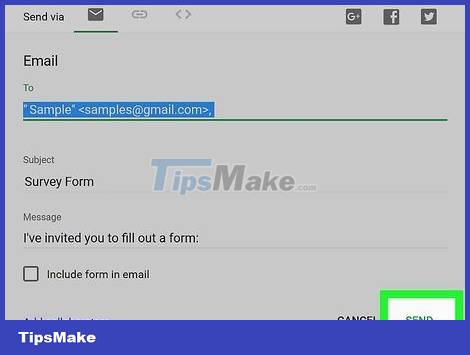
Click "Send" if you are using email. This is to send the form to everyone in the form filling list!
To submit the form via link, you need to manually post the link on social media or email.