How to create a new User on Windows 11
Creating a user account on Windows operating system is quite simple, I already have a number of tutorial articles on TipsMake.
However, as you all know, there has been a slight change in the interface on Windows 11 operating system, so today I will have a more detailed tutorial for you.
In addition to showing you how to create a Local Account on Windows 11, I will also guide you with related tips such as: delete Local Account on Windows 11, grant admin rights to Local Account, link Local Account with account Microsoft account…
Okay, now we will get to the main content of the article right now!
#first. Instructions on how to create a Local Account on Windows 11
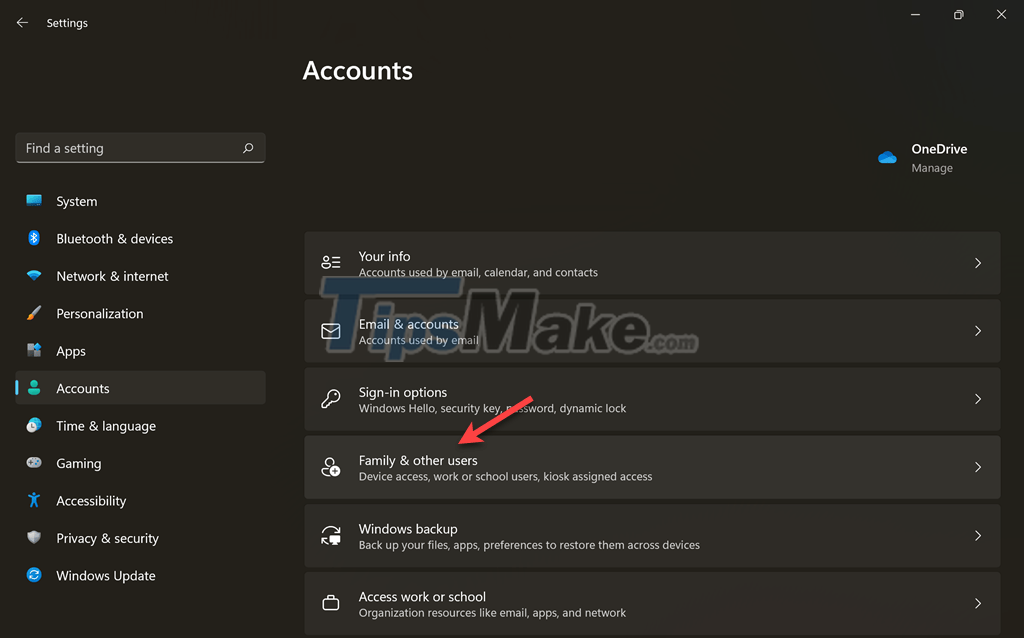
+ Step 1: You press the key combination Windows + I => then select Account => and select Family & other users as shown below.
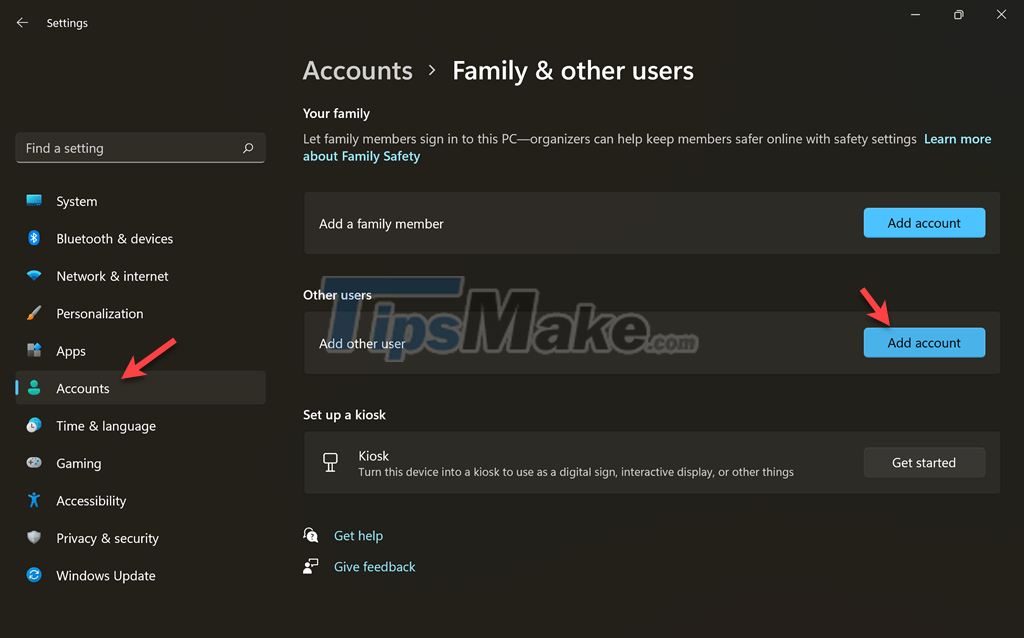
+ Step 2: Next, select Add account in the Other users section
+ Step 3: You select I don't have this person's sign-in information (I don't have this person's login information) in the Microsoft account window.

+ Step 4: In the next window, select Add a user without a Microsoft account (Add a user without a Microsoft account)

+ Step 5: Here you enter important information such as:
- User name: Enter username
- Enter password: Enter password
- Re-enter password: Re-enter the password.
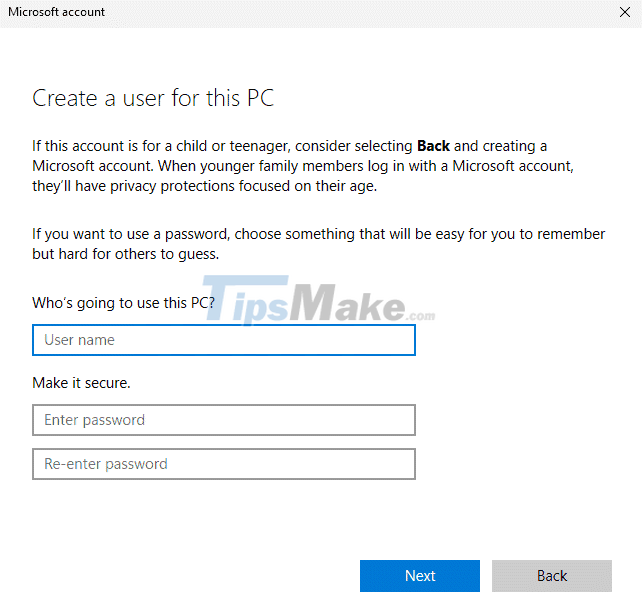
After entering the information, Microsoft will ask you to enter 3 more security questions to be able to recover the password when you forget it. You can record or take a screenshot of your computer screen to use when needed.
=> Then click Next to move to the next step.
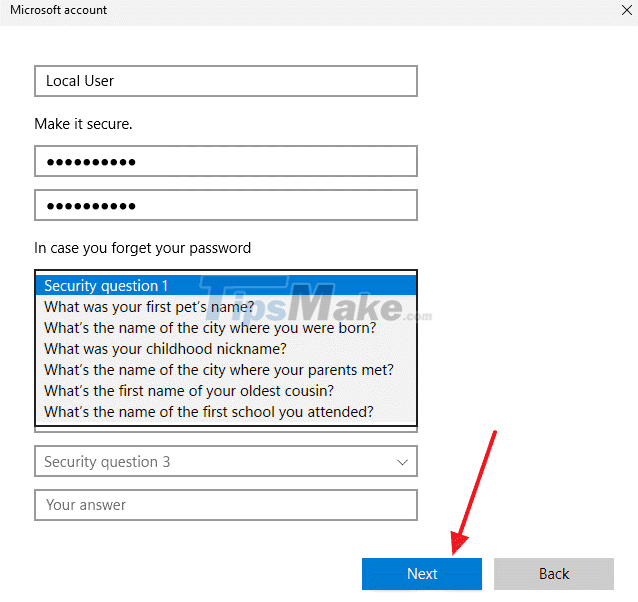
+ Step 6: Okay, that's it, the Local Account on Windows 11 has been created. You can press Windows key + L to check and can log-in to this new user account if you want.

NOTE: In addition to the above method for Windows 11 only, there are many other ways to create a Local Account, you can apply the same on Windows 11: The fastest way to create a new User on Windows
#2. Instructions to delete Local Account on Windows 11
+ Step 1: You also access the Account section => go to Family & other users
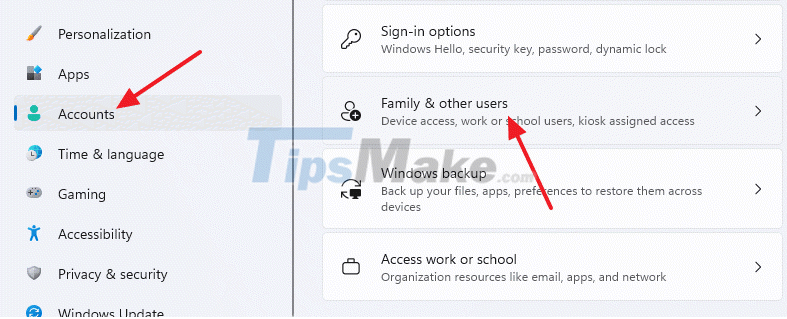
+ Step 2: Then select the Local Account you want to delete (click the down arrow)

+ Step 3: Select Remove
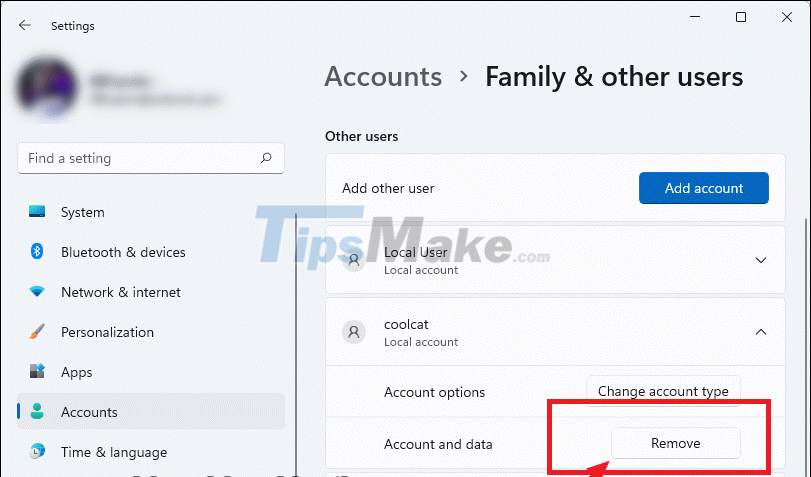
+ Step 4: And finally click the Delete account and data button to delete the Local Account account on Windows 11.

#3. Instructions for granting Administrator rights to the Local Account account
Granting Admin rights to a Windows User account is also very simple, you do the following steps:
+ Step 1: You access the Account section => go to Family & other users
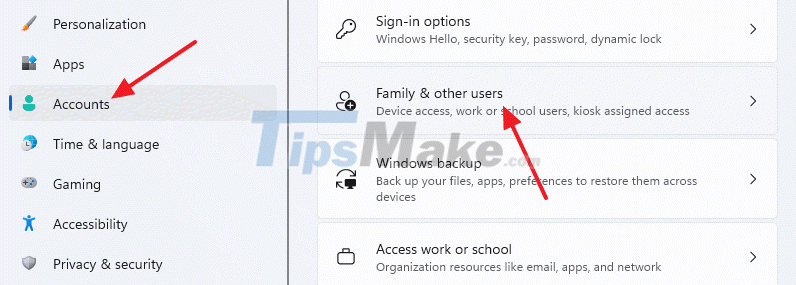
+ Step 2: Select the Local Account you want to grant Administrator rights => then click Change account type

In the Account type section, select the type of account you want to set. For example, here I will choose Administrator to grant permissions to this account => and click OK.
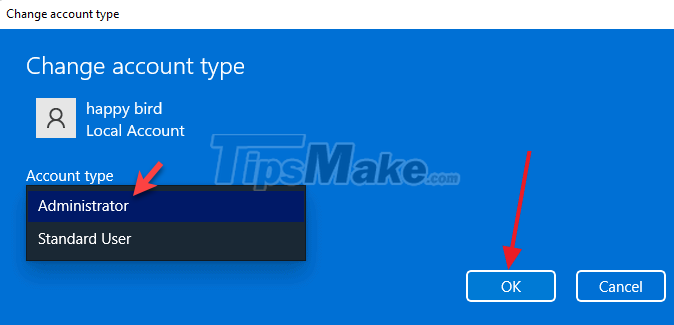
And as you can see, this Local account already has Admin rights.
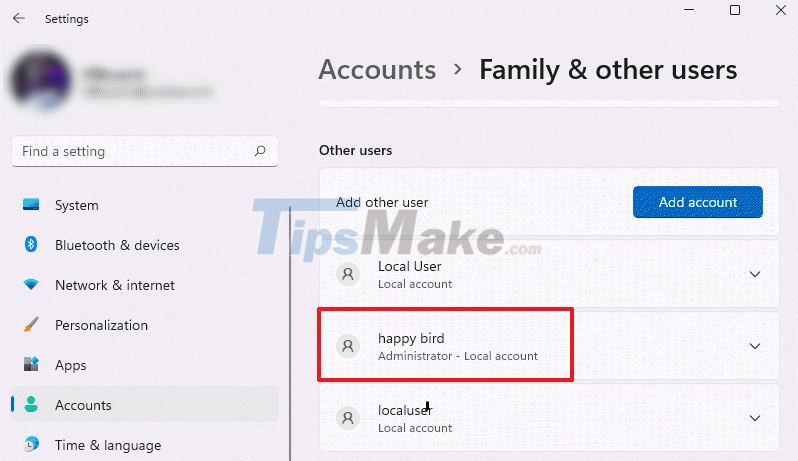
#4. Convert Microsoft Account to Local Account on Windows 11
For example, your computer is linked to a Microsoft account , ie the computer you are using Microsoft Account. Now you want to switch from Microsoft Account to Local Account, you will do the following:
+ Step 1: You press Windows + I to enter Windows Settings => then select Account => and select Your info as shown below.
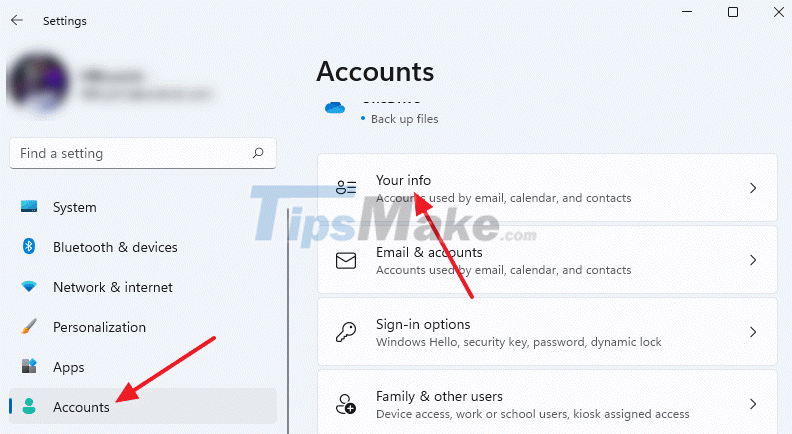
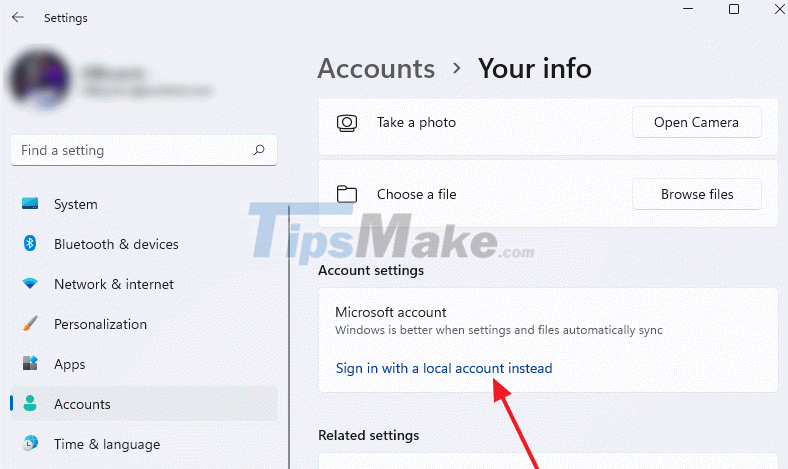
+ Step 2: In the Account settings section, click Sign in with a local account instead
Then click Next
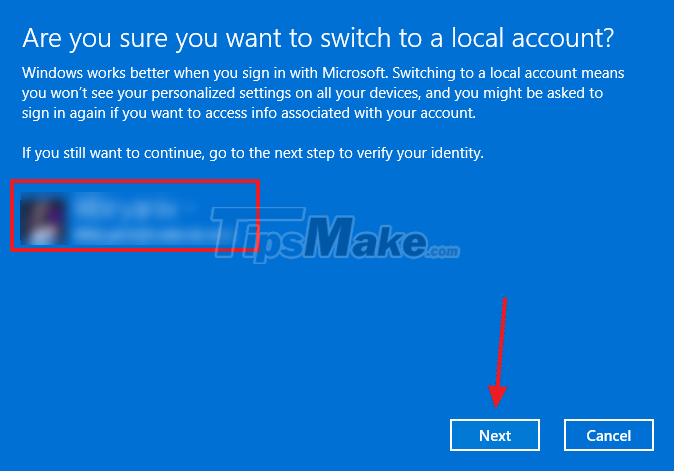
+ Step 3: Windows computer asks you to enter a Pin code to verify the change, please enter the current Pin code of your computer.
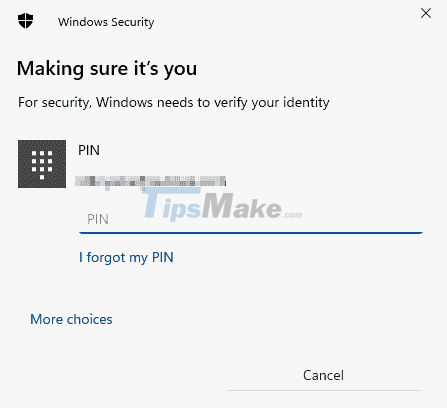
+ Step 4: Okay, the next window appears, enter information such as:
- User name: Account name Local Account
- New password: Set a password for the computer
- Confirm password: Confirm the password you just set.
- Password hint: Password hint.
=> Then click Next
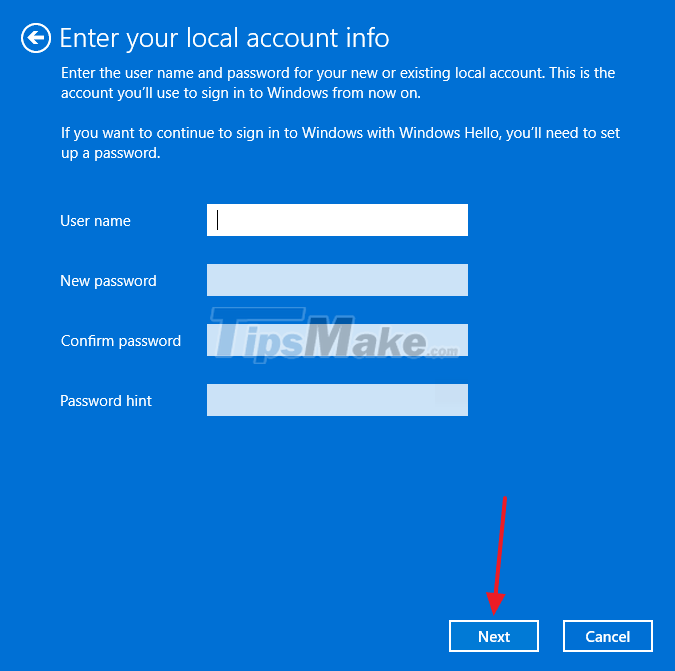
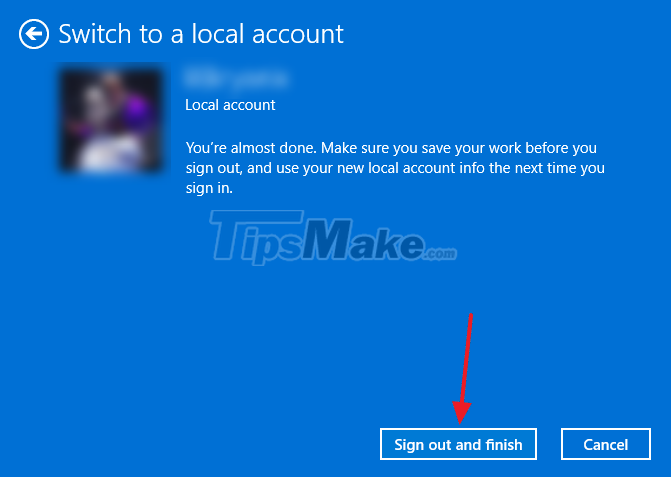
+ Step 5: Finally, to complete the conversion from Microsoft Account to Local Account, click the Sign out and finish button to finish the conversion process.
#5. Epilogue
Well, that's it, I've finished showing you how to create a new Local Account on Windows 11.
In addition, through this article you will also know how to delete the Local Account account, grant Administrator rights to the Local Account account, as well as how to exit the Microsoft Account on Windows 11.
Hope this article will be useful to you, good luck!
You should read it
- ★ How to reset Local Group Policy settings on Windows 10
- ★ How to enable Local Security Authority (LSA) protection in Windows 11
- ★ How to fix a local account error cannot open Windows 10 application
- ★ How to apply Local Group Policy to specific user accounts in Windows 10/11
- ★ Steps on how to create a local user account in Windows 10