Change the default Control Panel view to a Windows computer
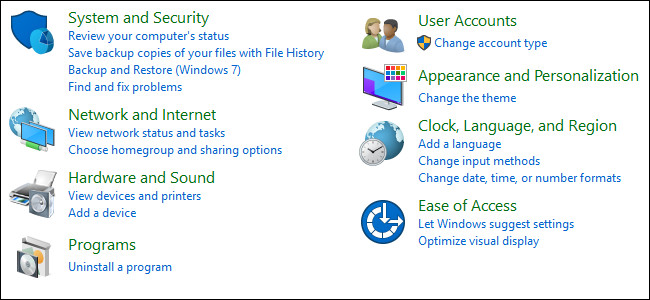
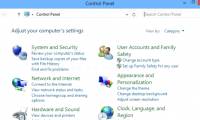
By default, Windows Control Panel will display the view by category: Category, Large Icons, or Small Icons. However, if you want to open the Control Panel window to display specific items fully, you can use the Registry or Group Policy to edit them.
Table of Contents
By default, Windows Control Panel will display the view by category: Category, Large Icons, or Small Icons. However, if you want to open the Control Panel window to display specific items fully, you can use the Registry or Group Policy to edit them.
1. For users of Windows Home version
If you use the Windows Home version, you can edit the Registry to change the default view on the Control Panel.
If you use Windows Pro or Enterprise you can use Local Group Policy Editor .
Note:
Registry Editor is a powerful tool, so you should back up the Registry before doing so in case a bad situation occurs.
First open the Registry Editor window by clicking Start , then enter the keyword regedit in the Search box and press Enter.

If the UAC window appears, click Yes to allow the computer to change.
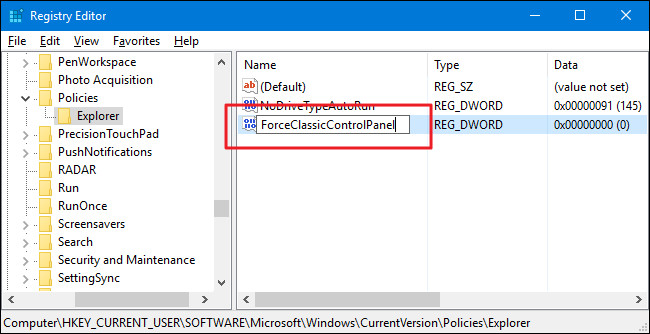
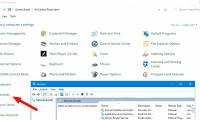
On the Registry Editor window, navigate to the key:
HKEY_CURRENT_USERSOFTWAREMicrosoftWindowsCurrentVersionPoliciesExplorer

Next, proceed to create a new value in the key Explorer. Right-click and key Explorer select New => DWORD (32-bit) Value. Name this new value as ForceClassicControlPanel.
There are 3 ways you can use to adjust Control Panel View:
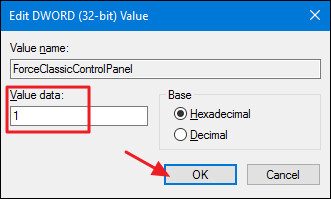
- If value ForceClassicControlPanel does not exist, Control Panel on Windows will by default open the classification the last time you use it.
- If value ForceClassicControlPanel is set to 0, Control Panel is always open under Category category.
- If value ForceClassicControlPanel is set to 1, Control Panel will always open under the Icon View category, either Large or Small icon, depending on the last time you used the Control Panel.
Double-click value ForceClassicControlPanel to open the Properties window. Here you change the value in the Value data frame from 0 to 1, depending on how you want and click OK .
Finally close the Registry Editor window and open the Control Panel window to check.
If you want to change back to the original default setting, you should follow the same steps and delete the value of ForceClassicControlPanel.
2. Use the built-in Registry
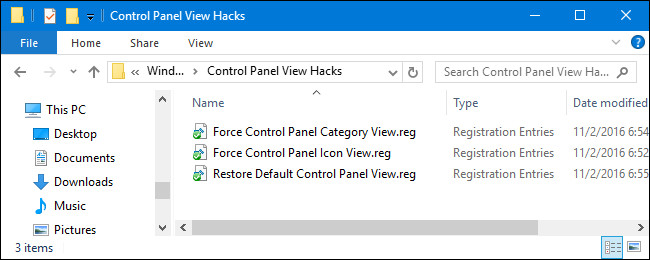
If you do not want to manually edit the Registry, you can use the pre-edited Registry.
Download Control Panel View Hacks here.
After downloading the Zip Control Panel View Hacks file , proceed to extract the file. Just run the Force a view file and set the appropriate value you want to open the Control Panel window.
Run the restore file to delete the value ForceClassicControlPanel and restore to the original default settings.
3. For Pro and Enterprise users
If using Windows Pro or Enterprise version, the fastest way to set the default view on Control Panel is to use Local Group Policy Editor.
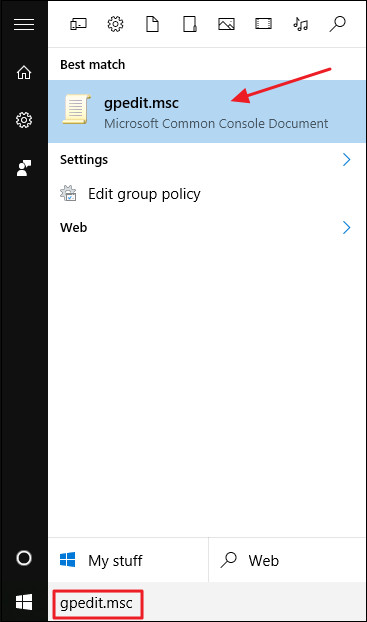
First click Start , then enter gpedit.msc into the Search box and press Enter.
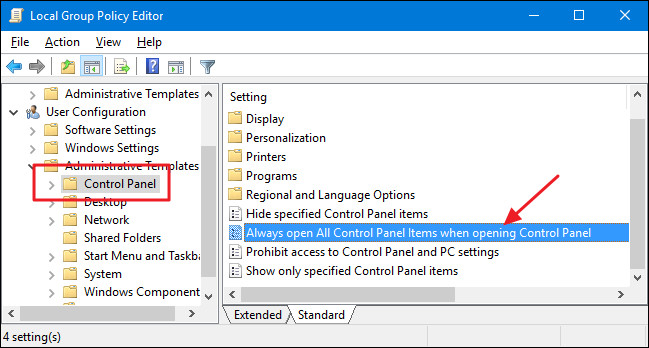
On the Local Group Policy window, in the left pane, navigate to the key:
User Configuration => Administrative Templates => Control Panel
In the right pane, find and double-click the option called Always open All Control Panel Items when opening Control Panel .
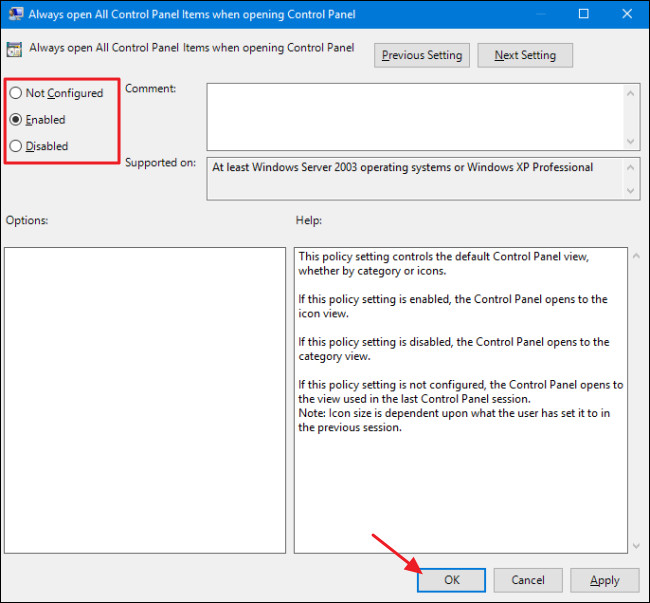
Now on the screen appears the Properties window, where you can configure according to 1 of 3 options below:
- Select Not Configured to set the Control Panel to always open the last time you use it.
- Select Enabled to force Control Panel to open in the view with the icon. It can be Large or Small icon.
- Select Disabled to force the Control Panel to open in the Category view.
After selecting, click OK .
Finally close the Local Group Policy Editor window and you do not need to restart the computer, open the Control Panel window and check the changes.
If you want to return to the initial default settings, follow the same steps and set the option to Not Configured .
Refer to some of the following articles:
- 6 ways to access Control Panel on Windows Server 2012
- How is Control Panel and Settings menu on Windows 10 different?
- Search and launch Java Control Panel on Windows operating system
Good luck!
Was this article helpful?
Your feedback helps us improve.
Related Articles
 Change the default browser in Windows 102 minutes read
 Instructions to disable Control Panel on Windows 73 minutes read
 How to add Services to Control Panel in Windows 7, 8 and 102 minutes read
 Quickly open the Control Panel tools2 minutes read
 How to open Control Panel on Windows 10, 8.1, 711 minutes read
 How to open Control Panel on Windows 113 minutes read
Reader Comments 0
Sign in with email or Google to join the discussion.