How to create a Fanpage on Facebook
Social network facebook is currently a social network attracting a lot of users around the world. Businesses promoting products and artists want to share their activities to fans, online sales people introduce the product to people on social networks . then use it for yourself. A separate fanpage is essential. It will help you to easily reach customers, fans .
The following article shows how to create a fanpage on facebook, you follow along!
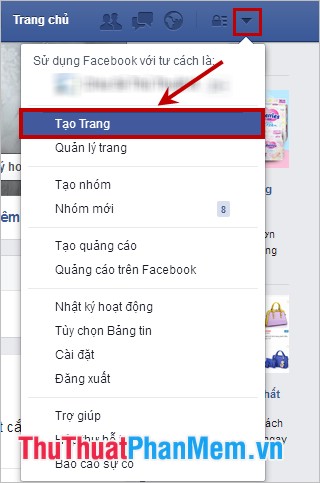
Step 1: First you need to access the facebook account that you want to set up the fanpage and on the facebook interface after logging in you select the triangle icon in the upper right and select Create Page .
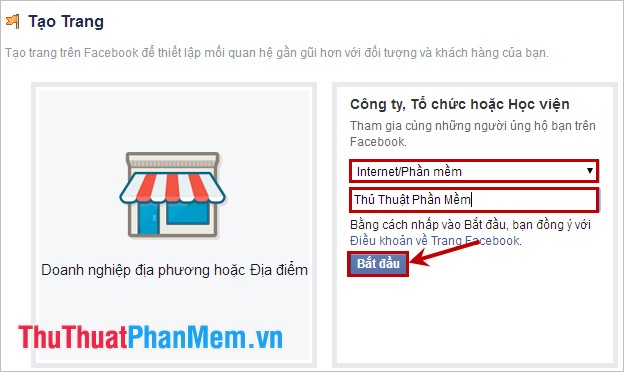
Step 2: Here you select the type for your fanpage, if you set up a fanpage for what purpose, then you select that type. For example, if you set up a fanpage to introduce clothes, bags or any products, you can choose the type of Brand or product . Or if you set up a fanpage about singers and artists, you can choose the type of Artist, Band or Public Character .
Facebook offers you 6 types:
- Local businesses or Locations.
- Company organization or Academy.
- Brand or product.
- Artist, Band or Public figure.
- Entertainment.
- Community activities.
Choose the type you just click on the mouse type that type.

Step 3: After selecting the type, the interface will appear a small interface in that type. You select the category and enter a name for the fanpage and click Start .
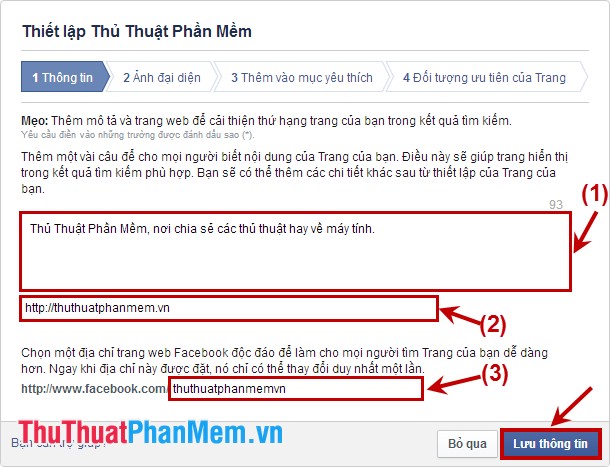
Step 4: Next facebook will redirect you to the settings page for the fanpage. In the Information section you need:
(1) -Enter the introduction, summary of the main content of the page (limited to 155 characters so you need to enter short, concise content).
(2) - Enter the website or links for your page, otherwise leave blank.
(3) -Setting your page address makes it easy for others to search.
Then click Save information to move to the next step.
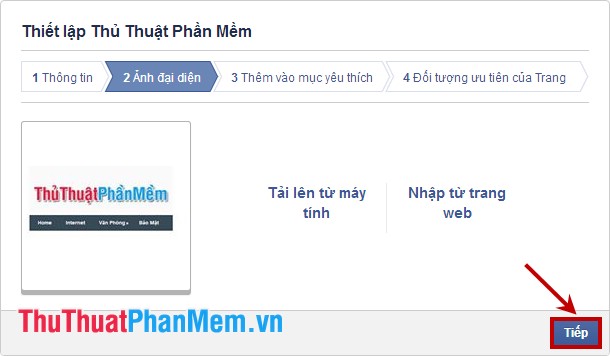
Step 5: Go to the Avatar image , you choose an avatar for your fanpage by Importing from the website or Uploading from your computer . If you do not want to create images for fanpage you can Skip . After selecting an avatar, click Next to continue.
Step 6: In the Add to favorites section , you can add fanpage to favorites by clicking Add to favorites . If not, you can select Skip .
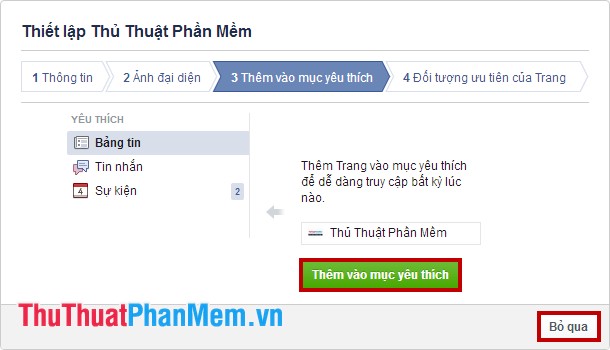
Step 7: Part Object Priority page , if you want to be those who know or who can easily find your page, you enter information: Location, Age, Gender, Interests and Click Save to have the Facebook page appear before those who have such information. If not, you can click Skip .

After completing the steps, your fanpage will appear, first there will be instructions for you to manage the fanpage you read and click Next to move on to other information.
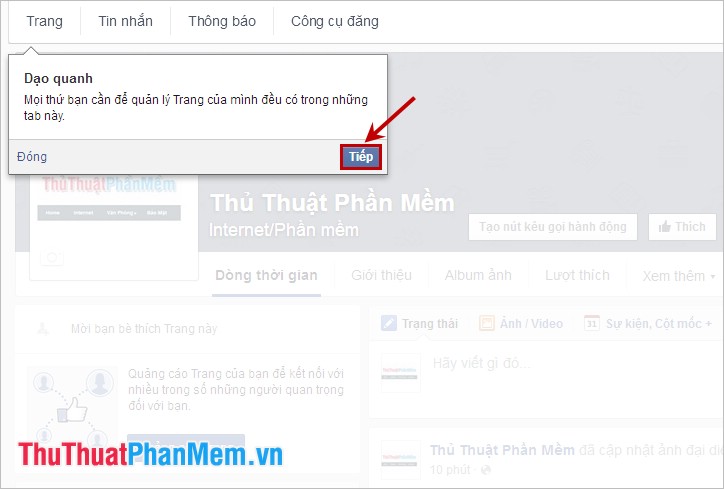
When the information is out, you should select Add cover photo to add a cover image for your fanpage.

You can choose the three-dot icon and choose Invite friends to invite friends to like your fanpage, or you can choose Page Ads to let more people know your fanpage.

To manage your fanpage, on the interface of the page you select Settings above the cover image, where you can manage all the content and sections related to your page.

So you've created your fanpage with basic instructions on how to use, you share the content is similar to sharing on your facebook. Good luck!
 Instructions to change email in Facebook - Change email account facebook
 Change the IP address with X-Proxy software
 Rename users in Gmail, Yahoo and Outlook
 How to check your computer's IP address - How to view and find the IP address
 Bulk mail in Gmail
 Change the password length of Teamviewer for more security