How to Clear the Cache on a Mac
This wikiHow teaches you how to clear the cache of temporary system files that your Mac stores as you use it, as well as how to clear the Safari browser's cache of temporary Internet files. Keep in mind that clearing the system cache can...
Table of Contents
Method 1 of 2:
Clearing the System Cache
-
 Close as many open programs as possible. Open programs use files from the "Cache" folder, so you won't be able to remove as many cached files as you like if you have multiple programs open.
 -
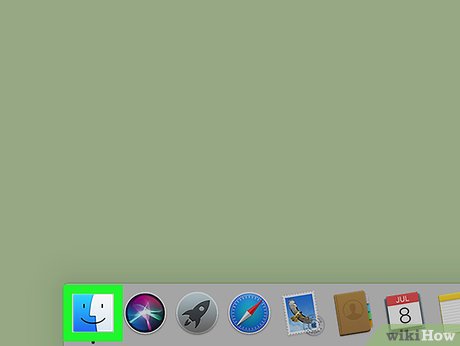 Go to your Mac's Finder. Do this by clicking on your Desktop image or on the blue smiley-face icon on the far left in your Dock.
 -
 Click Go. It's in the menu bar at the top of the screen. A drop-down menu will appear.
 -
 Click Go to Folder…. You'll find this option near the bottom of the Go drop-down menu. Doing so opens a text box.
 -
 Enter the "Library" folder path. Type ~/Library/ into the text box.
 -
 Click Go. It's a blue button in the bottom-right corner of the text box. This will open the Library folder, in which you should find a folder named "Caches".[1]
 -
 Double-click the "Caches" folder. This folder should be near the top of the Finder window, but scroll down to find it if it isn't there.
 -
 Select the "Caches" folder's contents. Click one item or folder in the "Caches" folder, then press ⌘ Command+A. Doing so selects everything in the "Caches" folder.
 -
 Delete the "Caches" folder's contents. Click the File menu item at the top of the screen, then click Move Items to Trash in the drop-down menu. The "Caches" folder's contents will be moved to the Trash.
- If you receive an error telling you that one or more of the files can't be deleted, they're being used by a program that's currently open. Skip deleting these files for now, then try deleting them later when the programs in question aren't open.
-
 Click Finder. It's a menu item in the top-left corner of the screen. A drop-down menu will appear.
 -
 Click Empty Trash…. This option is in the Finder drop-down menu.
 -
 Click OK when prompted. Doing so will empty the trash, thus completely clearing the cache files from your Mac.EXPERT TIPGonzalo Martinez is the President of CleverTech, a tech repair business in San Jose, California founded in 2014. CleverTech LLC specializes in repairing Apple products. CleverTech pursues environmental responsibility by recycling aluminum, display assemblies, and the micro components on motherboards to reuse for future repairs. On average, they save 2 lbs - 3 lbs more electronic waste daily than the average computer repair store.
Gonzalo Martinez
Apple Repair Specialist & President, CleverTech Gonzalo Martinez
Apple Repair Specialist & President, CleverTechExpert Trick: Shutting down your Mac completely clears your cache. Be sure to completely shut down your computer routinely to make sure there aren't applications that you quit but are still taking up some RAM space.
Method 2 of 2:
Clearing the Safari Cache
-
 Open Safari. The Safari app icon resembles a blue compass, and can usually be found in your Mac's Dock at the bottom of the screen.
 -
 Click Safari. It's a menu item in the top-left corner of the screen. A drop-down menu will appear.
- If you see a Develop menu item in the bar at the top of the screen, click it instead, then skip ahead to the "Click Empty Caches" step.
-
 Click Preferences…. It's near the top of the Safari drop-down menu. A new window will open.
 -
 Click the Advanced tab. You'll find it on the far right side of the Preferences window.
 -
 Check the "Show Develop menu in menu bar" box. It's at the bottom of the Preferences window. This adds the Develop tab to the menu bar for Safari.
 -
 Click Develop. It's an option in the menu bar at the top of the screen. A drop-down menu will appear.
 -
 Click Empty Caches. You'll see it in the Develop drop-down menu. Doing so will automatically clear your Mac's Safari cache.
- You won't see a pop-up window or a confirmation notice when the cache is cleared.
Was this article helpful?
Your feedback helps us improve.
Related Articles
 How to Clear Cache on Mac4 minutes read
 How to use Cleaner for PC Pro to delete cache, Windows junk files automatically3 minutes read
 What is cache? How to clear Cache in Windows 104 minutes read
 Instructions on how to clear application cache on iPhone are super simple3 minutes read
 How to clear iPad cache to increase storage capacity2 minutes read
 Instructions to clear DNS Cache with CMD command on Windows4 minutes read
Reader Comments 0
Sign in with email or Google to join the discussion.