Table of Contents
This updated guide examines Click: How to Install macOS on a Windows PC and organizes the essential facts, background, and practical takeaways in clear American English.
Part 1of 8:
Preparing to Install
 Check your computer's specifications. Your Windows computer must have an Intel i5 or i7 processor to run macOS High Sierra, as well as a minimum of two gigabytes of RAM. To check these specs:
- Open Start
 .
. - Type insystem information.
- Click System Information at the top of the menu.
- Look at the name of the processor to the right of the "Processor" heading.
- Scroll down and look at the number to the right of the "Installed Physical Memory" heading.
- Open Start
 Check your computer's BIOS type. Next to the "BIOS Mode" heading in the System Information menu, check to see whether it says "UEFI" or "BIOS". Keep this information in mind for later.
- You can exit System Information after this point.
 Determine your computer's bit type. There are two types of computer: 32-bit, and 64-bit. Your computer must be able to support 64-bit operation to install macOS.
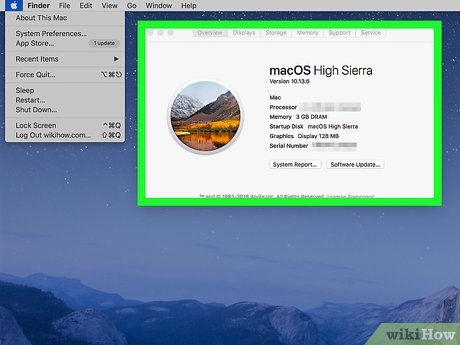 Make sure you have access to a recent model of Mac. The Mac in question must be able to download macOS High Sierra.
- If your Mac can't run macOS High Sierra, you'll need to use a Mac which can.
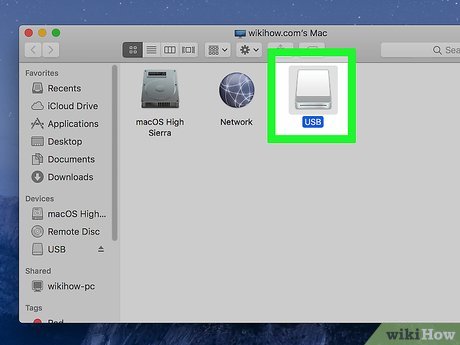 Gather the required equipment. to install macOS High Sierra on your Windows computer, you will need the following hardware:[1]
- USB drive - Find a flash drive that can hold at least 16 gigabytes.
- Blank hard drive - Find a USB external hard drive that holds at least 100 gigabytes (this is where you'll install your macOS stuff, so the bigger, the better).
- USB-C adapter - If you're working with a Mac that doesn't have traditional USB ports, you'll need a USB-C-to-USB-3.0 adapter.
Part 2of 8:
Downloading Unibeast
 Go to the Unibeast download site on a Mac. Go to https://www.tonymacx86.com/. Make sure you do this on a Mac, since the folder will download the wrong app if you do this on a Windows computer and try to transfer it over to a Mac.
 ClickLog in or Register. It's in the upper-right side of the page. A menu will appear at the top of the page.
 Enter your email address. Do so in the "Email address" field. Make sure this is an email address that you can easily access—you'll need to log in and verify the email address later.
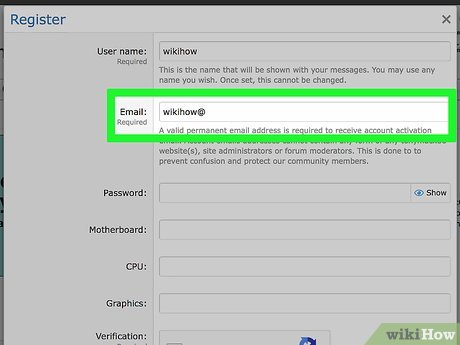 Check the "No, create an account now" box. It's near the bottom of the menu.
 ClickSign up. Doing so takes you to the Create an Account page.
 Enter the required information. Fill out the following fields:
- Name — Enter the name you want to use for your account.
- Password — Enter a password you'd like to use for the login.
- Confirm Password — Repeat the password you entered above.
- Date of Birth — Select the month, day, and year of your birth.
- Location — Type in your country's name.
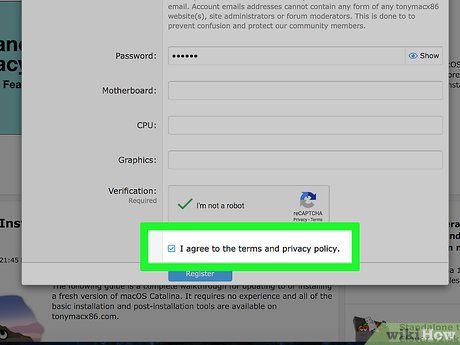 Check the "I agree to the terms and rules" box. It's near the bottom of the page.
 ClickSign up. This button is at the bottom of the page. Doing so creates your account and sends a confirmation email to your provided email address.
 Go to your email inbox. Go to the email address that you selected for your account. You may have to log in with your email address and the email account's password to open the inbox.
 Open the confirmation email. Click the email from "tonymacx86.com" to open it.
 Click the confirmation link. Click the link below the "Confirm Account" text in the middle of the email. This will take you back to the Unibeast download site.
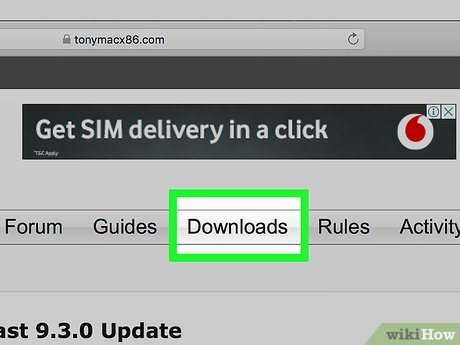 Double-click theDownloadstab. It's on the right side of the row of tabs that's near the top of the page. The Downloads page should open.
- If you just see a drop-down menu appear, click the Downloads tab once more.
 Scroll down and clickUnibeast. Make sure you click the version of Unibeast that has the highest number next to it.
- For example, the current release of Unibeast as of May 2018 is 8.3.2.
 ClickDownload Now. It's in the top-right corner of the page. Doing so will download Unibeast onto your Mac.
 Download Multibeast. This program, which is hosted on the same site as Unibeast, will allow you to install drivers so that you can use things like your PC's speakers, the Internet, and so on:
- Double-click the Downloads tab again.
- Click Multibeast - High Sierra 10.2.0
- Click Download Now in the upper-right corner of the page.
Part 3of 8:
Downloading the macOS High Sierra Installer
 Open your Mac's
 App Store. Click the App Store app icon, which is blue with a white "A" on it, in your Mac's Dock.
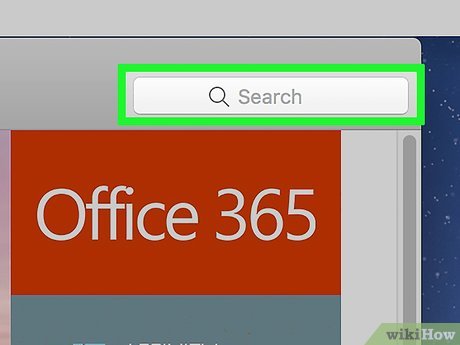 Click the search bar. It's in the upper-right side of the App Store window.
 Search for High Sierra. Typehigh sierrainto the search bar, then press⏎Return.
 ClickDownload. It's to the right of the High Sierra icon. Doing so will prompt the installer to begin downloading onto your Mac.
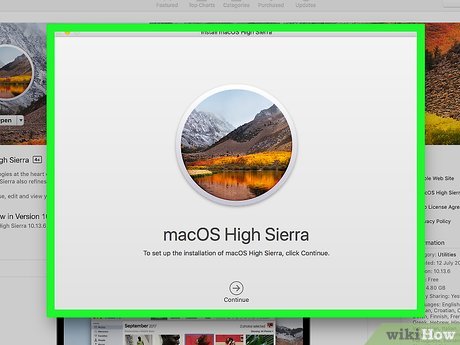 Wait for the installer window to open. Once it does, you'll need to close it immediately.[2]
 Press⌘Command+Qwhen the window opens. This will close the installer window.
 Open
Open Finder. Click the blue face-like icon in your Mac's Dock.
 Click theApplicationsfolder. It's on the left side of the Finder window.
 Make sure that the installer is there. The installer will be called "Install macOS High Sierra" or something similar and will have an image of a ridge of mountains on it. As long as the installer is present in the Applications folder, you can proceed.
- If the installer isn't there, try downloading High Sierra again.
Part 4of 8:
Formatting Your USB Drive
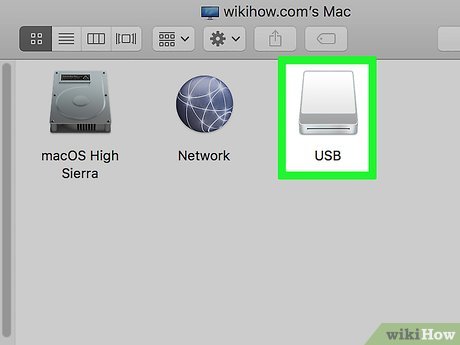 Plug your USB drive into your Mac. This is the 16-gigabyte minimum flash drive that you'll use to install macOS High Sierra on your computer.
- If your Mac doesn't have traditional USB ports on it, attach your USB-C to USB-3.0 adapter first.
 Open Spotlight
 . Click the magnifying glass icon in the top-right corner of the screen. A search bar will open.
 Typedisk utilityinto Spotlight. This will search your Mac for the Disk Utility app.
 ClickDisk Utility. It's below the Spotlight search bar. Doing so will open Disk Utility.
 Select your USB drive. Click the USB drive's name in the upper-left side of the window.
 Click theErasetab. It's near the top of the window. A pop-up box will appear.
 Click the "Format" drop-down box. You'll find this in the middle of the pop-up box. Clicking it prompts a drop-down menu.
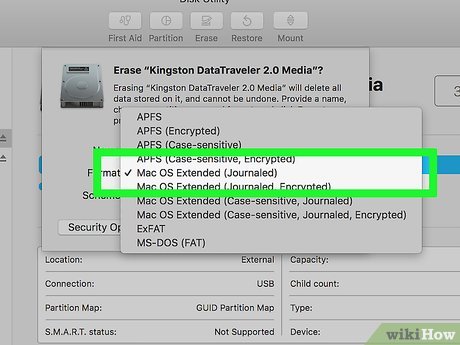 ClickOS X Extended (Journaled). This will set your USB drive's file system to that of your Mac.
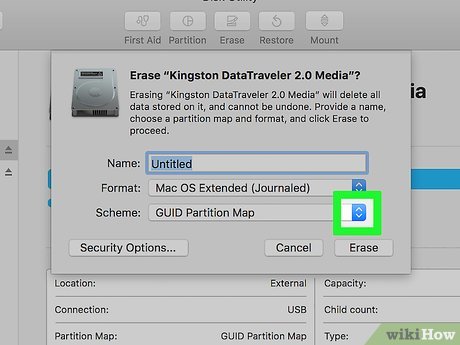 Click the "Scheme" drop-down box. It's below the "Format" drop-down box.
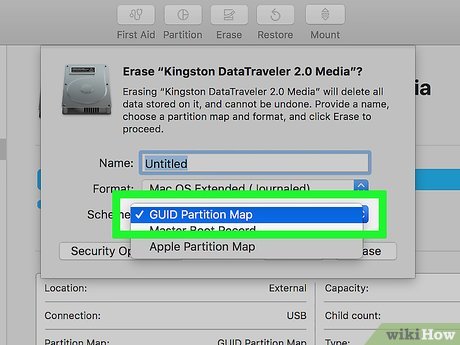 ClickGUID Partition Map. This option is in the "Format" drop-down menu.
 ClickErase. Doing so will reformat your USB drive to your Mac's file system.
 ClickDonewhen prompted. You can now proceed with creating your installation drive.
Part 5of 8:
Creating the Unibeast Installation Tool
 Open the Unibeast folder. Double-click the Unibeast folder to unzip and open it.
 Open Unibeast. Double-click the Unibeast PKG file to open it.
 ClickOpenwhen prompted. Doing so will open the Unibeast setup window.
- If your Mac is currently running macOS Sierra or higher, you'll have to verify the Unibeast installation before continuing.
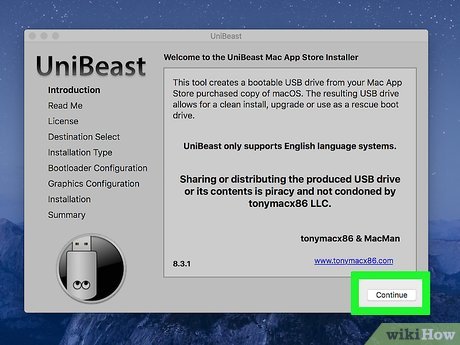 ClickContinuefour times. It's in the bottom-right corner of the first four pages of the Unibeast setup window.
 ClickAgreewhen prompted. It's at the top of the window.
 Select your USB drive, then clickContinue. Click the USB drive's name to select it.
 SelectHigh Sierra, then clickContinue. You should see High Sierra in the middle of the page.
 Select a motherboard type. Depending on whether your Windows computer has a UEFI- or a BIOS-type motherboard, your choice will vary:
- UEFI — Click UEFI Boot Mode , then click Continue .
- BIOS — Click Legacy Boot Mode , then click Continue .
 Select a graphics card option if necessary, then clickContinue. Check the box next to Inject [card name] for your preferred graphics card settings.
- If your graphics card supports macOS High Sierra by default, skip this step.
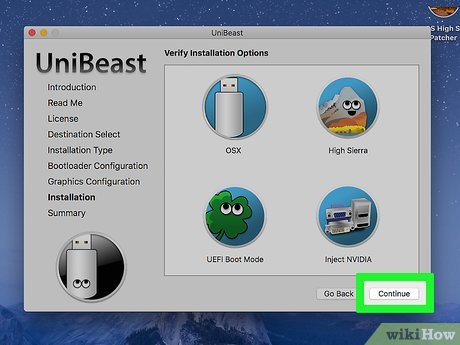 ClickContinue. It's in the bottom-right corner of the page. Doing so will prompt you to enter your Mac's password.
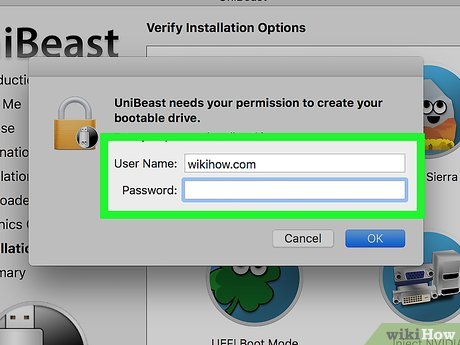 Enter your Mac's password. Type in the password you use to log into your Mac.
 ClickOK. This will prompt Unibeast to begin installing to the USB drive. Once the installation process is complete, your USB drive will be ready to install macOS High Sierra on your PC. While the Unibeast installation finishes up, you should change your Windows computer's boot order.
Part 6of 8:
Changing Windows Boot Order
 Unplug any USB items from your Windows computer. Make sure that you don't have any USB drives, in particular.
 Enter your computer's BIOS or UEFI settings page. This process varies from computer to computer, but you will typically restart your computer and then repeatedly press a key (e.g.,Del) immediately as the computer begins to start up.
 Locate the "Boot Order" section. This section is normally on the main page of the BIOS, though you may need to use the arrow keys to navigate over to the "Boot" or "Advanced" tab.
- The "Boot Order" section varies from BIOS to BIOS. If you can't find your BIOS' "Boot Order" page, consult your motherboard's manual or look up your computer model online to find direct instruction for your specific BIOS page.
 SelectRemovable Devices. Use the arrow keys to move the blinking bar down to Removable Devices .
- On some pages, this section may instead be called USB Devices or something similar (e.g., Peripherals ).
 Move your selected location to the top of the list. Typically, you'll press the + key with the boot location you want to use selected until it's at the top of the "Boot Order" list.
- You can double-check the key that you're supposed to use in the legend that's usually on the right side or the bottom of the BIOS page.
 Save your settings and exit the BIOS. Look for the key you're supposed to press to save and exit in the legend on the right side of the page, then press it. Doing so will shift your Windows computer's boot priority so that installation USB drive will be selected as the boot point once you plug it in.
- You may have to press another key to confirm this choice.
Part 7of 8:
Installing macOS on Your PC
 Place Multibeast on the USB drive. Open the USB drive's folder, then drag the Multibeast file into the folder. You'll need to use Multibeast later, so having it on the flash drive will make using it when necessary as simple as possible.
 Eject the Unibeast USB drive from the Mac. Open the Finder, then click the⏏Ejecticon to the right of the USB drive's name in the upper-left corner of the Finder window. After doing so, you can remove your USB drive.
- You should make sure that the Unibeast installation is complete before doing this.
 Shut down your Windows computer. Press and hold the Power button on your Windows computer until your computer shuts down completely. This will usually occur one or two seconds after the computer's display turns off.
 Plug both the Unibeast USB drive and the blank hard drive into your computer. These should both fit into USB ports on your computer.
 Start your Windows computer. Press the Power button to start the computer. Once the computer has a chance to begin booting, it should select your plugged-in USB drive as a place from which to boot.
 Select your USB drive when prompted, then press↵Enter. This will begin the macOS installation process.
FAQ
What is Click: How to Install macOS on a Windows PC about?
It provides a structured overview of click, explains the main context, and highlights practical takeaways for readers.
Why does this topic matter?
Understanding the main concepts helps readers evaluate the issue, avoid common mistakes, and make better-informed decisions.
How should readers use this information?
Use the guidance as a practical starting point, confirm details that may have changed, and follow current product, safety, or security recommendations.
Related Articles
 How to Install macOS Sierra (Clean Install) 10. 12 on Mac5 minutes read
 Run Windows Applications on Linux, macOS and Other Platforms8 minutes read
 How to Perform a Clean Install of macOS 10.15 Catalina6 minutes read
 6 Reasons Why Windows 11 Is Better Than macOS8 minutes read
 Install macOS Mojave on Win 10: How to Install macOS Mojave on7 minutes read
 How to Install macOS on a Windows Computer: Clear Instructions20 minutes read
Reader Comments 0
Sign in with email or Google to join the discussion.