Step 1 : Open the photo you want to edit in Photoshop.

Step 2: Use the Marquee Tool (M) to draw a rectangle or circle depending on the layout of your photo or your intention.

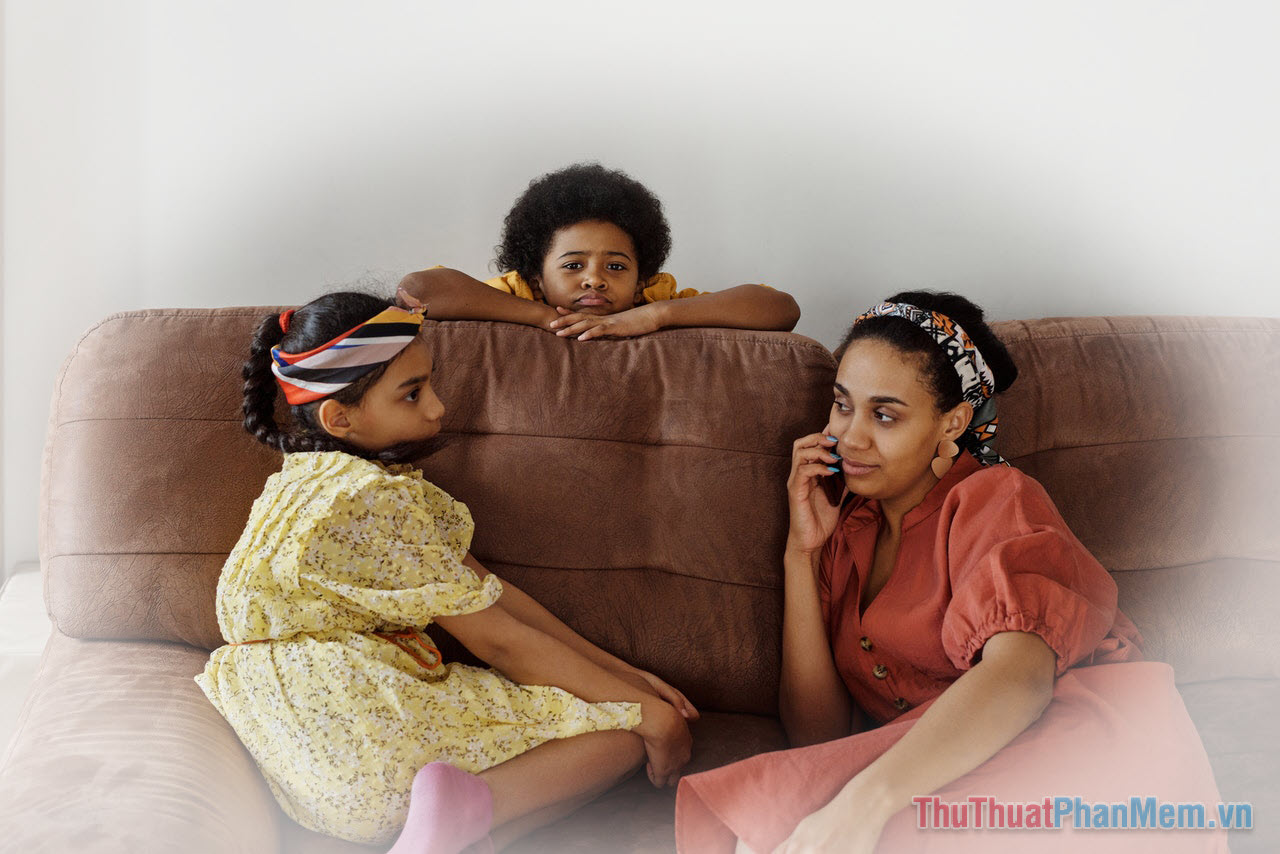
Here I use the Elliptical Marquee Tool with drag and drop to draw an ellipse around the characters. My goal is to make the ellipse's outer part become dim, only focus on the characters inside.

Step 3: To make the transition between outer and inner areas smoother, right-click and select the Feather .

Set Radius to 50 then click OK .

Step 4: Right-click >> Select Inverse to select the area outside the ellipse. You will see more dotted lines appear around the picture.

Step 5: Open Window -> Swatches to select the color for the border of the image.

You proceed to choose the color of the border through Swatches, usually should be white or black.

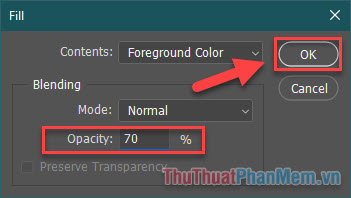
Step 6: On the menu bar, find Edit >> Fill . or simply press Shift + F5 .

In the Fill window , set Contents to Foreground Color and Opacity to about 70 .

Click OK to save the process.
After this step, you will see that the result has a beautiful white border around the characters:
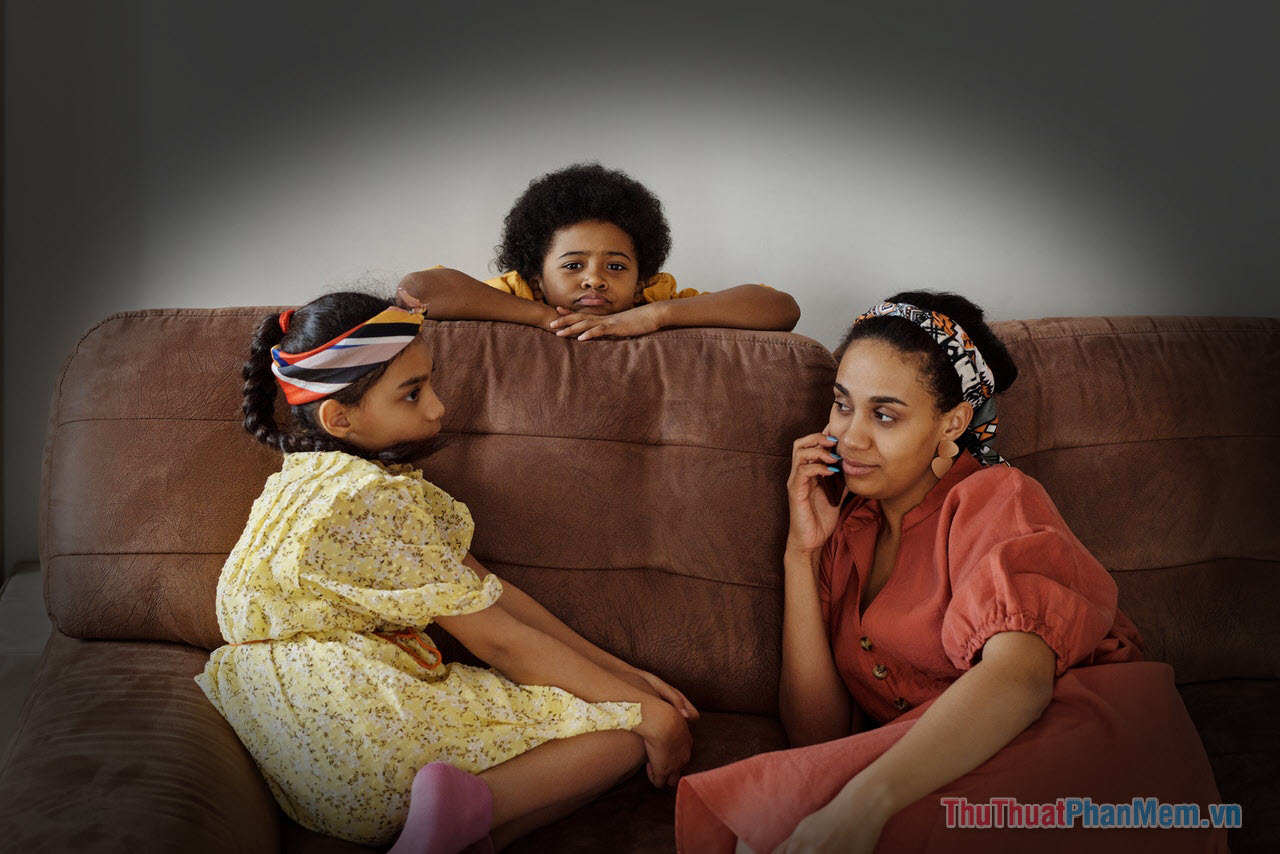
And here is the result for the black border:
So you know how to blur a photo in Photoshop. Wish you have beautiful photos!


 How to use Zperiod to automatically balance chemical equations.
 How to center a table in Google Docs
 How do I use the Learn Step by Step mode in Perplexity?
 Instructions on connecting Gmail to n8n via Google Cloud Console
 Instructions on how to fill in PDF files on iPhone using PDFgear
 Instructions on installing and using Yenka to simulate science experiments.