How to scale layer, scale image in Photoshop
Scale layer in photoshop helps you adjust the image in Photoshop big and small as you want but your image will be distorted or not the right ratio you need. In the tutorial below, TipsMake.com shares with readers tips for making scale easier and standard image.
Table of Contents
1. Scale images, layers with the Free Transform feature
Step 1: Right-click on the original layer (1) => Duplicate Layer . (2) .

Step 2: You name the layer (1) => OK (2) .

Step 3: You go to the menu Edit (1) => Free Transform (2) or using the key combination Ctrl + T .

Step 4: You proceed to Scale the image in the following ways:
Method 1: You left click on the corners of the image and move the mouse to enlarge / reduce the image. Doing this will help your image when zooming will keep the image aspect ratio.

Method 2: Hold Shift + click on the corners of the image and move the mouse. This will help you scale the image to the size you want, small, regardless of the aspect ratio. However, your image may be stretched or shrunk when you zoom in too much.

Method 3: You hold Ctrl + click on the corners of the image. This gives your image a tilting effect and can create images with a trapezoid or parallelogram. However, you need meticulous editing or the image will be very bad and lose details.

2. Scale layer, shape with Image Size.
If you simply edit the image to the size you need, Image Size is the most logical choice.
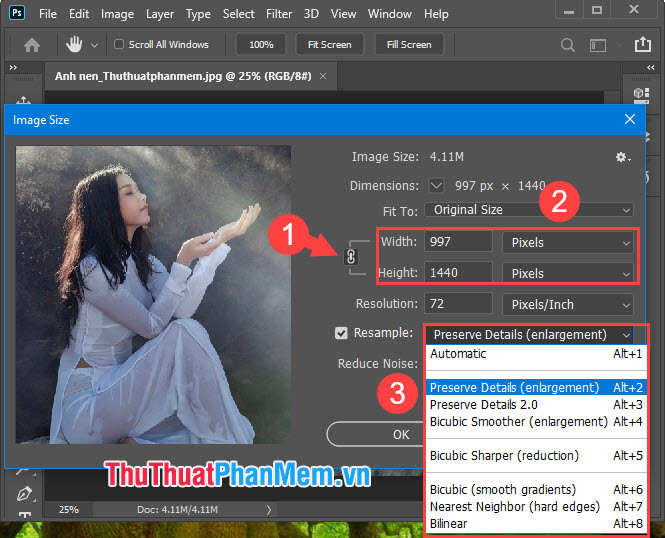
Step 1: You open the image in Photoshop. Next, go to Image menu (1) => Image Size . (2) .

Step 2: To edit the image size freely, click the chain icon (1) and set the resolution parameters (2) . If you want the image after zoom to be good quality, you choose the features in section (3) :
- Automatic: Automatic selection setting.
- Preserve Details (enlargement): Preserve image details when enlarged
- Preserve Details 2.0: Improved upgrade of the Preserve Details feature.
- Bicubic Smoother (enlargement): Disables sawing (for enlarging images)
- Bicubic Sharper (reduction): Sharpen images (apply when zooming out)
- Bicubic (smooth gradients): Sharpen image details with color gradients
- Nearest Neighbor (hard edges): Sharpen the image when the image details are blurred
- Bilinear: Sharpen photos with a linear method.
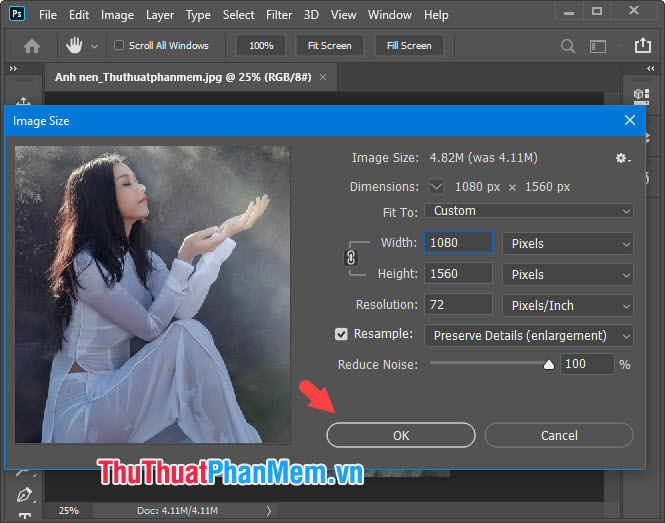
After setting the necessary parameters, you click on OK is done.
3. Scale the image, the layer with the crop tool
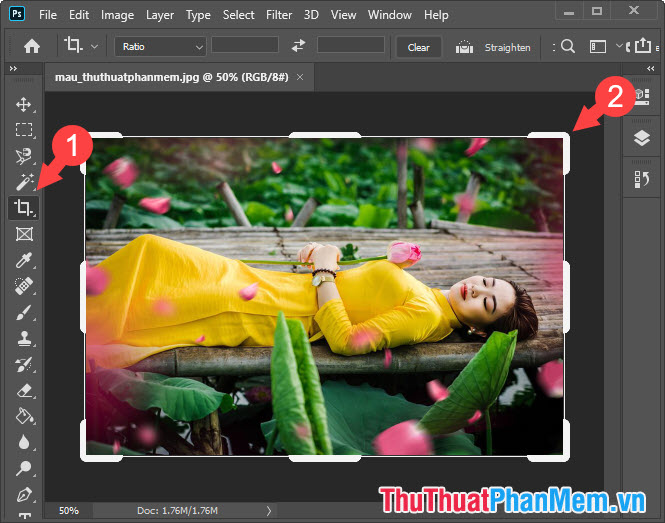
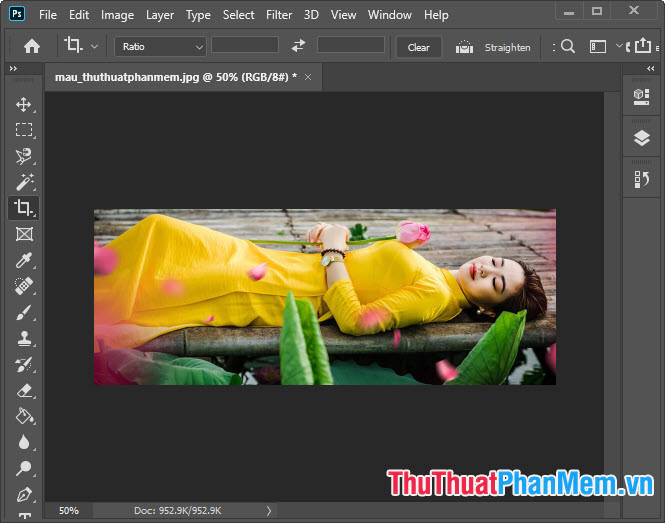
Step 1: Click the Crop tool (1) => click on the image corners (2) to crop the image.
Step 2 : You continue to crop the image and press Enter to apply the cropped image area.
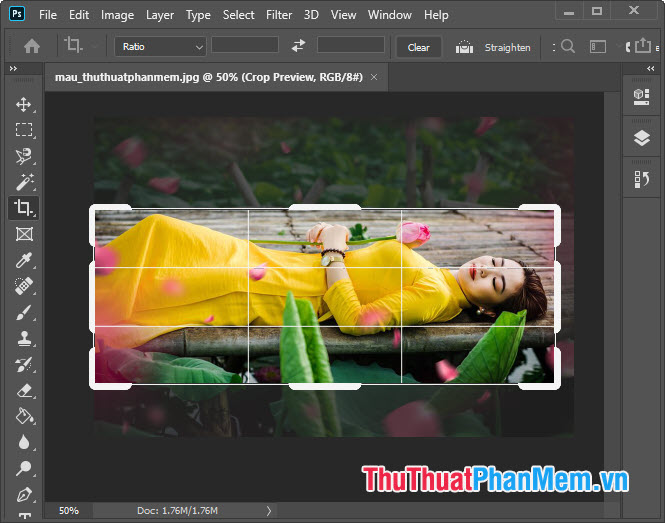
And after the successful crop, you will get the desired image thumbnail.
With the share about scale layer and scale image in Photoshop, readers can easily edit and trim images as desired. Good luck!
Was this article helpful?
Your feedback helps us improve.
Related Articles
 How to rotate a layer in Photoshop2 minutes read
 Remove bad details from photos with Adobe Photoshop5 minutes read
 How to Unlock Layers in Photoshop5 minutes read
 Basic operations on layers in Photoshop3 minutes read
 How to use Photoshop CS5 - Part 3: Introducing Layers6 minutes read
 How to use Photoshop CS5 - Part 10: Use Layer Mask and Vector Mask to delete the background image4 minutes read
Reader Comments 0
Sign in with email or Google to join the discussion.