Remove bad details from photos with Adobe Photoshop
In the following article, we will introduce and guide you to some basic steps to correct, delete unwanted components in any image with Adobe's Photoshop program ...
TipsMake.com - In the following article, we will introduce and guide you to some basic steps to correct, delete unwanted components in any photo with Photoshop program. Adobe . In fact, it is difficult to have a comprehensive plan that can help us recover the lost information and data after the image is processed and saved as JPG format. However, with a bit of Photoshop tips and support (similarly to Gimp), we can overcome this problem.
With Adobe Photoshop:

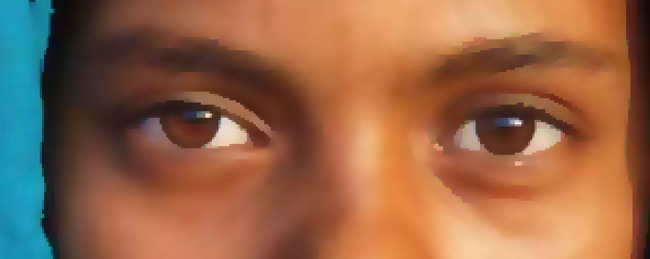
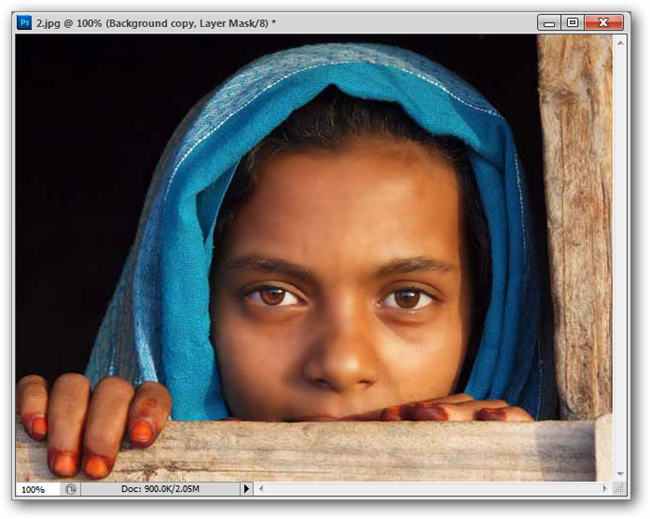
JPG is one of the most popular image formats today, but the lack of filetype support can make the picture a mess. Please zoom in and take a closer look at the photo above:
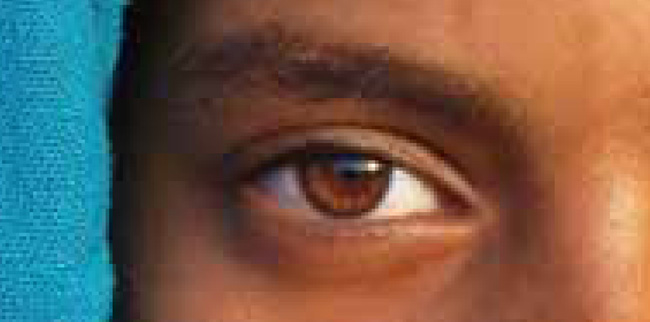
Clearly, we can easily see that every small piece of the image is visible, especially around the eyes. Follow some steps below to reduce this phenomenon.
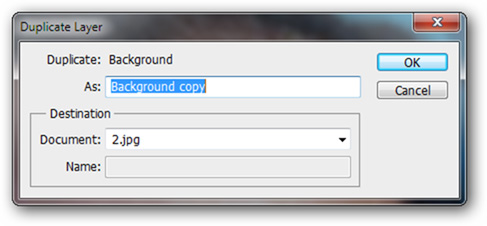
First, create a copy of the background image - Background , right click on the Background layer and select Duplicate Layer:
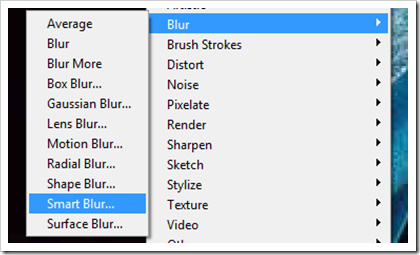
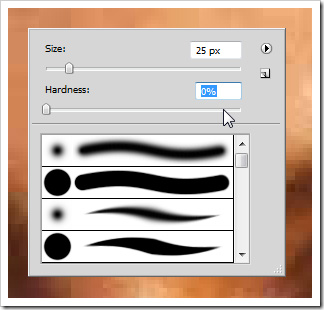
On the new layer , go to Filter> Blur> Smart Blur , and for Gimp , select Selective Gaussian Blur with the parameters of radius and Threshold :
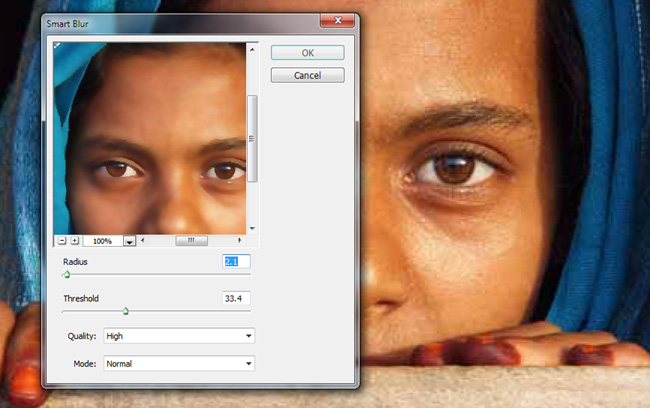
This setting works quite well with JPG images, if there are many extra details on the image, increasing the index of the Radius option and higher Threshold , the Quality section should set to High :

Depending on the Photoshop filter set, the results will be different. But it seems that the picture has not really been as natural as it used to be, but in the next section we will see how to improve and fix what remains on the image.
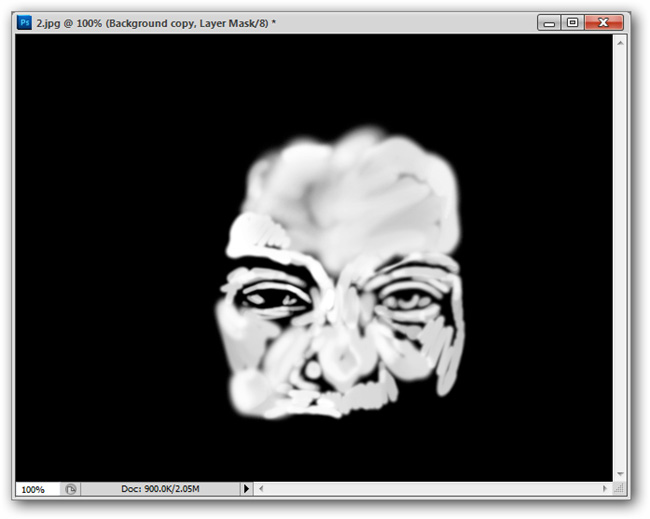
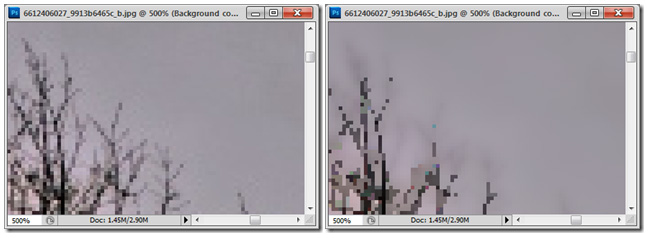
Convert corresponding Smart Blur into images:
With the screenshot above, we can easily recognize many of the problems that exist here. The details are too rough, many angles, colors overlap .
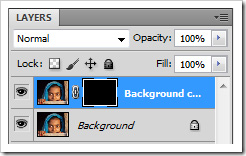
Create a new Layer Mask on the Smart Blur layer , and this layer will cover all the layers above the original JPG image.
Select the Brush tool and fill the Foreground color with white, set the Brush 's hardness to 0% initially, and the Size parameter option to fit the image.

Fill the parts of the image that we need to reduce the rough, angular details. Be careful with the parts around your eyes, use the Undo function many times until you get the results you want.
 Continue painting until the Smart Blur layer appears again
Smart Blur layer selection will allow users to retain the details, important components of the original image layer through distortion, change JPG, while eliminating unnecessary and rough details.
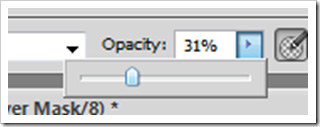
Depending on the specific situation, you should change the Opacity parameter to bring more obvious effect, besides, you can keep some details from the original JPG layer.
No need to perform too many complicated operations, we have seen remarkable effect on the photo at this time.
At this point, we only allow Smart blur layer to display on a part of the face, above is the Layer Mask layer . The white part is what we painted with white - the Brush in the previous step.
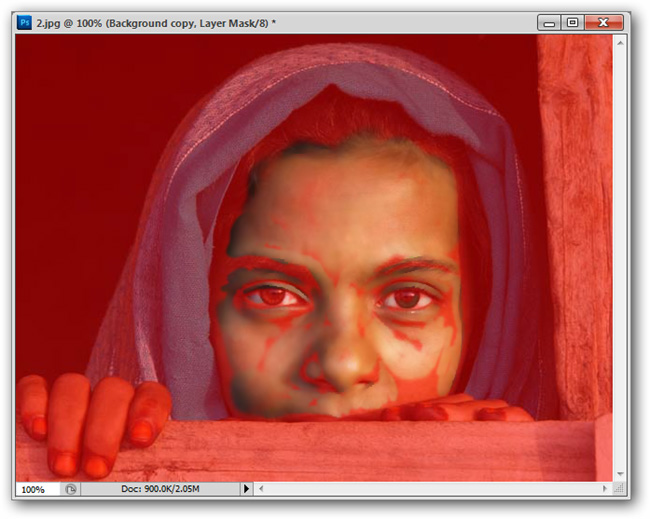
Above is the overlay, with the red part corresponding to the Smart Blur layer locked.
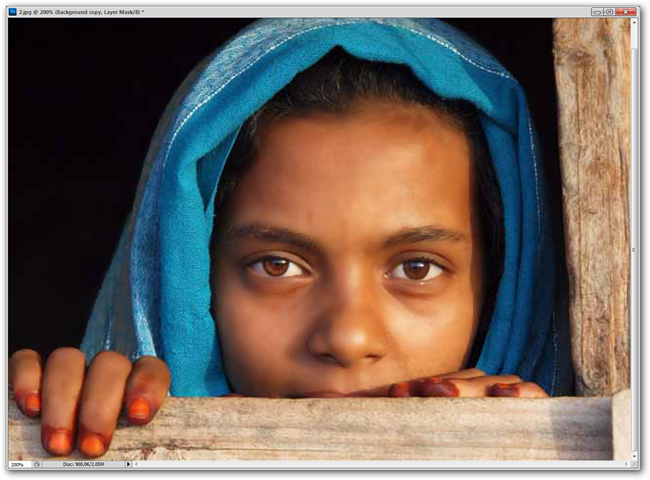
With some simple steps like above, we were able to make a difference to the image, still retaining the important details that have almost no effect on the surrounding components.
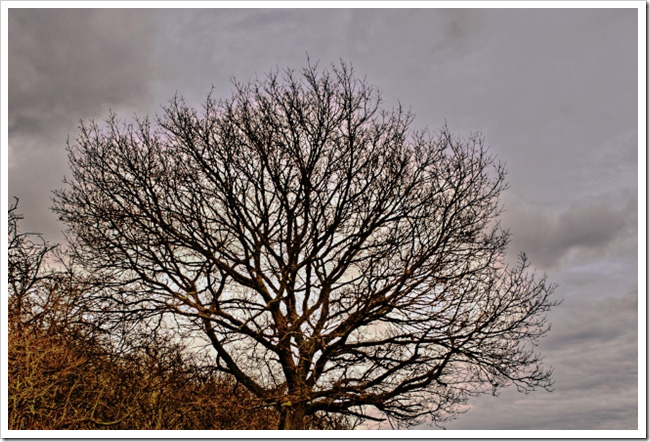
Go to the next example, when you have an outdoor landscape picture (for example, the image above), the JPG format often produces distorted details, the texture changes a lot compared to the original photo. .
The following way will be extremely useful if our image consists of the sky and small details attached, such as clouds, branches .
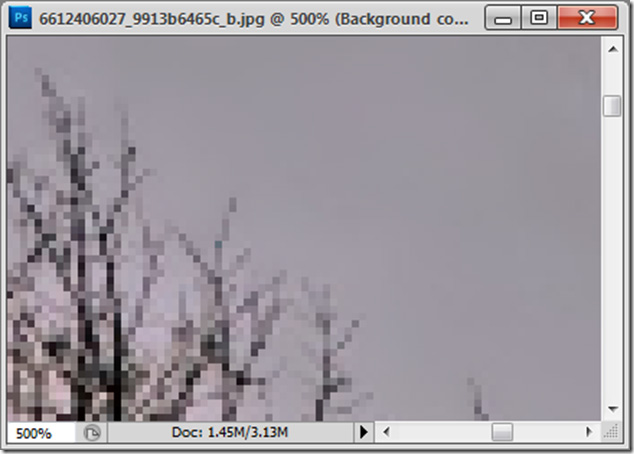
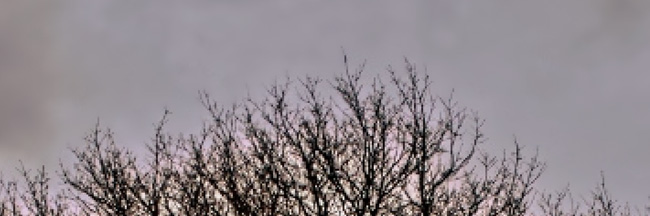
In this zoom mode, we can easily combine the smart blur layer with the details in the original JPG image. Still looking at the specifics of the branches, the sky became smoother, and the surrounding obstacles were greatly reduced.
Good luck!
- Use Photoshop Mix to delete details in the image
- How to use Photoshop Fix delete excess details in photos
- How to delete tattoos in Photoshop
- Adobe launches AI assistant for Photoshop, editing photos with natural commands.
- Remove objects in photos with Photoshop's new AI-powered Remove Tool
- How to remove stains on a shirt in Photoshop
- How to blur photos using Adobe Photoshop Fix Android
- Steps to delete selections in Photoshop are very easy and effective
- Link download Adobe Photoshop CC
- How to hide - show menu items in Adobe Photoshop
- Free software that can replace Photoshop
- 15 common problems in Photoshop and basic remedies
- Instructions for using Photoshop CS5 to edit photos in full set
- How to rotate 'brushes' in Photoshop in just 5 seconds with this tip
- How to design a website in Photoshop (Part 1): Create a theme for the craft shop
- How to design a website in Photoshop (Part 2): Create a Landing page for travel websites
- Do you want to learn Adobe Photoshop tips within 1 minute? Take a look at these tutorial videos
- 3 tips to improve low-resolution image quality
- Instructions for using Photoshop for newbies
- How to use Photoshop CS5 - Part 26: Create a lightning effect
-
 How to create professional shadow effects in Photoshop
-
How to sharpen images using Photoshop
-
Photoshop CS6: How to create abstract geometric shapes
-
How to create stunning 3D pop-out effects in Photoshop
-
How to turn an image into a pencil sketch in Photoshop
-
How to Create a Monochrome Color Effect in Photoshop
 How to create professional shadow effects in Photoshop
 How to sharpen images using Photoshop
 Photoshop CS6: How to create abstract geometric shapes
 How to create stunning 3D pop-out effects in Photoshop
 How to turn an image into a pencil sketch in Photoshop
 How to Create a Monochrome Color Effect in Photoshop
-
 Free Tools
-
Application
-
Web Email
-
Website - Blog
-
Web browser
-
Support Download - Upload
-
Software conversion
-
Social Network
-
Simulator software
-
Online payment
-
Office information
-
Music Software
-
Map and Positioning
-
Installation - Uninstall
-
Graphic design
-
Free - Discount
-
Email reader
-
Edit video
-
Edit photo
-
Compress and Decompress
-
Chat, Text, Call
-
Archive - Share
-
-
System
-
Mac OS X
-
Hardware
-
Game
-
Tech info
-
Technology
-
Science
-
Life
-
Electric
-
Program
-
Mobile