Table of Contents
This guide explains how to create Beautiful Text Borders in Photoshop, with clear steps, practical tips, and important checks before you begin.

Step 1: You proceed to open the image and select the Text tool to write text.
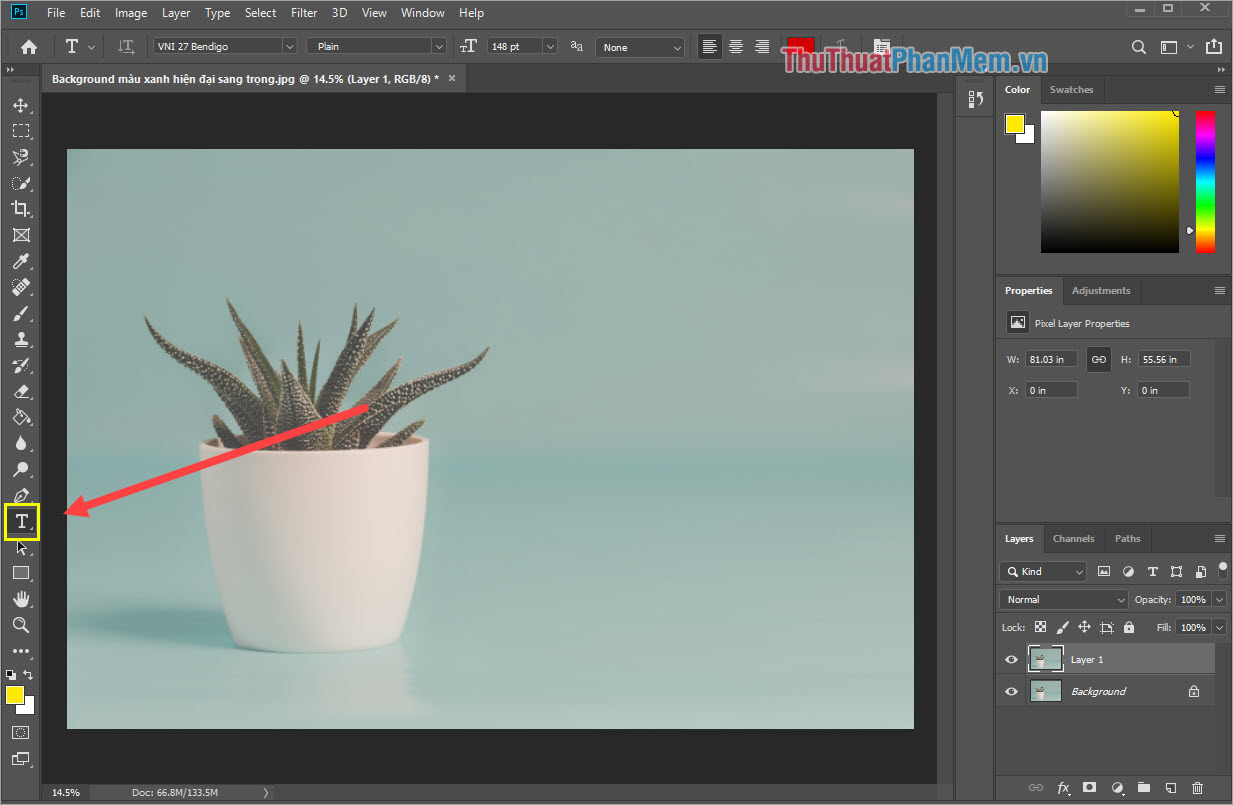
Step 2: After you finish writing the text, select Layer Text to edit the text border effect. Next you select the FX tool (Effects) .

Step 3: The FX card will display a lot of different options, you choose Blending Options .

Step 4: You choose the Stroke tab in Blending Options. here are 02 parts:
1. Structure:
- Size: Size
- Position: Mode to create borders (from outside to inside from inside)
- Bend Mode: Blend mode
- Opacity: Darkness
2. Fill Type: Choose the color for the border.
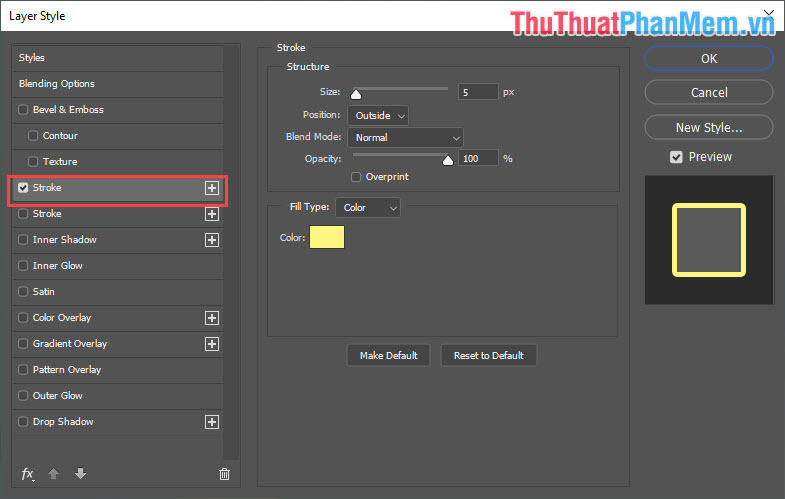
After setup is complete, click OK to see the results.
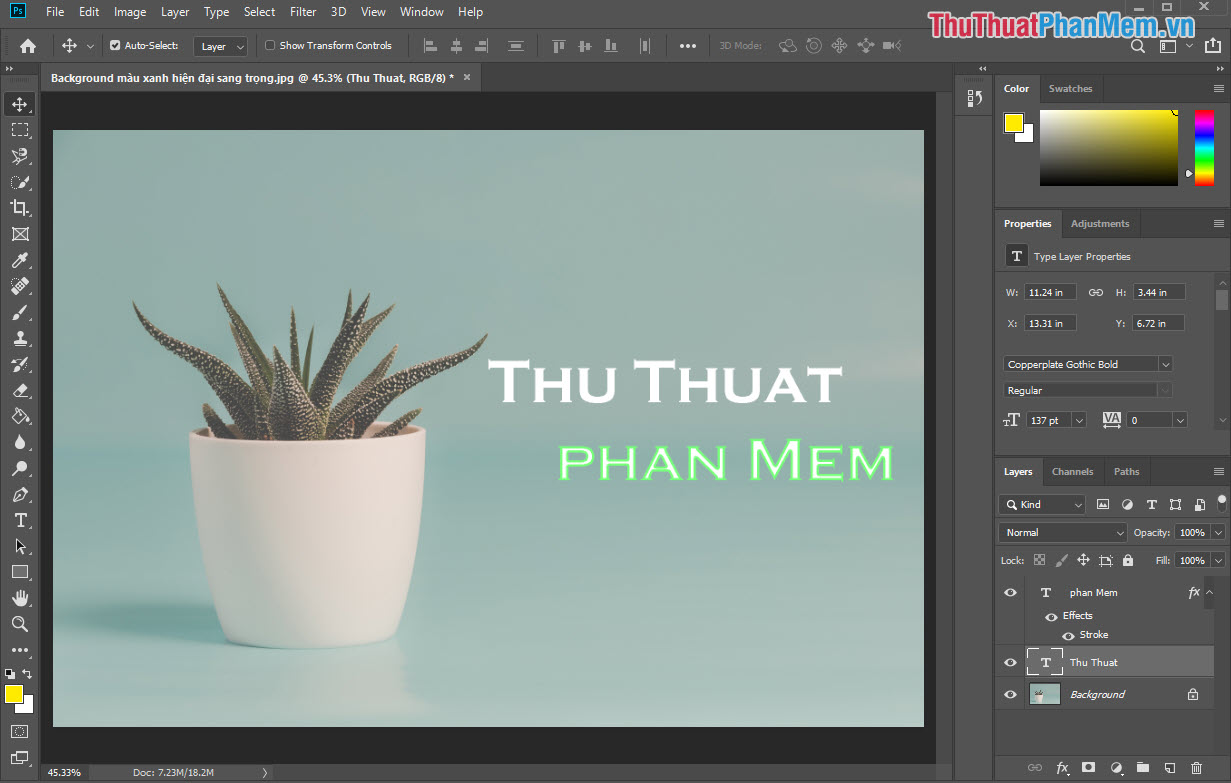
You proceed to do the same with the remaining Text Layers that you want to create borders for the text.
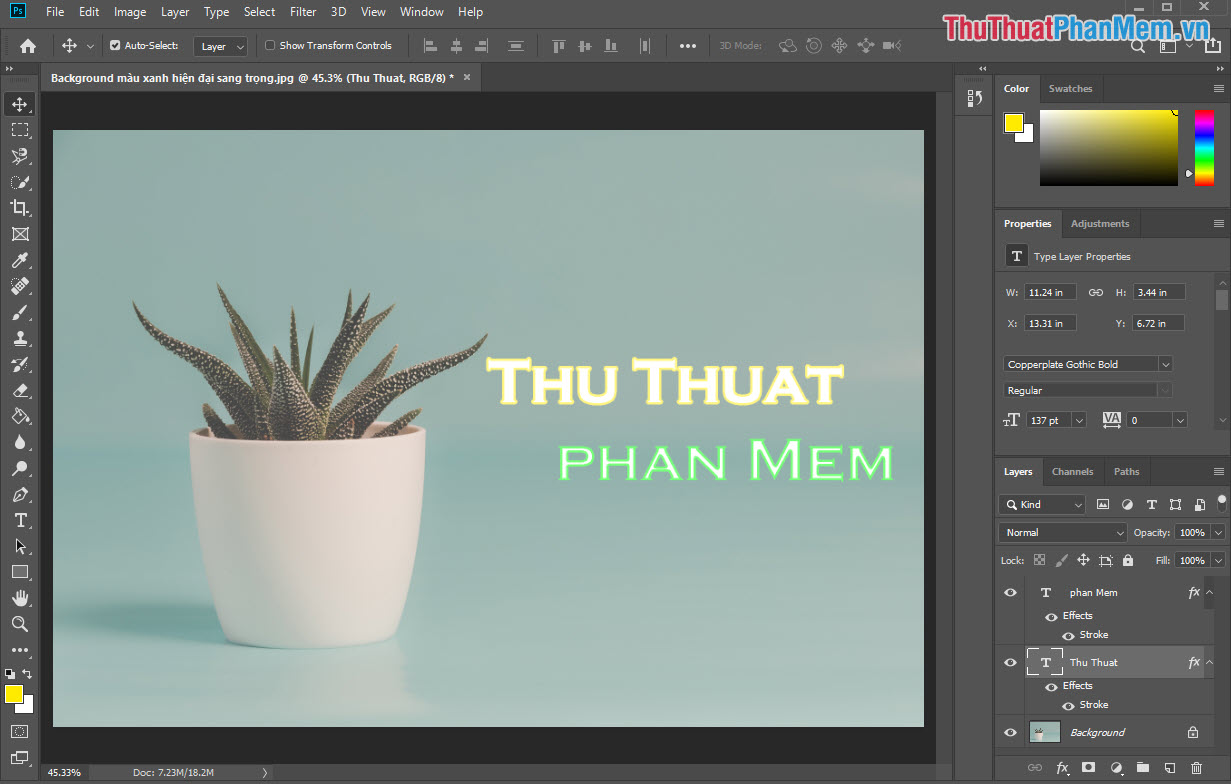
Step 5: If you want to turn off the border effect to check, then click on the Stroke line (The eye will disappear). At this time the text border effect will be turned off.
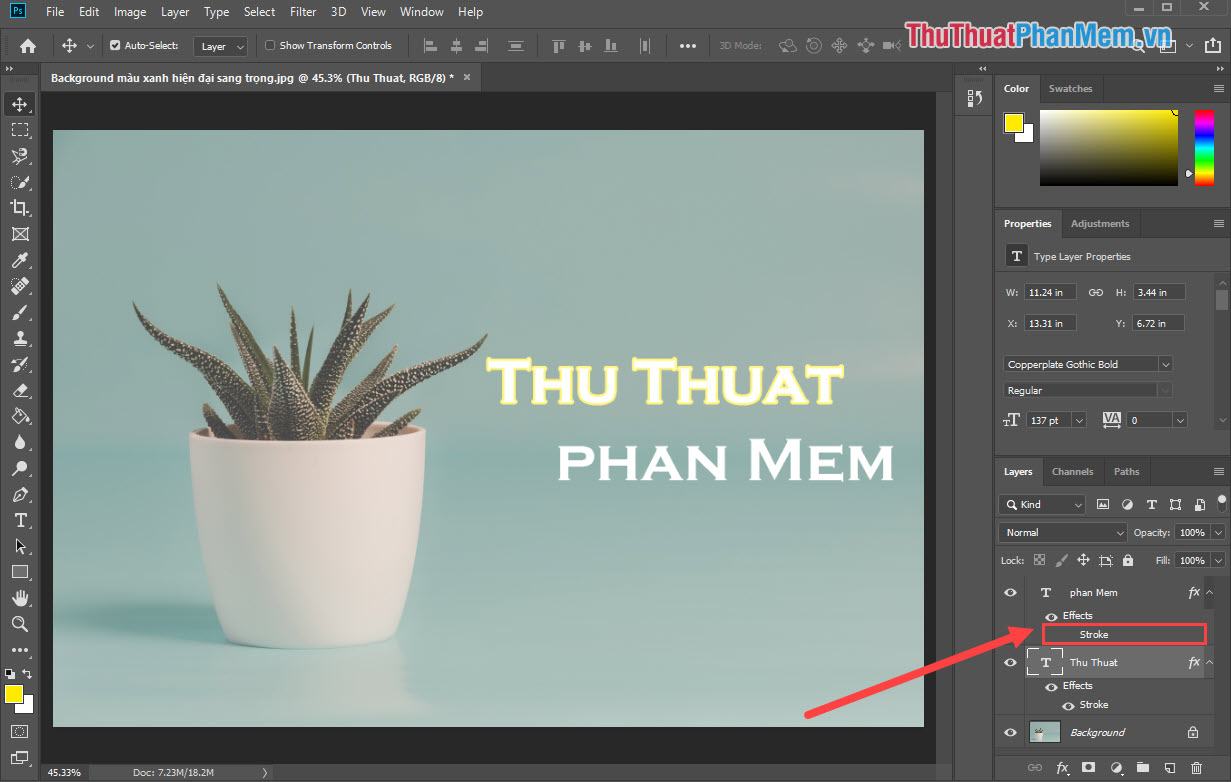
In this article, the Software Tips guide you how to create text borders in Photoshop quickly and beautifully. Have a nice day!
FAQ
What should I know about Create Beautiful Text Borders in Photoshop?
Focus on the key features, requirements, limitations, and practical use cases explained in this guide.
How do I get the best results with Create Beautiful Text Borders in Photoshop?
Follow the recommended steps, use current software or information, confirm compatibility, and review settings before major changes.
Are there any risks or limitations?
Potential limitations depend on compatibility, data quality, cost, privacy, support, and how the product or method is used.
Related Articles
 4 Steps to Create Beautiful Text Borders in Photoshop7 minutes read
 How to Create Borders in Photoshop4 minutes read
 How to Create Text Borders in Photoshop4 minutes read
 Create Beautiful Border Borders in Word3 minutes read
 Create Borders and Fill the Background for Text in Word3 minutes read
 How to Create a Blur Border in a Photoshop Image3 minutes read
Reader Comments 0
Sign in with email or Google to join the discussion.