Create Master Document in Word 2010 from many Word files
Have you ever edited a Word document that included many pages? If so, everyone would easily realize that Word manages such types of documents not really effective
Table of Contents
TipsMake.com - Have you ever edited a Word document that included many pages? If so, everyone probably recognizes that Word manages such types of documents not really effective, so the usual way to overcome this situation is to split large text files into small files. different. But if so, how can we ensure that they are numbered correctly, the contents of the table and index entries are not 'broken'? In the following article, we will introduce you to a nice feature of Word to apply in such cases, Master Document - able to combine many small Word text files into 1 file. only.
The Master Document concept here can be understood simply as a Word file containing links to other Word components and files - also known as subdocument . The entire contents of the subdocument will not be inserted inside the Master Document file, so that we can easily perform other operations such as editing, deleting, adding or removing information on separate subdocument files. And any changes will immediately be updated to the Master Document file automatically. In the case of many people working on a single text file, the Master Document will allow users to separate different parts of the document individually.

Create Master Document from Scratch:
If you start creating a completely new Master Document file, you can create it from Scratch first. To start, create a new Word file, save it with an arbitrary name. Then, select the View tab and click Outline in the Document Views section :

Start typing the content for the heading in the outline form, using the Level drop-down list, pouring green for bulleted items in the Outline Tools section of the Outlining tag:

After completing this heading, click Show Document in the Master Document section of Outlining :

At this point, the program will display more options in the Master Document section of the Outlining tab, select the entire outline in the text and click Create :

Click Create around each individual text section, then save the Master Document file one more time at this time:
Then, each part of that particular text will be made into the corresponding files (as shown below). The name in the heading heading of those sections will be placed for each file subdocument:

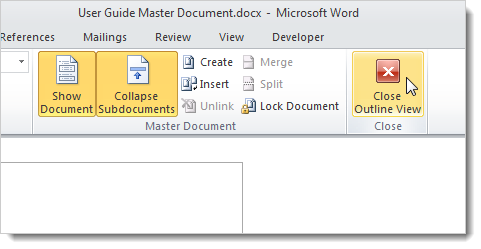
To switch to the previous View mode, such as the Print Layout , click the Close Outline View button in the Close section of the Outlining tab:
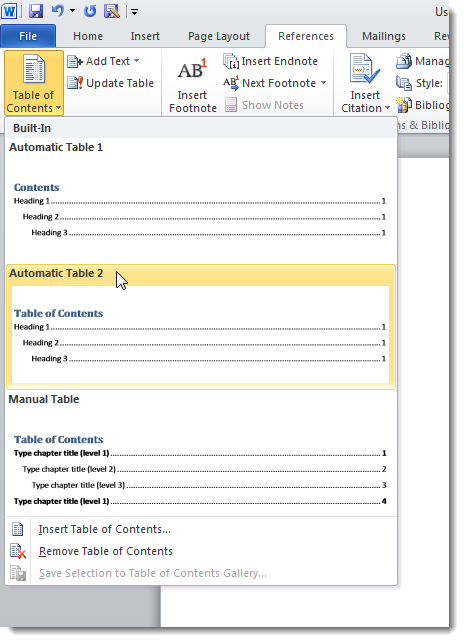
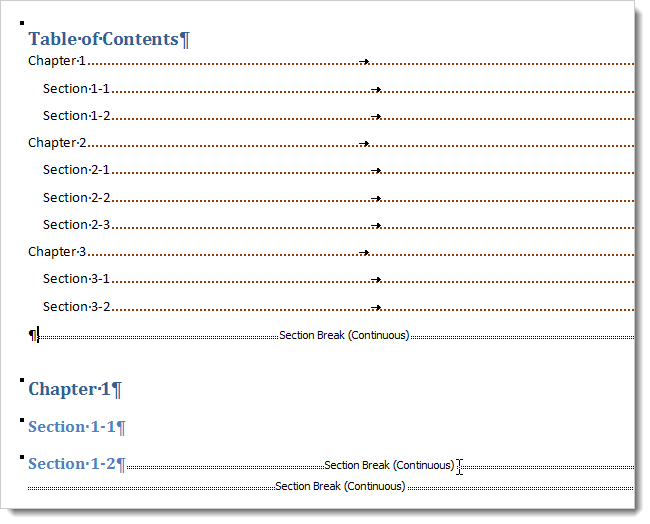
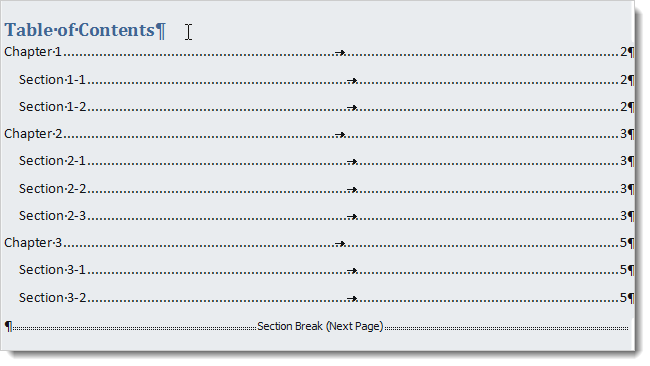
If you want to create a table of contents in Master Document, place the cursor at the beginning of the text and open the References> Table of Contents tab, then select 1 of the Automatic Table options to insert any table format into the position of the cursor:
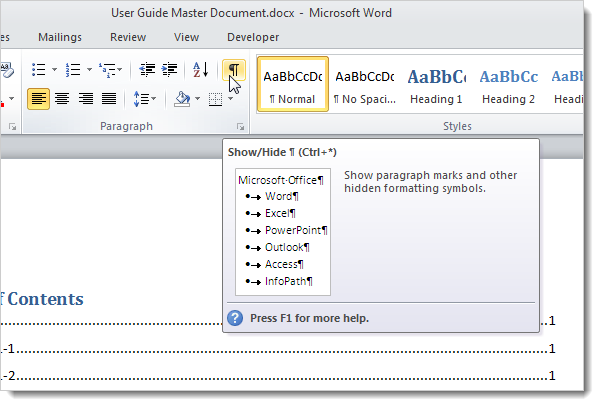
To see the Section Break section inserted by Word when creating the subdocument, open the Home tab and press the button with the icon shown below:
Word displays exactly the Setion Break segments and formats
Note that when you create the Master Document in this way, Word automatically inserts Section Break before and after each subdocument is created. This also means that there will be no paging in the entire document, but you can easily change and edit the Section Break:
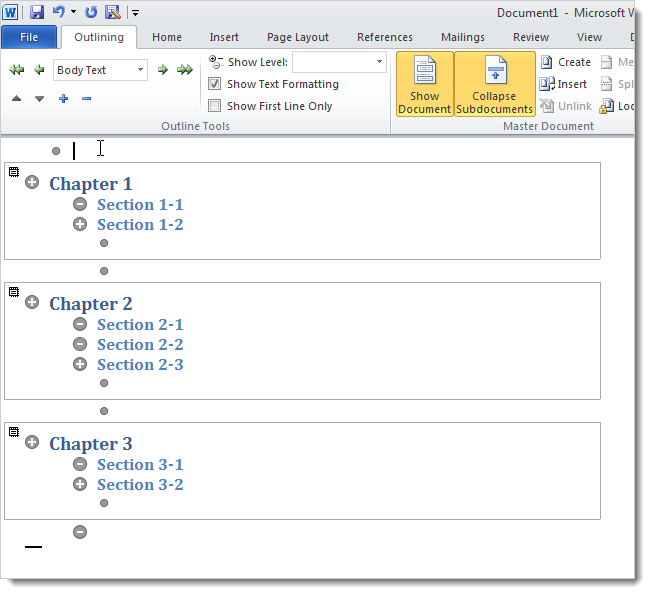
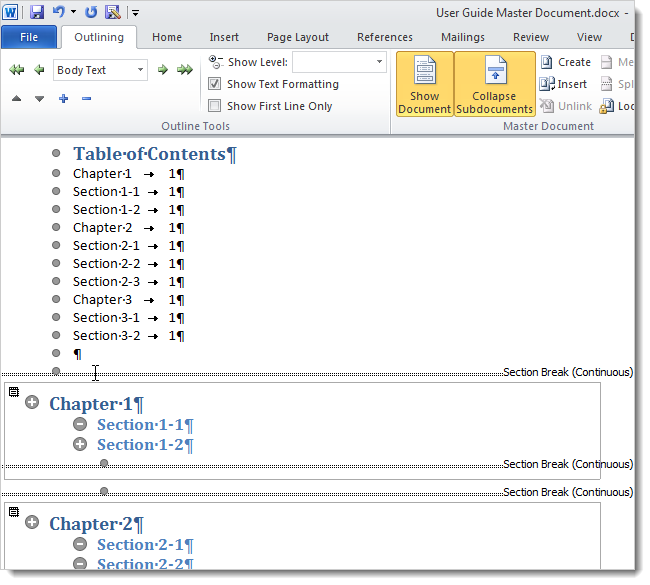
The image below is an overview of the main text in outline mode with the subdocument sections expanded:
Create Master Document from existing Word files:
In the next part of the article, we will create a Master Document file in a basic way, create a new Master file, then insert existing text files into a subdocument.
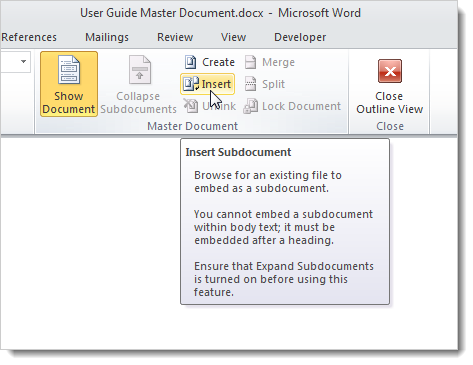
To do this, create a new file and save it as you did above. Then, open the View tab and click Outline in Document Views . The Outlining tag will be usable at this step, click Show Document in Master Document to activate additional options. To insert a subdocument, click Insert :
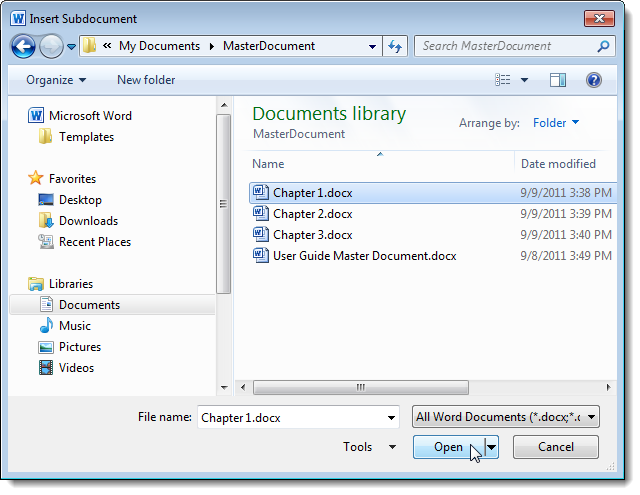
The main control panel of Insert Subdocument displays, you point the path to the folder containing the text file to insert, select the first file and click Open (should place these subdocument files with 1 folder and name arranged in order for ease of use):
In case the system displays a notice that Style is available in both Master Document and subdocument , select Yes to All . This will retain the entire Style in the subdocument to match Master Document:

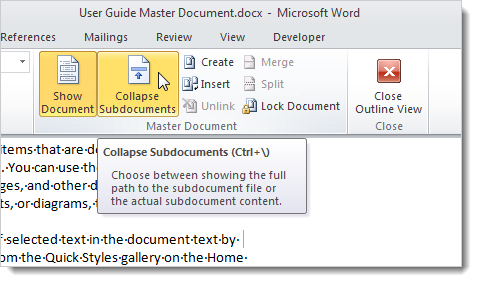
Then, repeat this step for each file subdocument you want to insert into the main text. When done, we can collapse the subdocument sections if desired, by pressing the Collapse Subdocuments button in the Master Document section of the Outlining tab:
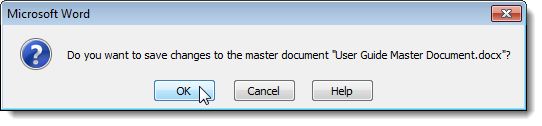
However, we must save the changes in the previous subdocument files, when Word displays the bulletin board as shown below, please press the OK button:
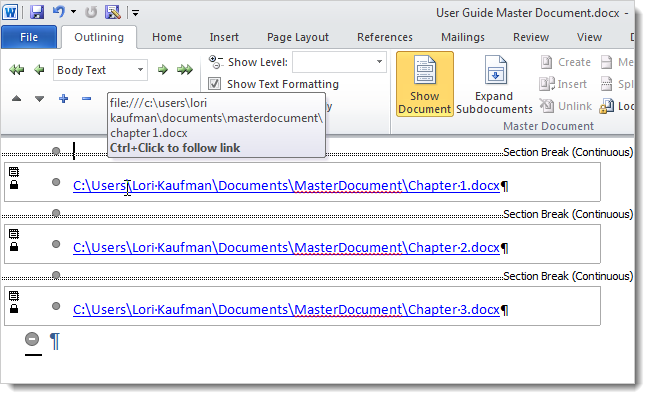
One point to note here is that the path of each file subdocument will be fully displayed. To open the subdocument for editing, we can double-click the text icon above the left corner of the subdocument, or Ctrl + click the corresponding direct link of the file. When you import the existing Word file into the Master Document file, Word automatically inserts Section Break before and after each subdocument:
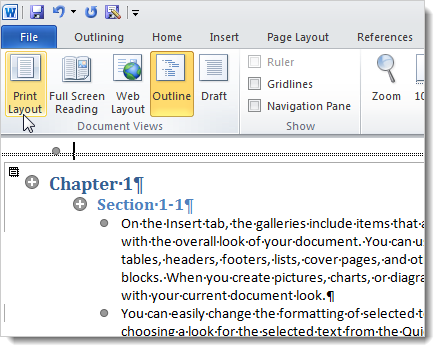
To view all non-outline documents, click View> Print Layout or select other view types here:
Besides, you can create more tables similar to the ones mentioned above:
And the last thing to do is edit, format, add or remove information in the Header and Footer sections .
>>> Video reference:
Hopefully, with the above information, you will have some tips in the process of using, formatting and managing documents effectively. Good luck!
Was this article helpful?
Your feedback helps us improve.
Related Articles
 Create a new Word file, open the file in Word 20135 minutes read
 How to Insert a Hyperlink in Microsoft Word6 minutes read
 Instructions for attaching files in Word3 minutes read
 Create a new document in Word2 minutes read
 No need to use software, here are 3 ways to get images from Word files fastest4 minutes read
 How to Create and Apply Master Page in an Adobe FrameMaker Document5 minutes read
Reader Comments 0
Sign in with email or Google to join the discussion.