Squeeze squares in Word and print Word cups
Network administration - You can turn the white paper in Word into grid paper but can't print it in the usual way. That's a quite serious barrier. However, retouching in Word is very useful when you need to get the alignment of images, objects or text.
Today TipsMake.com will guide you how to create square cups in Word, apply to Word from 2003, 2007, 2010, 2013, Word 2016 and also how to print cells in Word, of course it will be a little more difficult. with regular Word printing.
Reticle in Word 2013, 2016

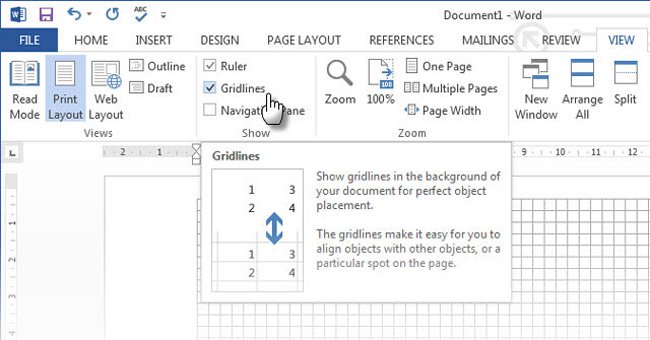
To plot cells in Word 2013, 2016, on the Ribbon, select View, check the Gridlines option to view in grid mode.
How to create cells in Word 2007, 2010

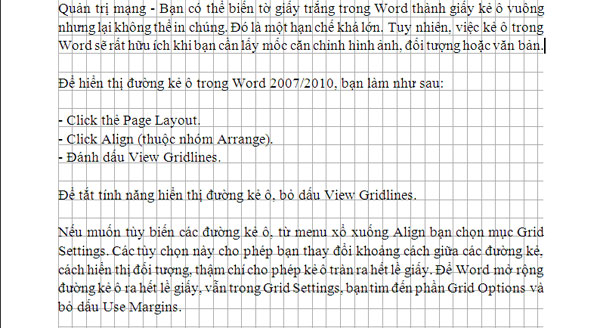
To display the grid line in Word 2007/2010, do the following:
- Click the Page Layout tab.
- Click Align ( Arrange group).
- Check View Gridlines .
To turn off the display of grid lines, uncheck View Gridlines .
If you want to customize the grid lines, from the Align drop-down menu, select the Grid Settings item. These options allow you to change the distance between the lines, how the object is displayed, and even allow the cell to spill out the edge of the paper. In order for Word to expand the grid line to the end of the paper margins, still in Grid Settings , navigate to the Grid Options section and uncheck the Use Margins mark.

Create square cups in Word 2003
To display the grid line in Word 2003, do the following:
- On the Drawing toolbar, click Draw .
- Click Grid .
- Mark Display Gridlines .
How to print cells in Word
To print the plotter in Word, follow these instructions:
- Word has View in Gridlines mode
- Select One Page in View , and you should now see the entire Word document. Press Alt and Print Screen keys on the keyboard at the same time to copy the Word document on the screen.
- Open Paint and Ctrl + V to paste the image taken with the Word document with the line. Click Select on the menu strip, drag to create a rectangle to select the part you want to print and press Crop .
- If the text on the document is too small, fuzzy after doing it, select Full Screen view , 100% Zoom , click Print Screen, Esc , then Ctrl + V paste the image into Paint . This only captures part of the document. Then, drag Word's scroll bar down, repeat the steps just to take a picture of the missing part. In Paint, click the tiny square at the bottom edge of the previously pasted image to create more space, Ctrl + V to paste the captured image into it. Use Select to draw a rectangle around the image you just pasted, drag the mouse up to match the image above, so that it looks like a Word page. Now Select again, select the entire Word page you want to print, then Crop.
- After you have pasted the image and got a complete Word page in Paint, just press Print (Ctrl + P) to print as usual.
It will be quite laborious if the document you need to print has many pages. But because MS Word does not support the print feature, there is only one way to do it manually.
You may want to see:
- Summary of common shortcuts in Microsoft Word
- Create a quick dot (...) line in Microsoft Word