How to move rows and columns in Excel
How to move rows and columns in Excel. When you edit documents on Excel columns and rows it may be during that process that you want to rearrange the order and position of the columns and rows. If you do not know how, you can follow the following method of TipsMake.com..
When you edit documents on Excel columns and rows it may be during that process that you want to rearrange the order and position of the columns and rows. If you do not know how, you can follow the following method of TipsMake.com .

1. How to move columns in Excel
There are two ways to move columns in Excel, with the first one you can use the mouse to move, this method is suitable when the distance you want to move is not too far. The second way you need to use in combination with the keyboard.
1.1 Method 1
First, you need to highlight the column to be moved by hovering over the position at the top of the column then click on the column name, so the entire column will be highlighted.

Then move the mouse to the side of the highlighted column. You need to put the mouse in the position where the mouse will turn into a four-arrows cross.

Click and hold the mouse to the position where you want to move the column.
The blue border shows the position of the data column to be moved. Release the mouse when the appropriate location is reached.

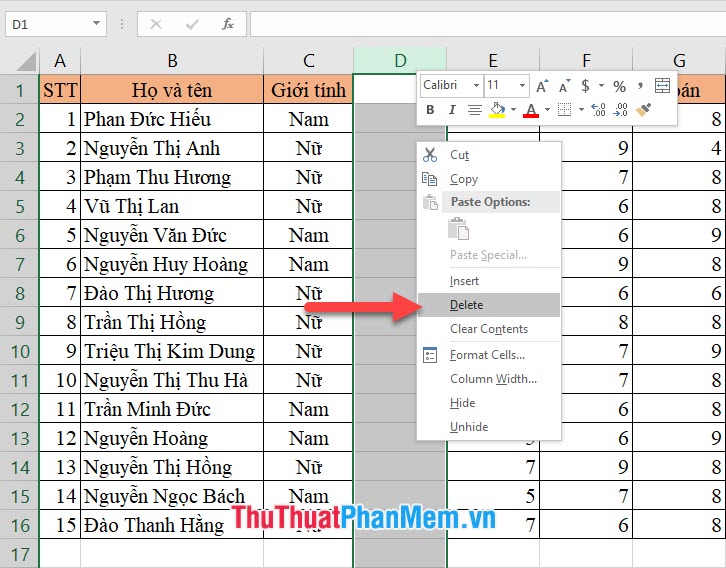
When you move the data to a new location, the position in the old column will leave a space. Now you just need to clear that space. To delete that column space, you just need to black out the whole column by the method guided above.
Then right-click on the highlighted array and select Delete from the menu that appears.
1.2 Method 2
The second way we can use Excel's Cut and Paste function to be able to move columns of data.
First you need to black out the data column you want to move, doing this similar to the instructions mentioned above.
Next, right-click on the highlighted array, select Cut in the options panel that appears. Or you can also use the key combination Ctrl + X to perform the same function.

Next, you highlight the column at the position you want to transfer data to. (Note that if the blacked location you want to move to already has data there, the new column will move to the left of the old data position.)
Right-click on the highlighted array and then select the Insert Cut Cells row in the options panel that appears.

As you will see, the resulting column will be moved to the location you selected.

2. How to move rows in Excel
The method of moving rows in Excel is exactly the same as moving columns in Excel. So we also have two ways to move goods.
2.1 Method 1
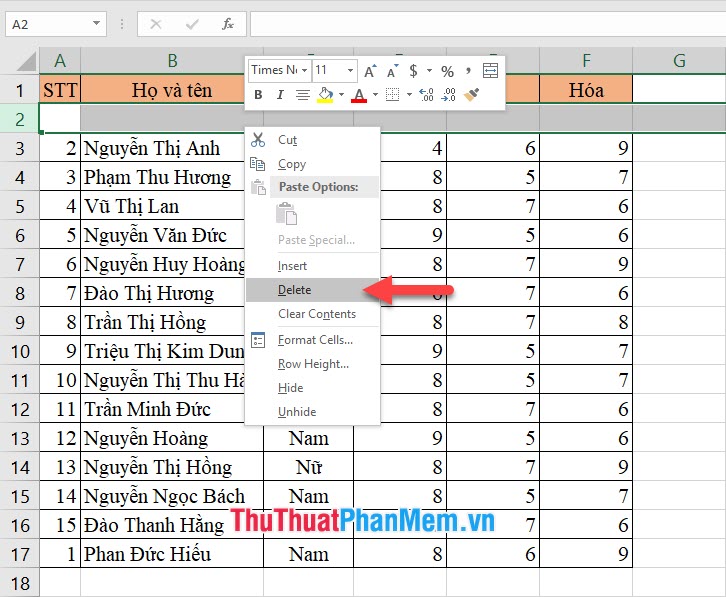
You highlight the rows to move in Excel by moving to the numbered position on the left edge of the Excel interface. Click on that number.

Move the mouse to the upper or lower edge of the highlighted row. Then the mouse pointer will change to form a cross arrow.

You click and drag it to the position you want to move to. The blue box will display the position of the row you just blacked.

As you move the column leaving an empty row out, you need to highlight the row and right-click on the highlighted array and select Delete to delete the extra blank row.
2.2 Method 2
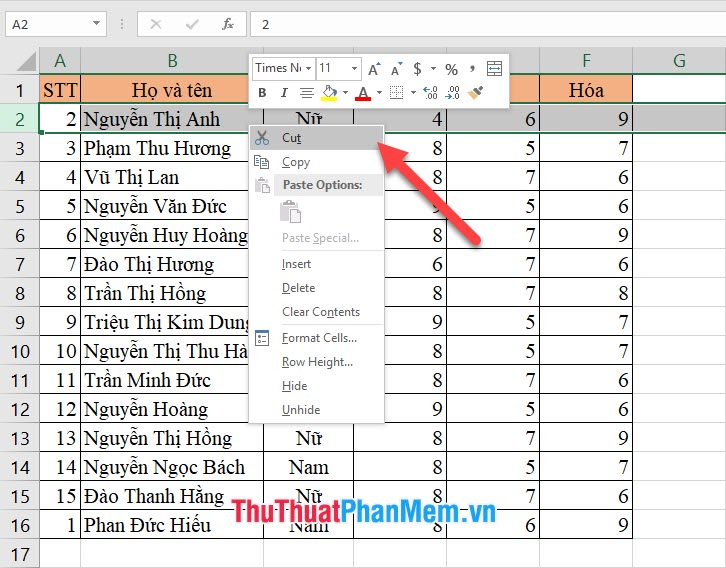
With the second method you also need to black out the entire row to be moved. Then right-click on the highlighted array and select Cut in the menu that appears. Or you can use the key combination Ctrl + X for the same function.
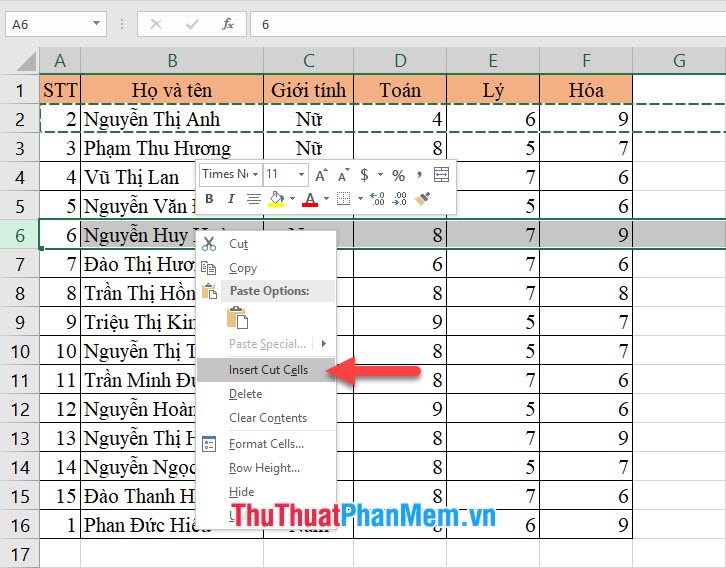
Then, like the column insertion method, you highlight the rows where you want the data to be transferred. (Note that if the blacked location you want to move to already has data there, the new row will be located above the old data position.)
Right-click on the highlighted array and then select the Insert Cut Cells row in the options panel that appears.
The highlighted product will be delivered to the location you selected.

Thanks to everyone for following our article TipsMake.com about moving rows and moving columns in Excel. Hopefully the article has provided sufficient information necessary for you to successfully implement this trick.