Basic tips with Sheet in MS Excel
Instead of using tabs to manage multiple windows as in some applications, MS Excel supports the integration of sheets (spreadsheets) as cards to help you manage them easily. ..
Instead of using tabs (tabs) to manage multiple windows as in some applications, MS Excel supports the integration of Sheets (spreadsheets) as cards to help you easily manage the tables. count and link them together. If you don't like the existing settings of the Sheet, you can customize it according to your preferences and incorporate other basic operations in the process of working with the Sheets.
1. Change the display size of the Sheet card
By default, you will see that the tab displays the following Sheets of small size, so to increase its size makes it easy to see the following steps:
With Windows XP:
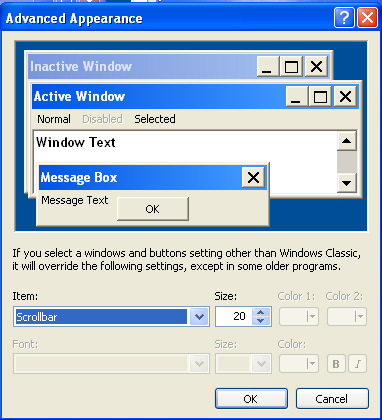
- Right-click on the Desktop screen and select Properties , browse to the Appearance tab, click the Advanced button below, from the Item list, click on Sroobar , change the size in the Size section and OK twice to acknowledge.
With Windows 7:
- Right-click on the Desktop and select Personalize , click the Windows Color item and click on the blue link in Advanced Appearance settings , then follow the same steps as for Windows XP.
2. Determine the number of Sheets displayed by default
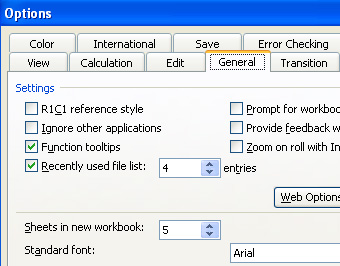
By default the MS Excel window only displays up to 3 Sheets when opening a new work window, and you can easily add or delete a Sheet. However, to change the default number of Sheets displayed, from the Tools menu select Options , browse to the General tab and change the number in the Sheet in new workbook . (With Office 2007, click the Office Button button and select Excel Options , in the Popular section on the left panel, change the number after the Include this many Sheet text option in the When creating new workbooks frame).
3. Change the Sheet color card
As you can see, the Sheet tags all have the same color as the following, the purpose of setting a separate color for each Sheet is so that you can easily classify the spreadsheet. So to change your default color, right click on any Sheet and select Tab Color then select the color and OK .
4. Copy the format of a Sheet
Each Sheet has a different print format before printing, so that you don't need to repeat these formats for another sheet, you can quickly copy it using the following steps:
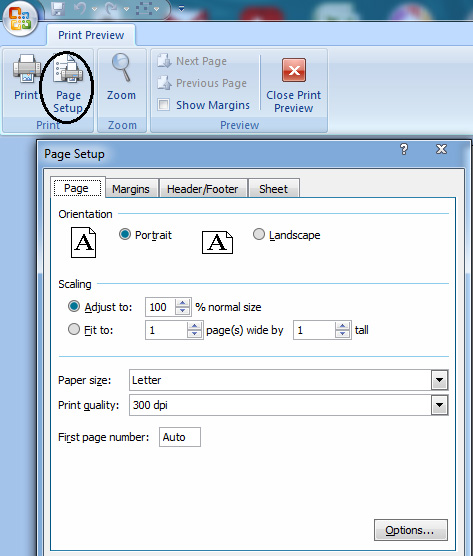
Select a Sheet tab containing the format you want to use for another Sheet, hold down the Ctrl key and click the Sheet tab to update. From the File menu, select Page Settup , click OK to acknowledge. (With Office 2007, select the Print command from the Office Button, in the Print window, click the Preview button, then select the Page Settup icon from the toolbar in the Print Preview window).
5. Hide the workspace in the Sheet
To hide a sheet, click to select it and go to the Format menu, select Sheet > Hide (to show it again, select Unhide ). But in a data spreadsheet, when you need to hide a selected area, do the following: Click the first column or row of the data area to hide, then hold down the mouse while dragging the range of the data area. then right-click and select Hide . To show it again, simply access the Format > Row > Unhide or Format > Column > Unhide commands.