5 tips to use Google Tasks effectively
Google Tasks has made significant strides. It has tried to become more functionally rich by adding new features to the platform. You may have asked yourself how to use Google Tasks effectively or how to use it as a productivity app?
Some tips can definitely help you get more involved in Google Tasks. Let's find out more details through the article below!
1. Add and remove recurring tasks
You may not be familiar with this tip as it is intended for more personal use than professional. Google Tasks allows you to set recurring tasks. To add a repeating task, simply click the Repeat button below the Add Tasks option. A dialog box will appear asking you to add more details.

Add in a simple task like cleaning up the trash, that's something you need to do often. If you edit this action, you will be able to set the date and time before pressing Enter.
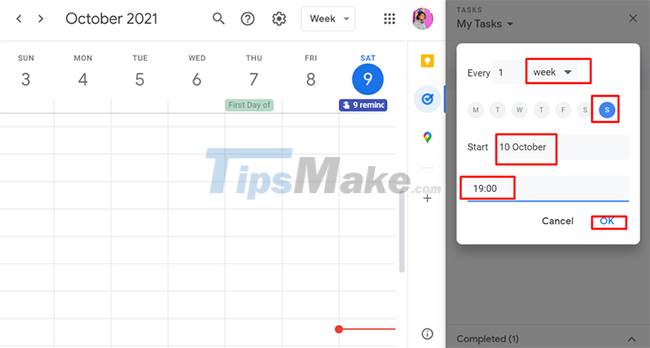
You can start doing this every Sunday night. Now, you can see that there is a repeat feature at the bottom of the page.
Therefore, you can schedule this task to happen every Sunday. You can select multiple options, such as by day, week, month, or year. Here, you want to do it weekly, so you choose Sunday, October 10, so select OK.
Now the task will be there. If you go to My Tasks, your task will appear there, on Sunday, October 10. You'll also see a small icon there. This indicates that it is a repeatable task. By marking it complete, it will disappear from the quest list but will reappear here on Sunday.
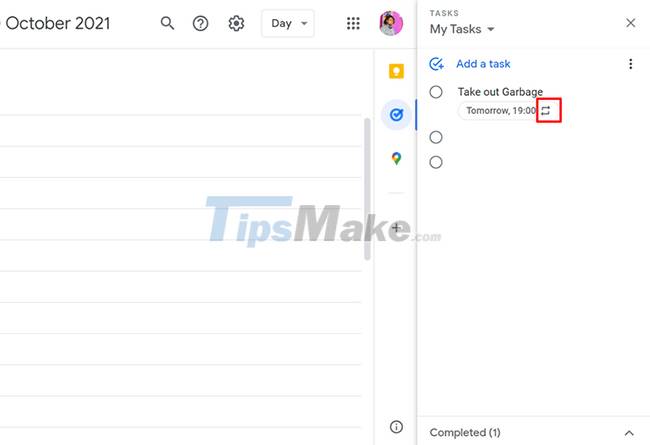
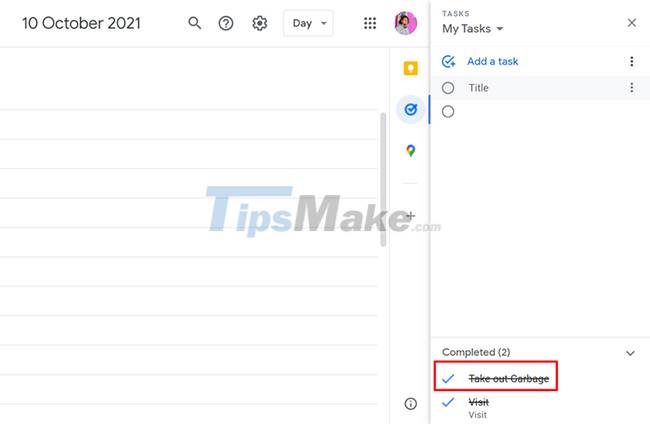
Below you will always find the Completed area. To remove the repeater, go to the Completed section where you can delete future tasks.
2. Add Due Time
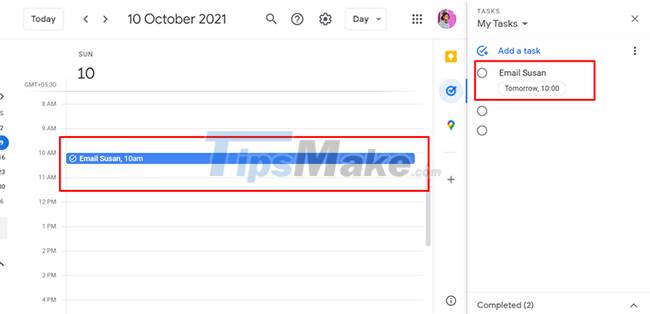
The ability to add a specific due date is also rarely used. Imagine you plan to email Susan in the morning. Simply set up the task for October 8, you need to make sure to do it by noon. You can do this by choosing Set time from the menu. You can enter the date as text or by tapping it, such as 10 am. Next, click OK.
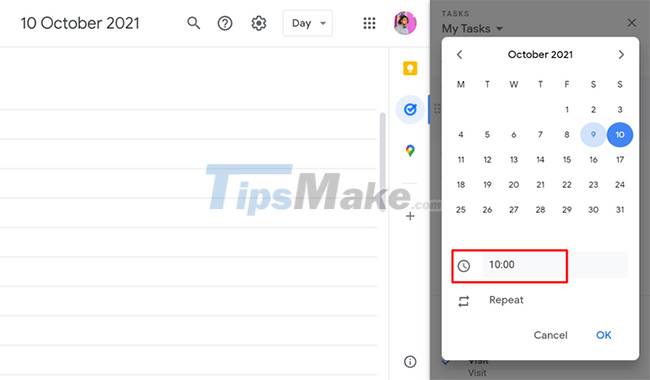
Now, you can see it on the left side in the Tasks bar. Your calendar will also show the task. The Tasks calendar in Google Calendar shows everything with a specific time if enabled. So, in addition to getting a reminder, you'll also see it on your calendar.
3. Create sub-tasks
Typically, you'll manage a project in Google Tasks or a task. The only difference this time is that you will be able to add side quests by clicking on the three-dot menu.
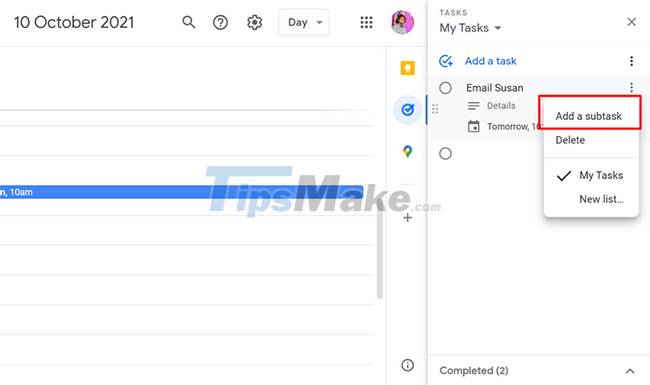
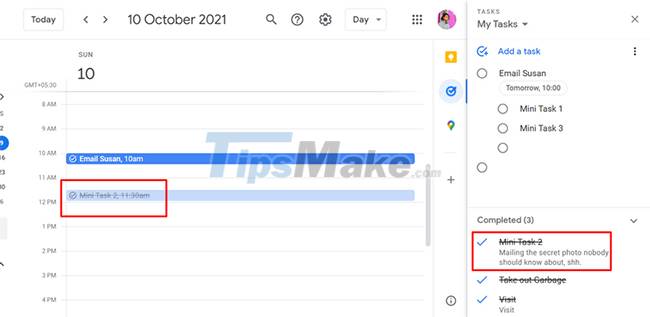
The sub-tasks will appear in the Add date/time option. It will look like a mini-task: Mini Task 1, Mini Task 2 and Mini Task 3. The other tasks you add to your task list will work as part of this mini-project. You can add them there.
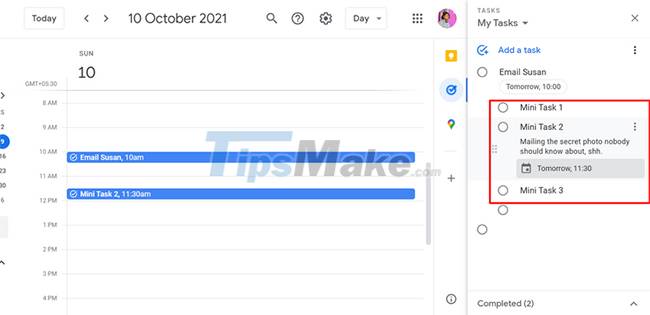
Tasks appear as a separate task when you look at the Tasks side panel. Therefore, you can go to Mini Task and set a specific due date. You can provide more details and specify specifics for this task.
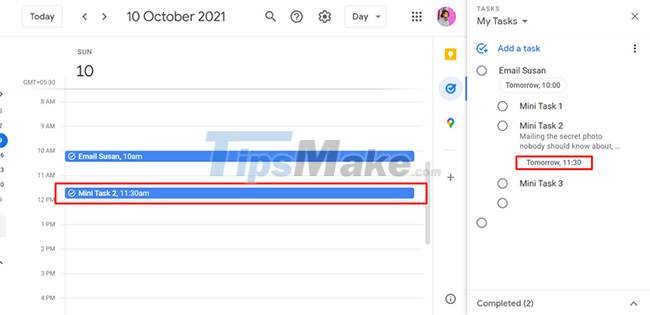
In other words, if you set it on a due date, such as a weekend, it won't separate from other subtasks. Despite the fact that some subtasks don't have a due date, these are subtasks that are still linked together. You can also start bookmarking them when done. Assuming you've completed quest number two first, you can get rid of it first. So you don't have to follow any order.
4. Use multiple lists
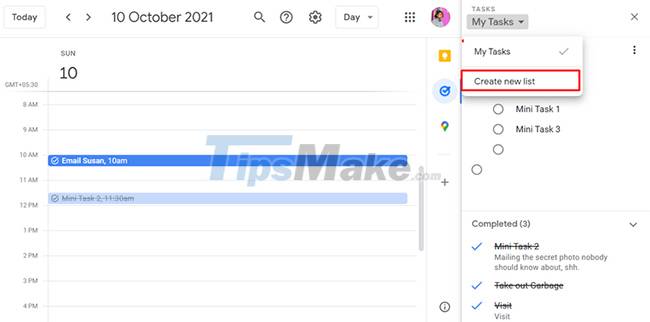
You can create multiple lists in Google Tasks. Google creates a list of My Tasks by default, but you can create other lists as well. To create a new list, simply click the drop-down arrow next to My Tasks and click Create New List.
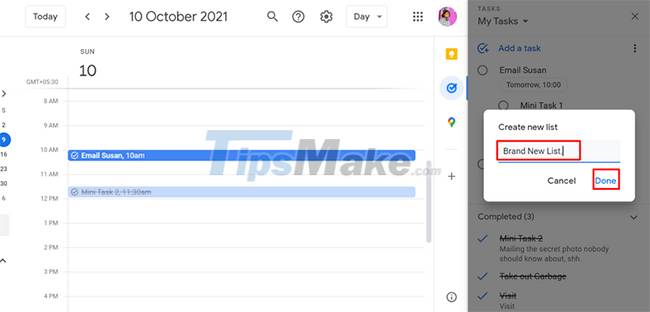
For example, you could call up Brand New List and click Done. You can then separate your personal and work lists.
You can now view the Brand New List. It is currently empty. Feel free to add a new quest to it for other days.
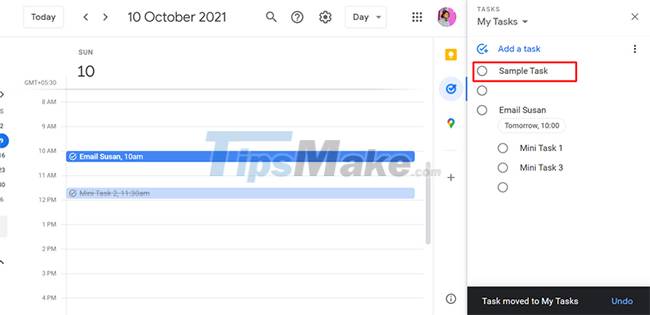
Imagine that you created this quest, but then completely forgot about it. What you want is to add it to My Tasks. Fortunately, everything is quite easy.
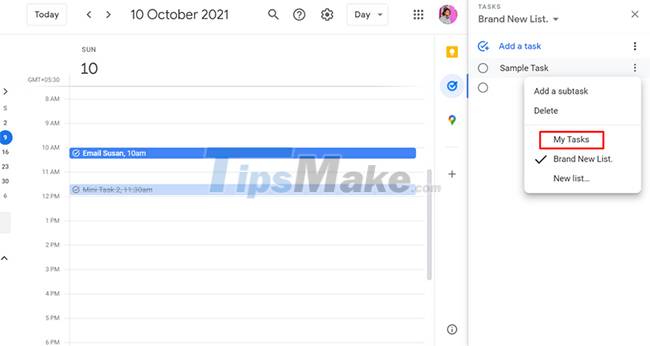
If you go to the three-dot menu, you'll see all your listings. You can select specific lists to transfer your tasks to.
5. Create Tasks from Gmail
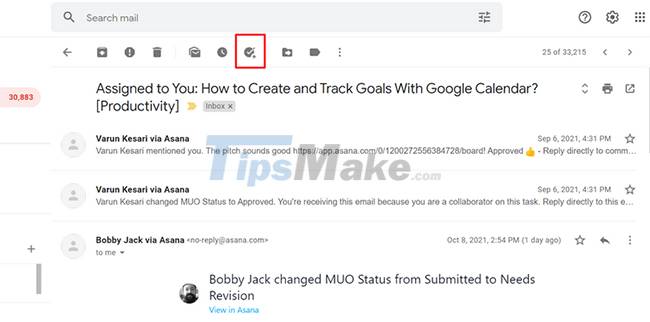
Sometimes you want to turn your Gmail emails into a task. There is a little checkmark icon at the top of each email and you can choose to add it to a task.
The taskbar automatically appears and the email is added to the taskbar as a task. Tasks are also labeled by default. And below Date/Time, the subject line of the email will be used as the title of the task.
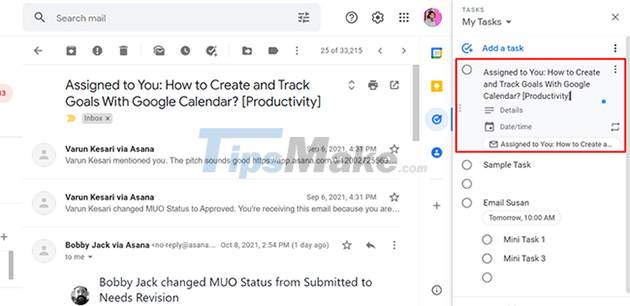
You can then add more details if you want. Of course, you can go here and rename it. The real benefit is that you will be provided with a direct link to this email. So you can go back and refer to it whenever you want.
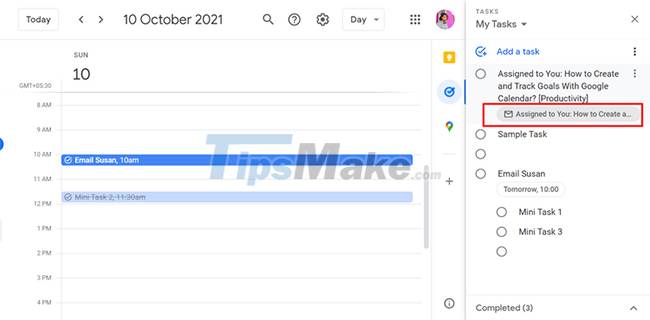
Let's say you come across this on your to-do list and you think, "What's the task in that email?"
On the left side of the screen, simply click the link containing the subject line of the email. This will immediately open the relevant Gmail and email window. You can convert any email into a task by selecting the bookmark button on the email. This is a really powerful tool that saves time.
In addition to being an organizer and to-do list app, Tasks can also function as a productivity app. This app is really great because of the pretty simple and fast features it provides. Alternatively, you can also use Tasks with other apps like Google Calendar and Gmail.