4 Steps to Create Beautiful Text Borders in Photoshop
How to use border creation through Photoshop software, Hoang Ha PC would like to share with you how to create text borders in Photoshop, extremely simple..
What is the purpose of creating text borders in Photoshop?
With the current development needs, designing products related to text that are outstanding and eye-catching is what designers aim for. You can easily design a billboard with a few simple steps, but how to attract attention and make your billboard stand out among countless other billboards on the street is quite difficult. This requires an aesthetic eye and the ability to design to highlight your focus.
When working with text sections, creating a border in Photoshop with a color that highlights the main text color will make the text stand out much more than if you left it with a normal font.
Adding a border to your text in Photoshop will add a touch of artistry and help people pay more attention to the content of the text. If you have used bold but still find the text too small for the layout, adding a border to the text will help enlarge the text area to create balance without having to increase the font size.
With Photoshop, creating text borders is extremely easy and simple. You just need to choose a beautiful background, think of an impressive slogan or brand name, then put the text into the available background.
After aligning the color and position of the text to make the layout most suitable, use the built-in tools in Photoshop to create and adjust the text. With just a little bit of aesthetic talent, you can create a product with extremely prominent and beautiful text. You can apply this method to create billboards or posters with slogans or simply emphasize the caption in a souvenir photo.

Summary of 04 Simple Steps to Create Text Borders in Photoshop
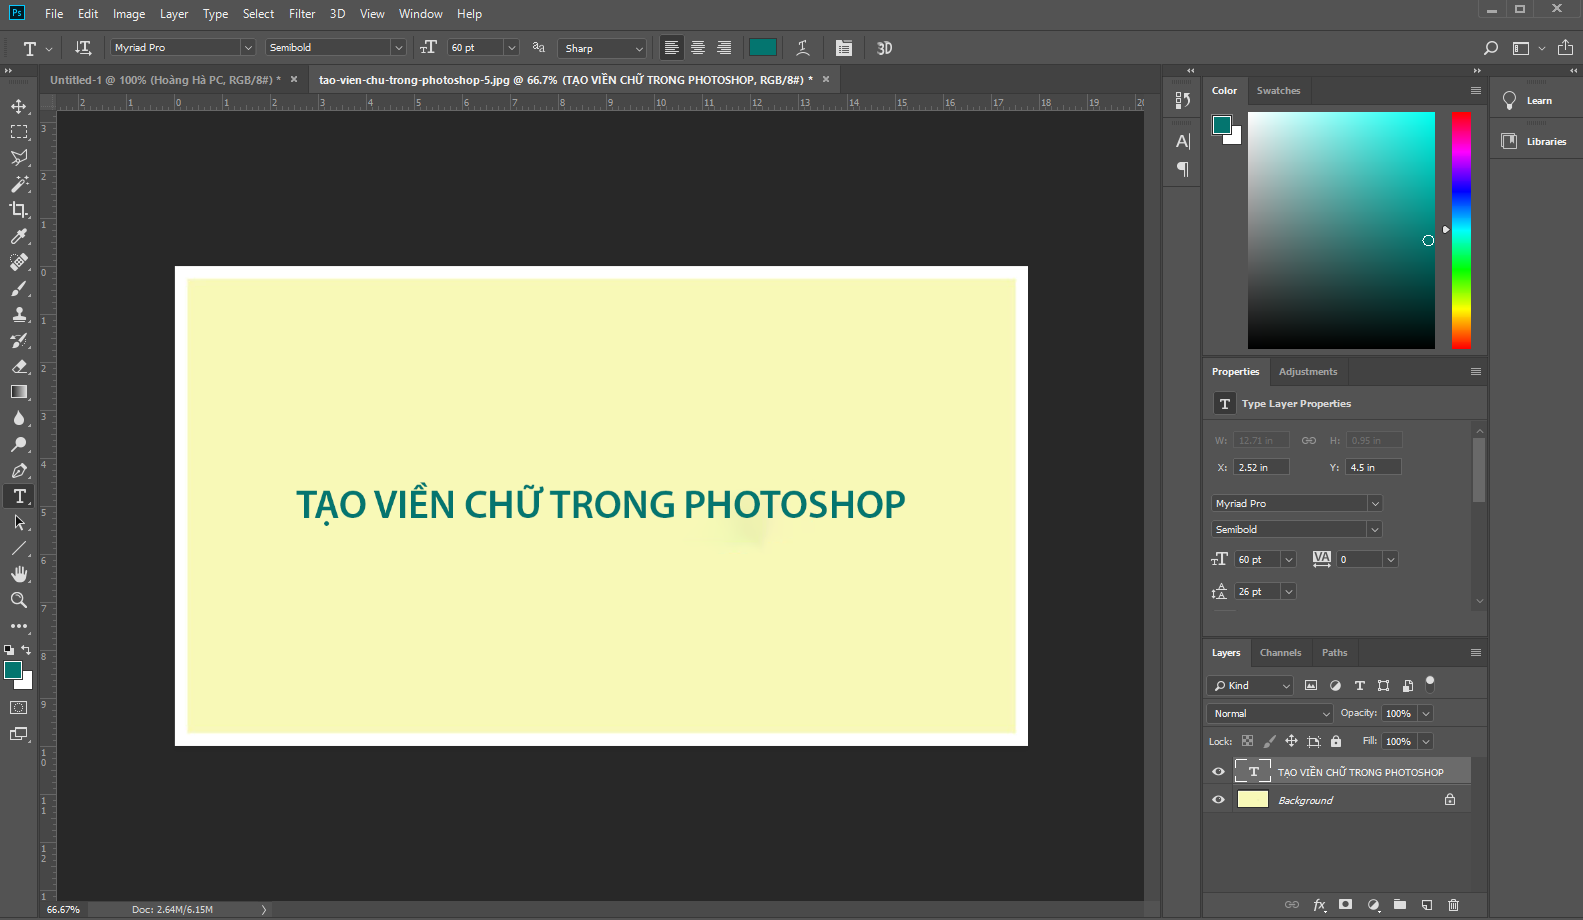
First, to create a text border in Photoshop, start Adobe Photoshop, then create a new working file or choose to open an existing image as the background. Use the tool to create the text that you need to create a border. You can choose the size, font, font style and color to suit the characteristics and environment of the product that will be used. Here we will choose an existing image and align the text to match the overall background.
So we have 2 layers: One layer used as background and one text layer above the background layer before starting the process of creating borders for the text.
Step 1: Initialize the working file and create a text layer
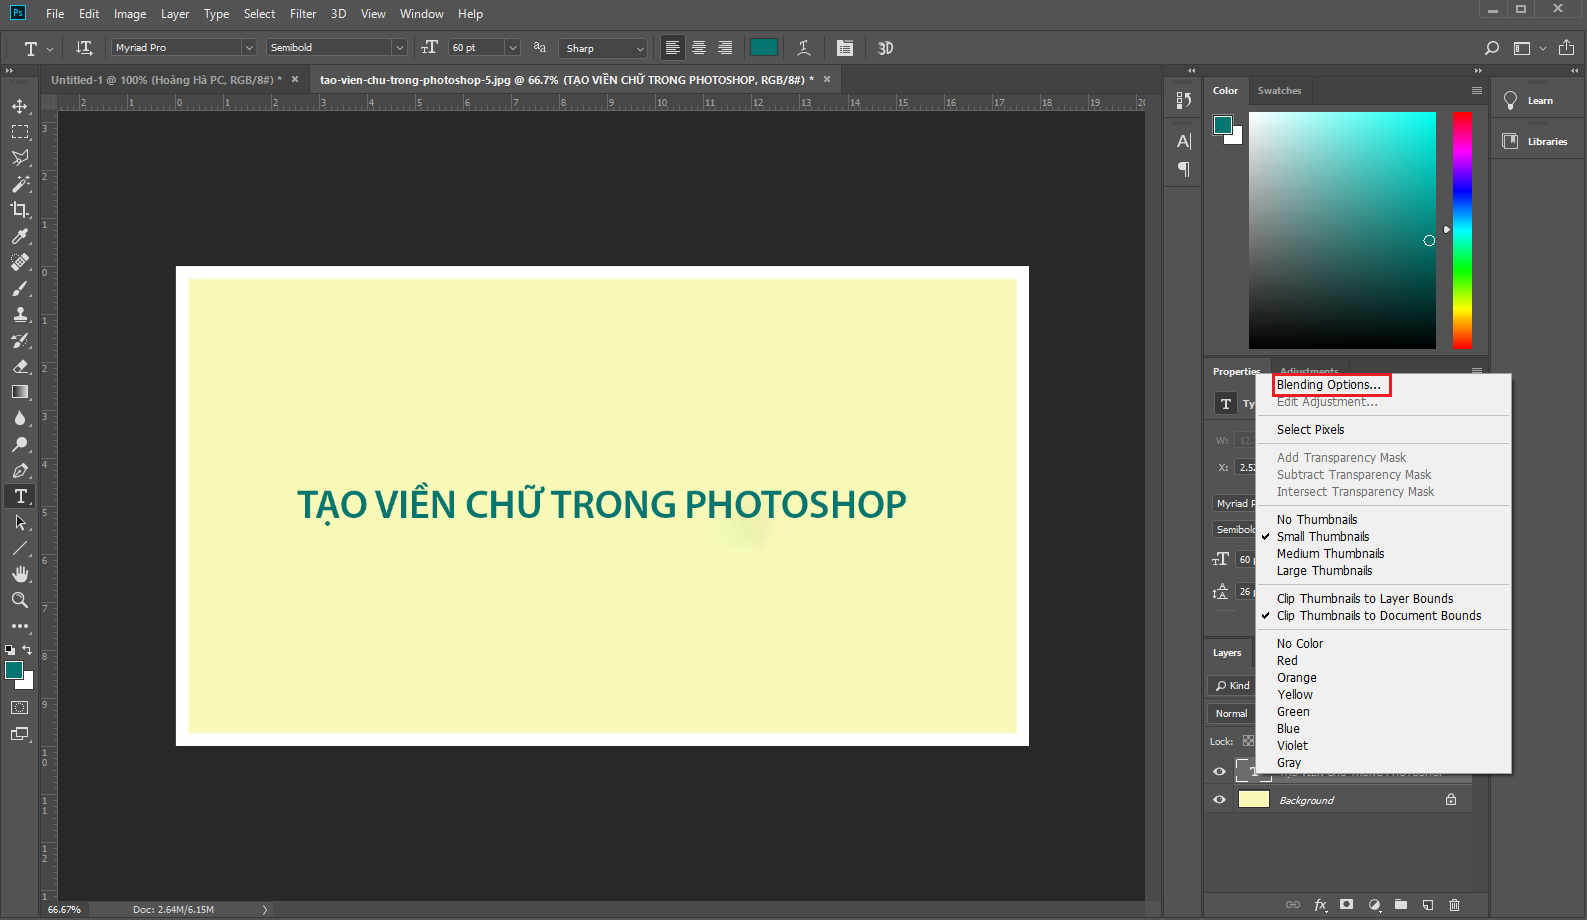
Step 2: Select Blending Options for the text layer
Looking at the layers panel at the bottom right, you will see 2 layers. Right click on the text layer above the background layer and select ' Blending Options '.
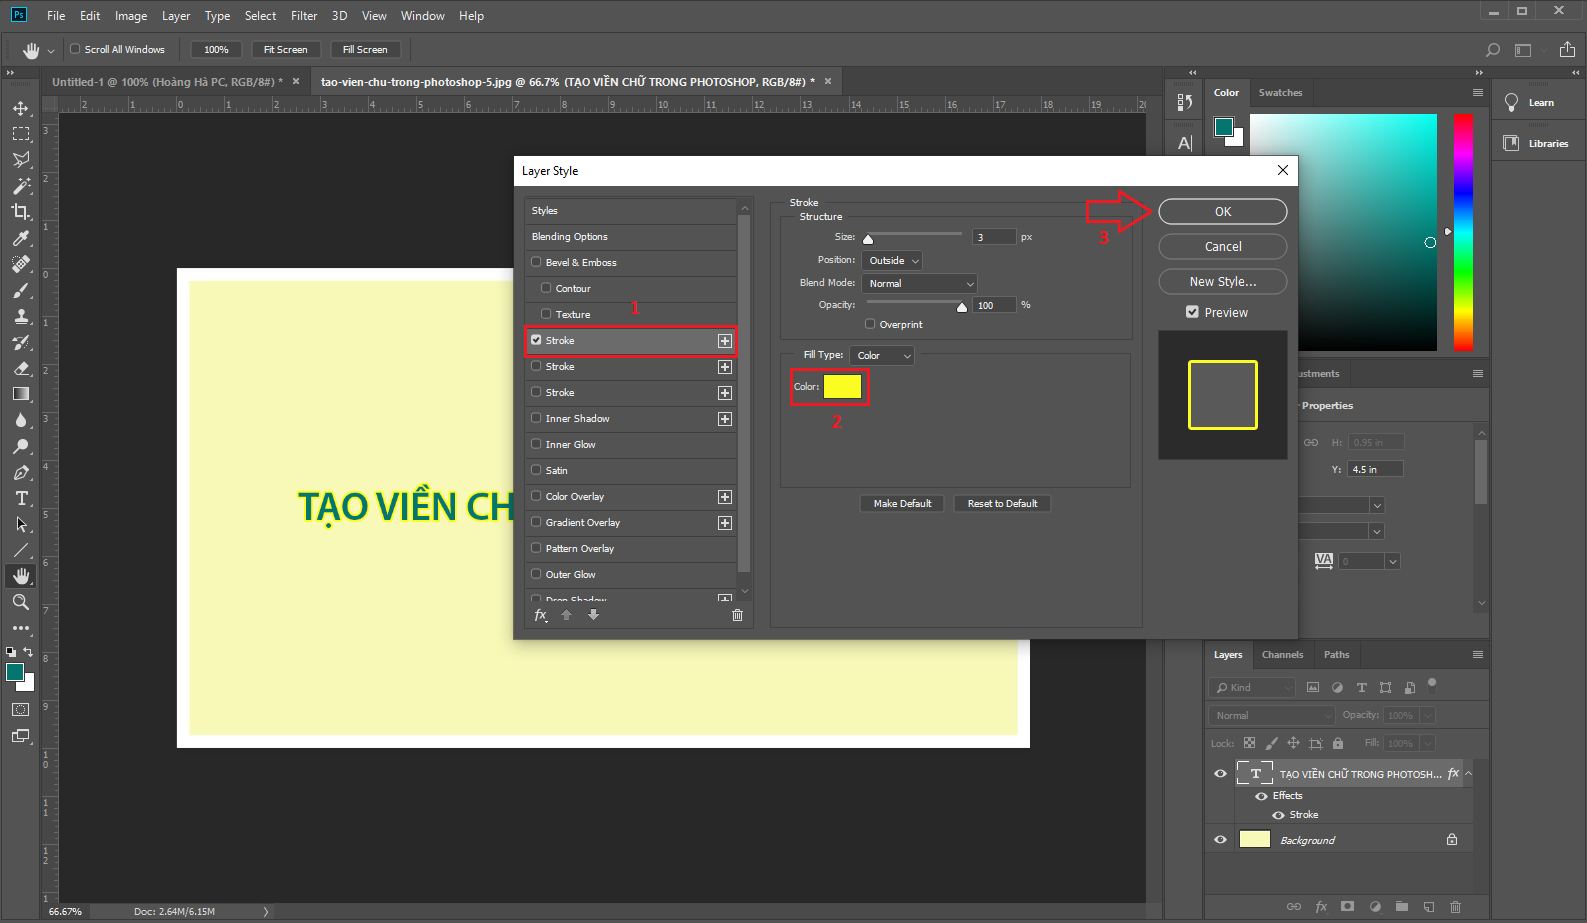
Step 3: Adjust the parameters in Stroke
Next, Photoshop will show us a layer style panel with many options to adjust and design layers in Photoshop. To start creating text borders in Photoshop, select the 'Stroke' section located at position 4 in the 'styles' panel.
In the ' Stroke ' section, there are a few parameters you need to keep in mind when creating text borders in Photoshop as follows:
Size: this is the size of the text border area you will create in pixels.
Position: Will give you 3 options and you can only choose 1 of those 3 options: Outside option (border on the outside) is the most commonly used option, Inside option (border on the inside), and finally Center option (border in the middle).
Bend Mode: This is the style of the text border. You can choose the border style that suits your product. If you do not have any selection in the Bend Mode section, the border style will be set to 'Normal' by default.
Opacity: This is the parameter that adjusts the opacity of the text border. If you find the border is too dark and does not fit the overall look, you can adjust it to make the border less opaque.
Color: This is the section to choose the color for the text border. You can choose your favorite color by selecting the color in the color palette or using the color code to fill in. If you don't know the color code you need, you can search the internet with the keyword 'look up color code' for more details!
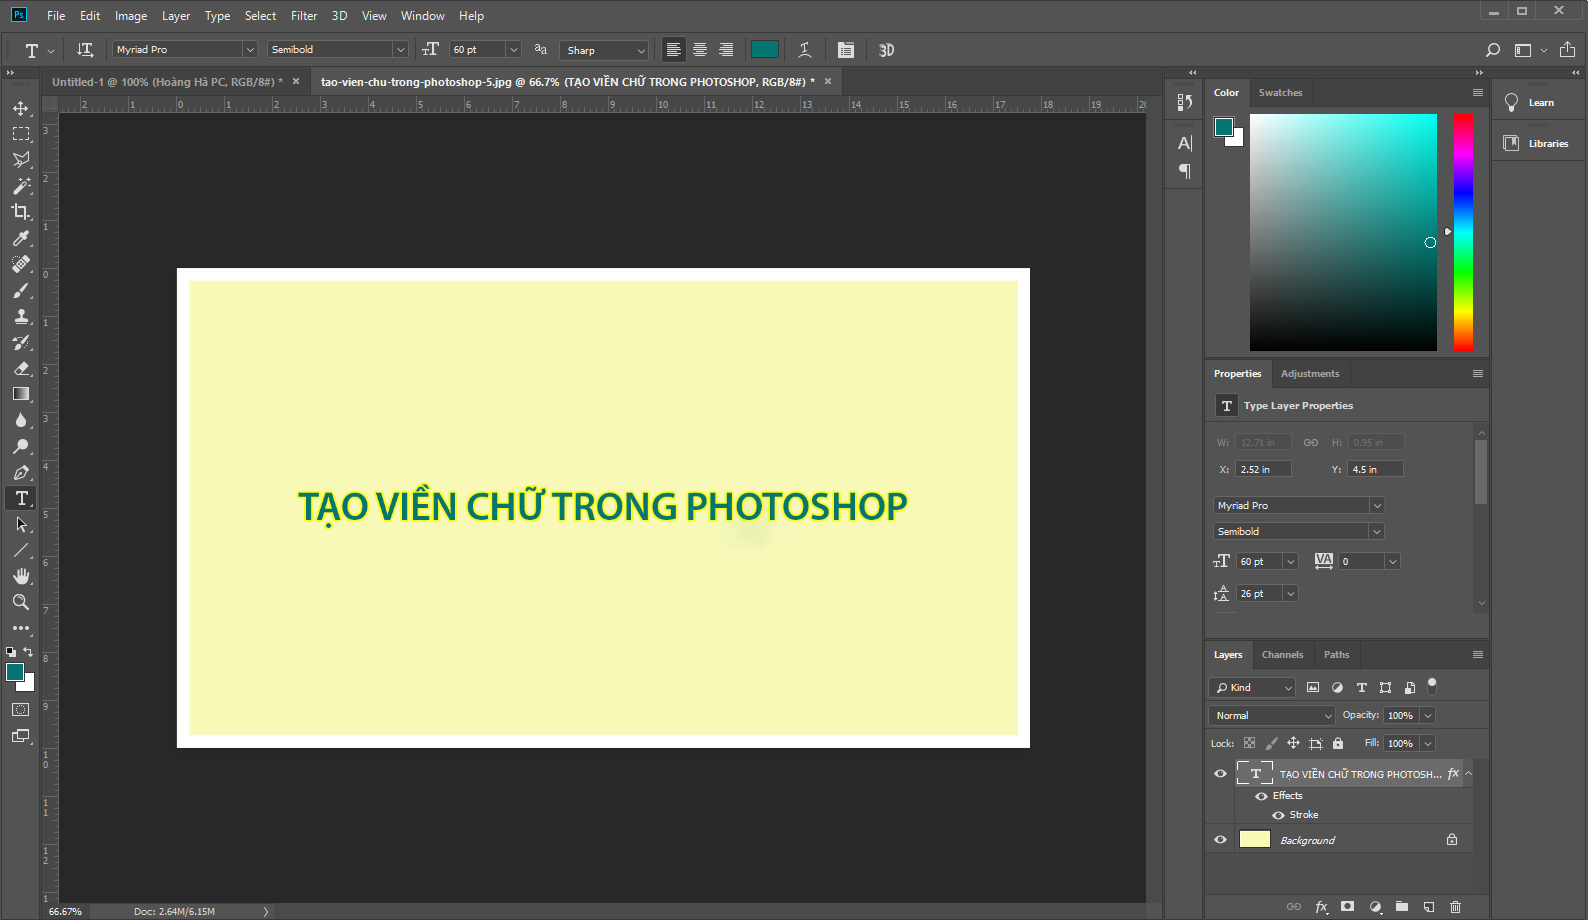
Step 4: Complete the product
Once all is done, simply click the 'OK' button to complete the text border creation process and enjoy the results.
Computer configuration to run smoothly all versions of Photoshop CC
Below are the minimum computer configurations to use all versions of Photoshop CC. To work professionally, you must upgrade the configuration below to more.
| Operating system | Windows 7 with Service Pack 1, Windows 8.1, or Windows 10 (64-bit) |
| CPU | Intel Core i3 Quad core (core i3 – 4 cores or higher) |
| RAM | 8 GB |
| Graphics card | 2GB VRAM |
| Free hard drive space | 4Gb |
| Minimum screen resolution | 1280 x 800 |
| Support system | OpenGL 2.0 |
With these 4 basic steps, you can create a very simple border , of course there are many other ways to do it that also bring results as well as create extremely beautiful borders, but it will take more steps to do. If you want to understand more about photoshop tutorial articles or computer configurations related to photoshop work, follow TipsMake !