Create a border (border) around the text
Create a border (border) around the text.
Before creating a border, select the text (black out).
Method 1 : Click on the icon Table borders (In this way, you will not be able to select custom border types).
Method 2 :
1. Go to Format Border and Shading .
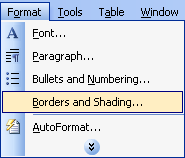
2. Show Border and Shading dialogs, select Border tab:
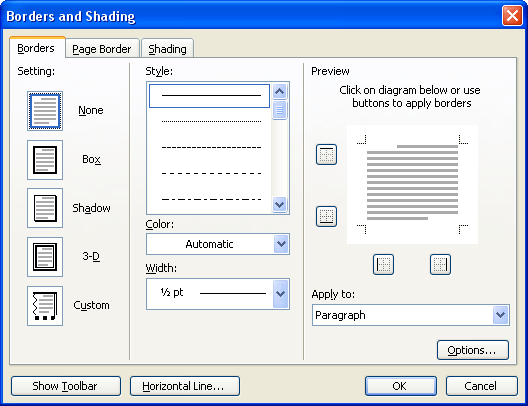
- Setting: Border type:
- None: No borders
- Box: Normal contour type
- Shadow: Contour type with shadow
- 3-D: 3D contour type.
- Custom: Optional border type (Example: You can select each border to be a different type of border, color, or bold, light stroke . different).
- Style: Contour line style.
- Color: Contour color
- Width: Contour width. (bold, light strokes)
- Apply to: Apply to:
- Text: Each line has a border.
- Paragraph: Each paragraph has a border
- Show Toolbar button: Display the Tables and Borders toolbar used to edit borders.
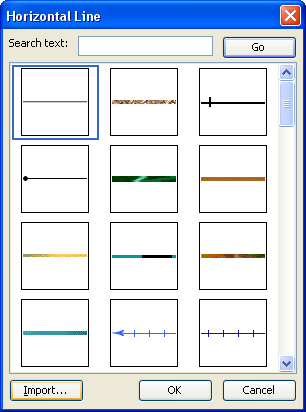
- The Horizontal Line button . => The Horizontal Line dialog box appears: Select the horizontal line type.
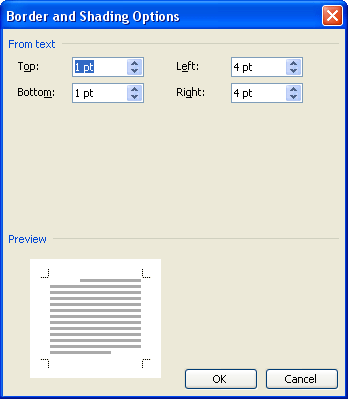
- Options . => The Border and Shading Options dialog box appears: Change some properties about the distance from the text to the outline stroke.
3. Click the OK button to finish creating the outline for the paragraph.
Want to fill the background color of the bordered text
1. Go to Format Border and Shading .
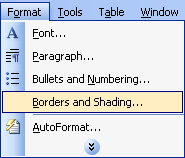
2. The Border and Shading dialog box appears, Shading:
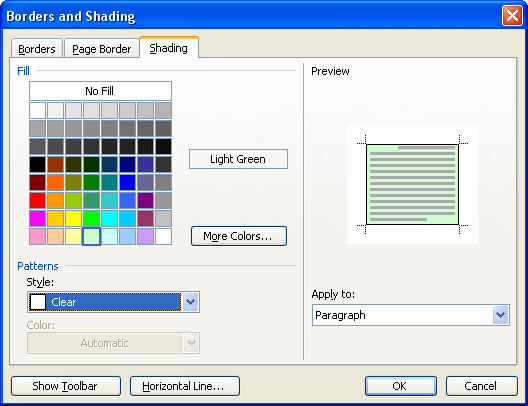
- Fill: Select which background
- More Colors button . Expand the colors to select
- Style: Choose a style with small dots in the background.
- Color: Color of small dots.
- Inside Preview area: Display selected features.
3. Click the OK button to complete the background fill.
You should read it
- Border Image - Create image borders in CSS
- How to Draw a Circle in Gimp
- How to choose all the same colors in Photoshop
- How to draw a frame, create a border using Photoshop
- Rounded Corner in CSS
- The terminology of color, wheel color and skill used to color
- Macromedia Flash - RGB color slider
- Use and maintain color inkjet printers
May be interested
- 106 tips with Microsoft Office - Part 2the fastest and most common way to access the text files commonly used in microsoft word today is to go to file and find the text to open. the disadvantage of this way is that the number of files saved in this list is relatively limited, even if the user has entered tools | options | general to set the 'recent used file list' parameter to a larger number.
- 106 tips with Microsoft Office - Part 3you absolutely can easily draw a horizontal line of your text in a very simple way as follows: you type in 3 consecutive dashes (-) and press enter you will have a single line.
- 106 tips with Microsoft Office - Part 6in order to fully exploit the microsoft office software suite, we would like to introduce to you some of the following small tips in the hope that it will help you use it more effectively. common shortcuts in excel: shortcuts in ms office applications are one
- 106 tips with Microsoft Office - Part 7usually the charts will come with data related to it. but sometimes you want to print that chart out of a completely separate page, separate from the data. very simple, you select the chart and then enter
- 106 tricks with Microsoft Office - PowerPointin a microsoft powerpoint presentation, sometimes you want to hide a slide - reference information slides or further explain the meaning - and only access this slide when necessary. the hidden slides will not be displayed on the slide screen unless you instruct powerpoint to access the slide show.
- ADX Toys 2: Programming editor for Wordprogramming requires you to have a suitable program and a specific environment, plus a translation program to translate the source program. however, when you want to interpret a certain meaning content in a language, you need to write it into a text to express your meaning.