How to draw a frame, create a border using Photoshop
To draw a frame to create a border in Photoshop you can follow the following steps of TipsMake.com to learn the fastest way, quickly create a frame and border for your photos.

There are two types of borders that TipsMake will guide you today: creating a border outside the image and creating a border right on the background of the image.
1. Create a border outside the image
With this style of creating a border we can create a border right next to the edge, but overlap the content of the image, you can refer to this method in the following tutorial: How to create borders for photos in Photoshop
Or another method of creating borders is that you create a border completely surrounded the image without inserting the content of the image. We will use Canvas Size to create this border.
To make it a little clearer on Canvas Size , you can understand that it is the function of resizing the image, we will take advantage of this function to create a space around the image from there. bar image on the border around the image that TipsMake said above. To do that you can follow these steps:
First, click on Image on the toolbar and then select Canvas Size in the displayed list. Or you can also use the key combination Alt Ctrl C to use the same function.

The Canvas Size window will appear. You change the parameters of Width and Height . You change the unit of measurement into the most appropriate unit, possibly to Inches , Centimetes or Milimeters are the units we are familiar with. But TipsMake recommends that you set the unit of measurement to Pixels so that we can estimate the size of the border compared to the whole image.
After we change the unit, we change the length and width of the image. We increase both units by a fixed number. In the old image size we have Width Width of 1200 and Height Height of 992, the created border is about 1/10 the size of the frame is the best so we will increase Width and Height each 100 party units.
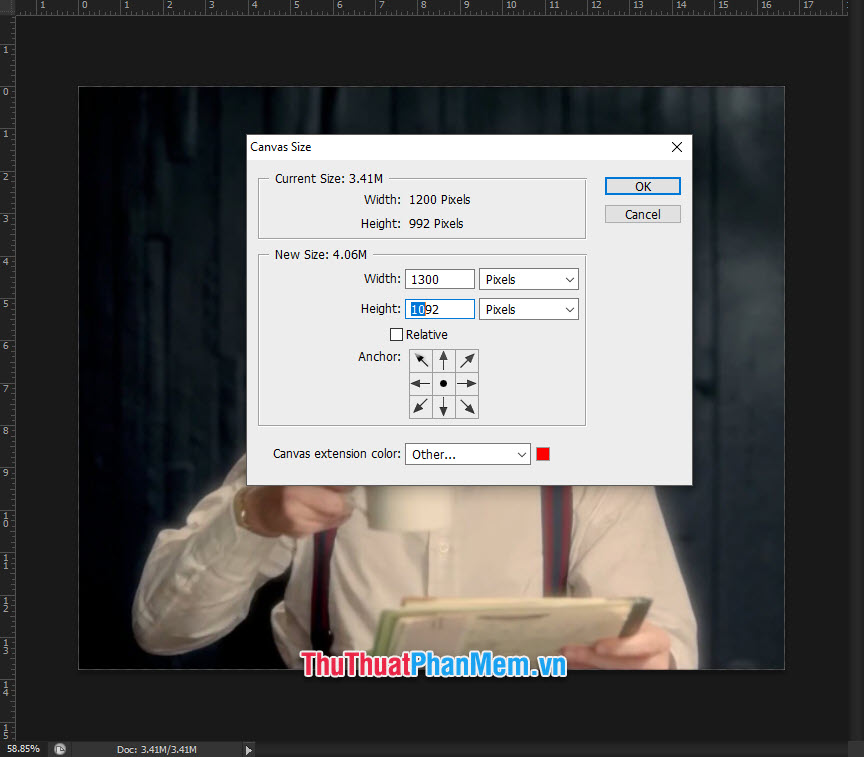
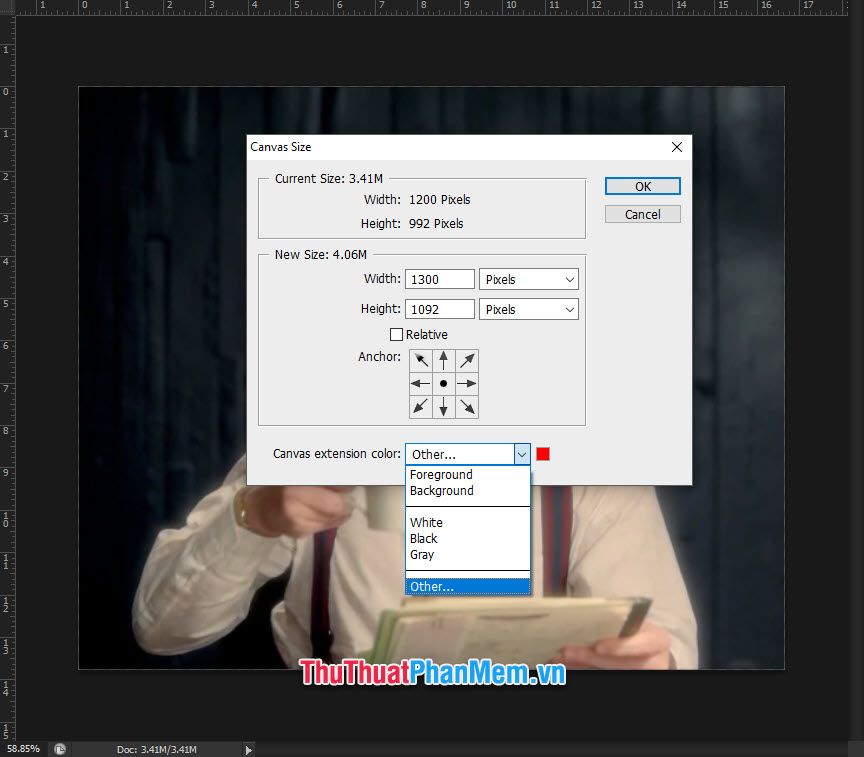
Next is to choose the color for the border, you click on Canvas extention color . Available in three fixed colors: White (white), Black (black) and Gray (gray). But if you do not like these colors, you can click on Other .
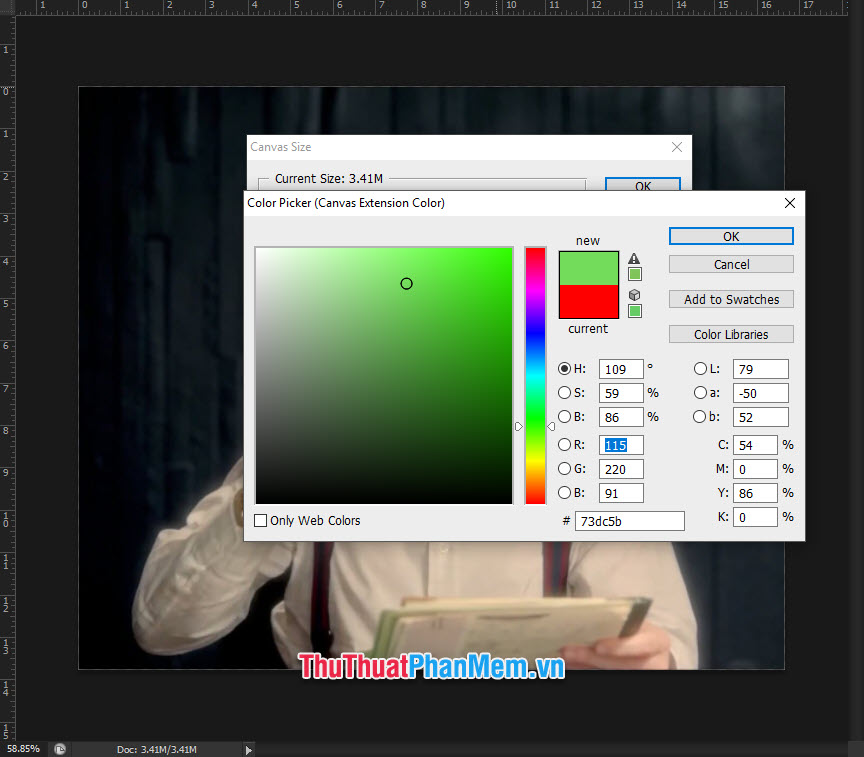
You choose the color in the Color Picker panel .
Finally, click OK to confirm the settings have changed, you will receive a bordered image as shown below.

2. Create a border on the photo background
2.1. Create the border using Stroke
Using the Stroke method, we will create a border around a certain layer, from which can create an optional border for you to use. Here in the example TipsMake only guide you to create a rectangular border on Photoshop CS6 software.
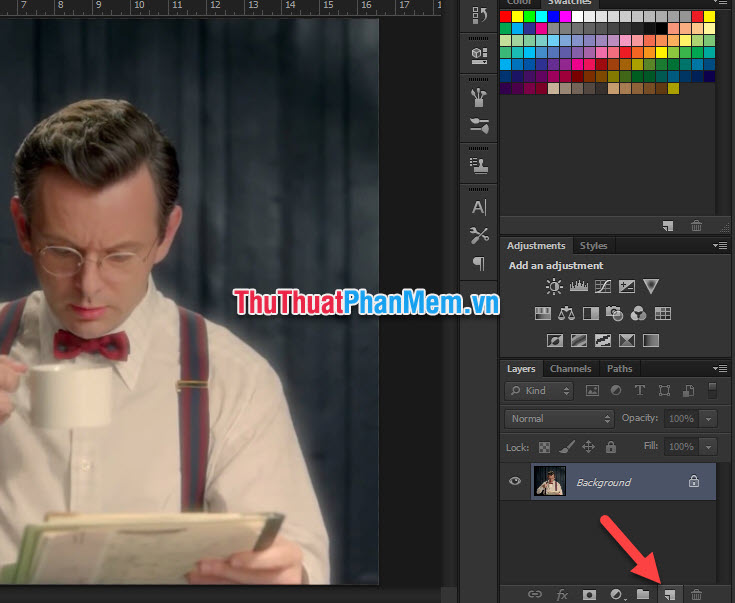
First you need to create a shape layer first, click on the New Layers icon in the layer management tray to create a new layer.
You select the Rectangular Marquee Tool (shortcut M) on the toolbar.

Click and drag to create a rectangle that fits within the border you want to create. Then select the Paint Bucket Tool icon (shortcut G).
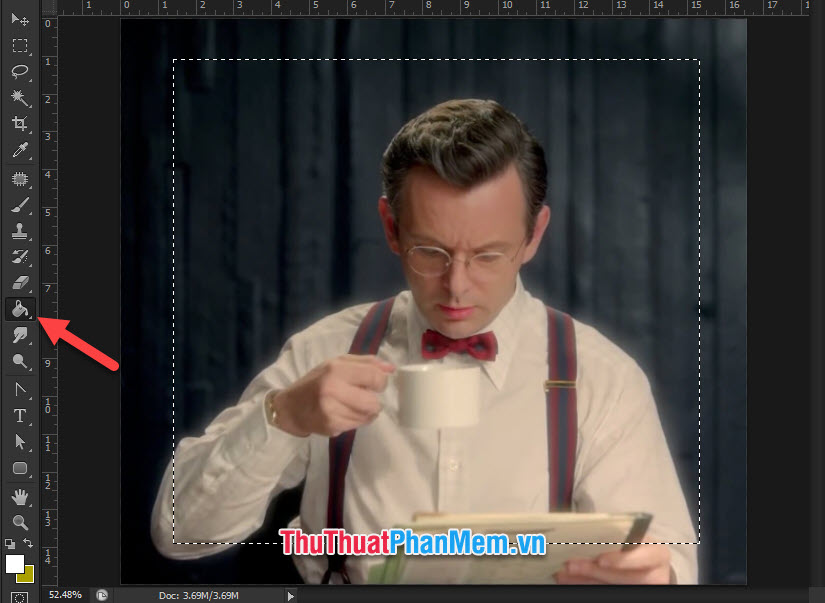
You click on the position to create a color for it (no matter what color, just create a color space to determine the shape of the layer). After coloring, you use Ctrl D to delete the selection.
Now that you have a shape layer, you can resize it by clicking on the Move Tool icon (shortcut V), then around your layer will appear a quadrilateral border. Allows you to adjust the width of the layer.
Then press Enter to confirm the changes have just been installed.
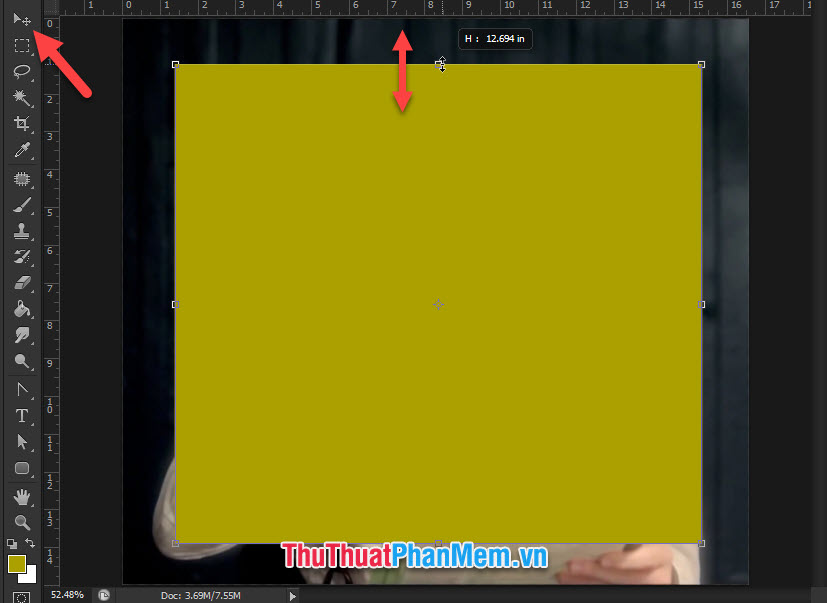
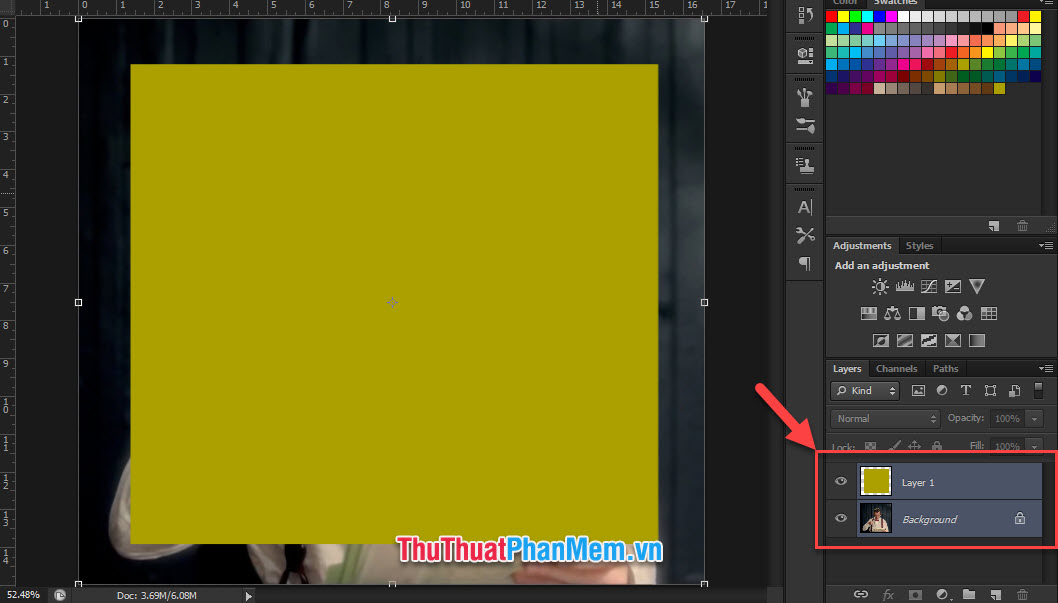
Next, to align this shape layer on the original layer, highlight both layers by holding down the Ctrl key on the keyboard and clicking to select the two layers.
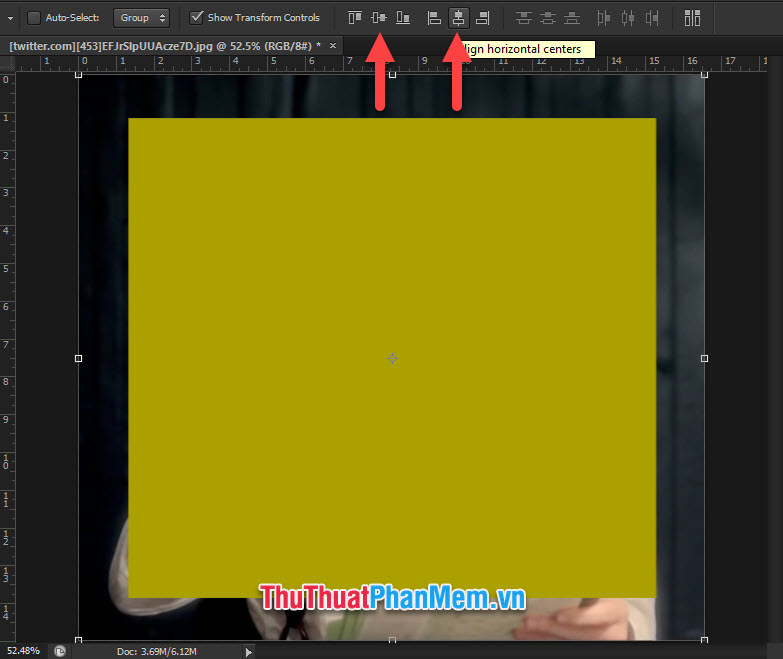
You click on the icon to center vertically and center horizontally to be able to align the image layer in the middle of the original layer.
Next, you look down the position below the list of layers, you will see an icon with the word fx, this is the Add a layer style icon so we can create different interactions on the selected layer.
You select Stroke on the list of options shown.

The Layer Style display panel will appear. Now you can adjust the relevant parameters to create a border you want.
The first thing to consider is the Size , which is the size of the thickness of the border you want to create. You can customize it as you like, and you can look directly at how small it is on your main image (because when you tick the Preview changes in Layer Style will always show the drawing directly to people user can feel the most intuitive).
Next you edit Position , there are three options Outside , Inside and Center . Inside:
- Outside : the border will cover the outside of the selected layer.
- Inside : the border will be within the selected layer, right next to the outer edge.
- Center : Combining the two above, the border will be right on the edge of the layer, that border will be the center line of the border.
Next you adjust the Opacity . This is adjusting the visibility of the border. If you set to 100%, the border will show completely, the lower the% the more transparent the border will be.
Finally, adjust Color to select the color of the border.
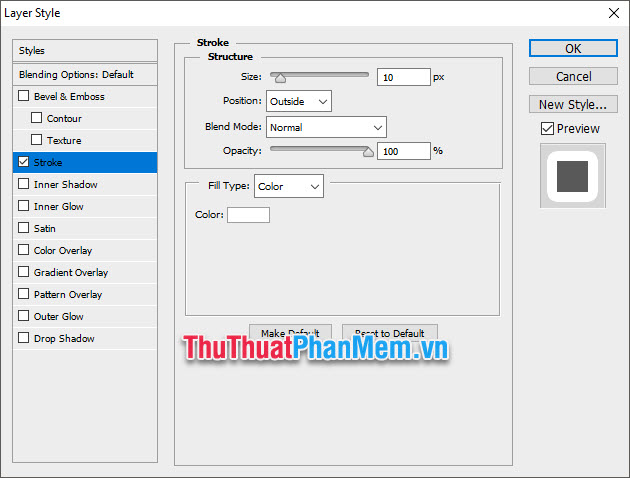
Finished all you click on OK to confirm and will get the results as shown below. As you can see by the above parameters, TipsMake has created a 10pt thick border around the selected layer.
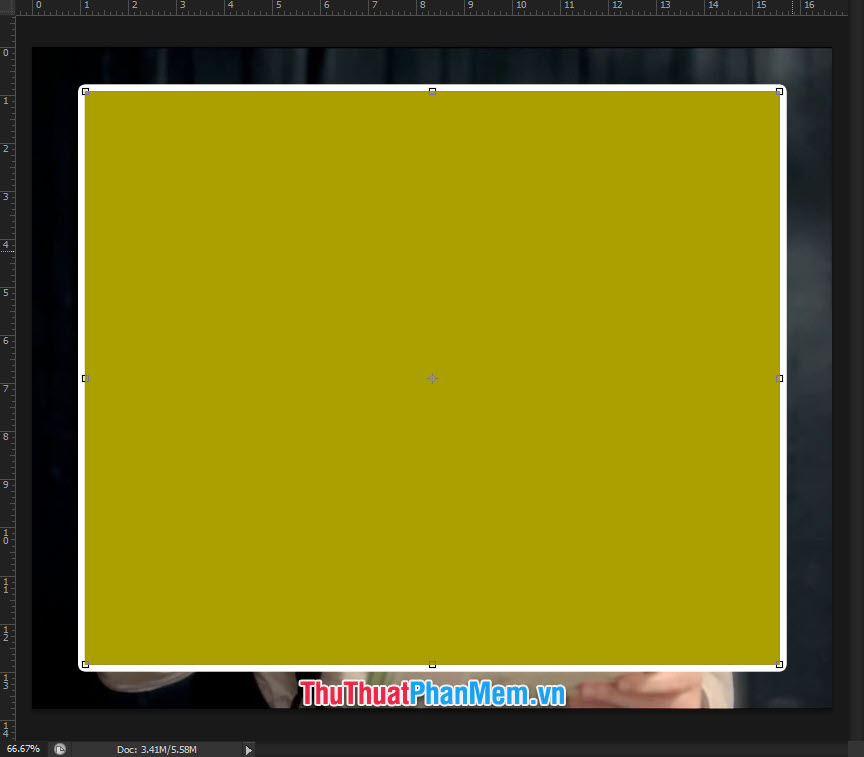
But going there is not enough to create a border frame because there is still some color in the middle, a border frame cannot have an image in the middle to cover all the main content. We need to make that image disappear.
Adjust the Fill of this layer to 0% so your layer becomes completely transparent. You can adjust this Fill by clicking on the necessary layer, you will see two indicators at the top of the corner are Opacity and Fill .
Opacity is to adjust the visibility of the entire layer including the Style - the border we just created. Fill is the visibility of the original layer.
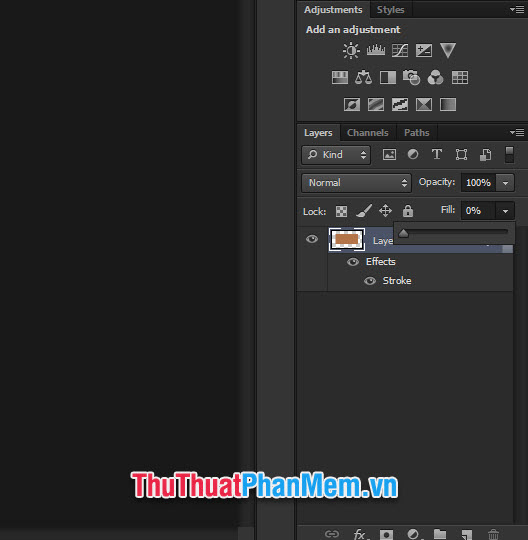
The result will be like the image below, a border of a shape around the first layer you have created.

From there you can see, this created border is free to change according to the shape of the layer that you create. And you can create very diverse borders according to the shape of the layer.
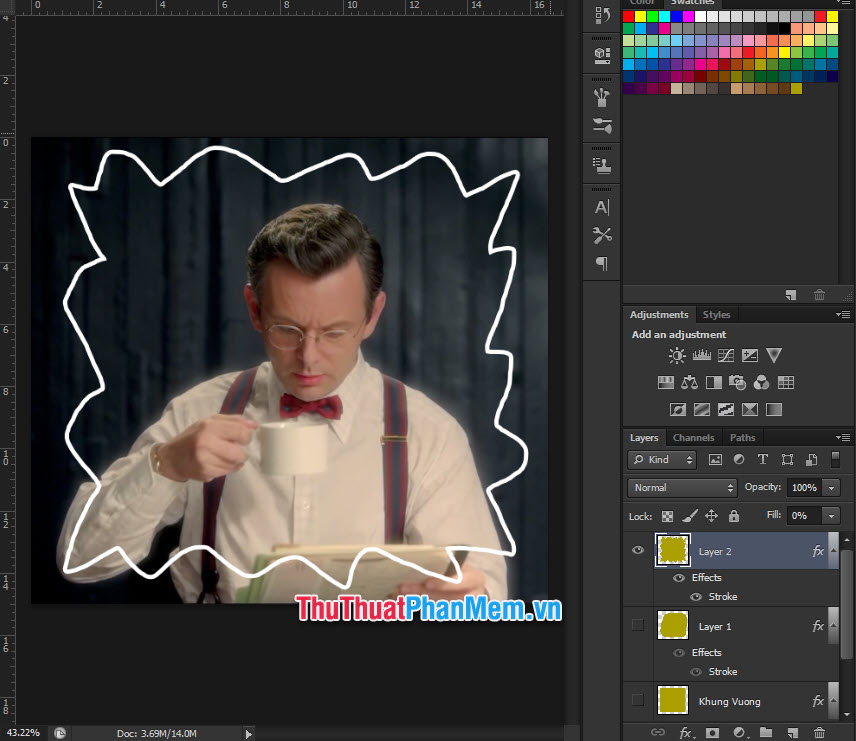
2.2. Create the border using the Rectangle Tool
With this method, we can directly create the border, but the shape will be fixed and cannot be changed like using the Stroke above.
Use the simple Rectangle Tool
Photosho provides 4 simple shapes for the Rectangle Tool: rectangles / squares, angled squares, circles / ellipses and hexagons. Just right-click on the Rectangle Tool icon to select the corresponding shapes.
Here TipsMake will select the ellipse as an example.

After selecting the shape, you continue to adjust other parameters to be able to create a pleasant border.
For Fill , choose Solid Color (the red rectangle in the cross icon).
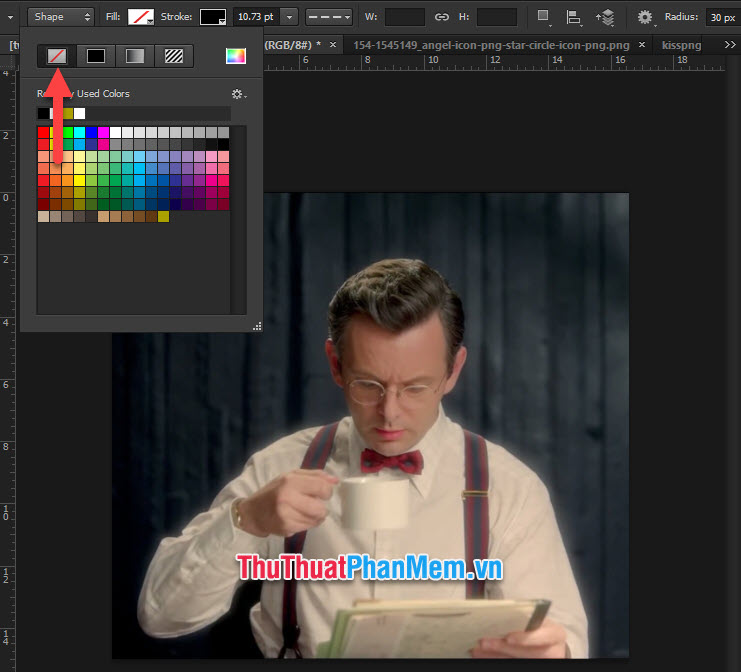
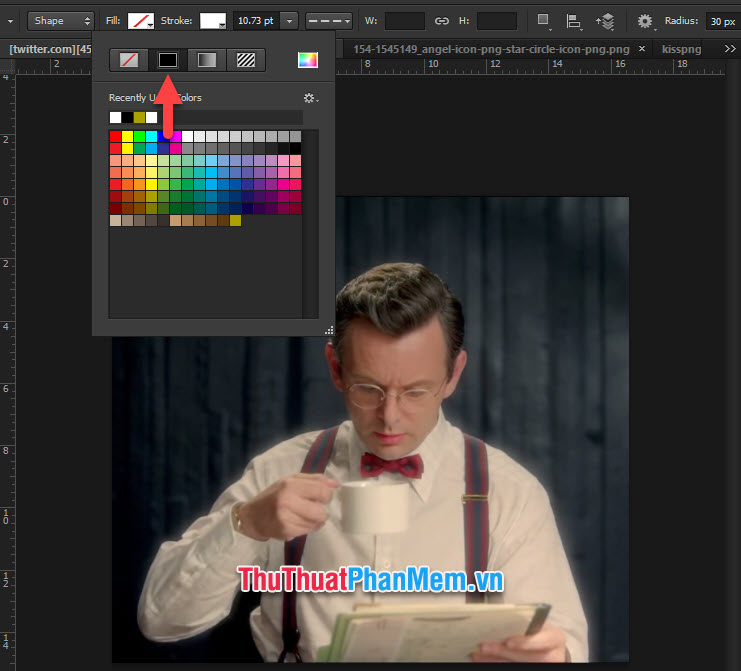
With Stroke , you select the colors you want to create for the border.
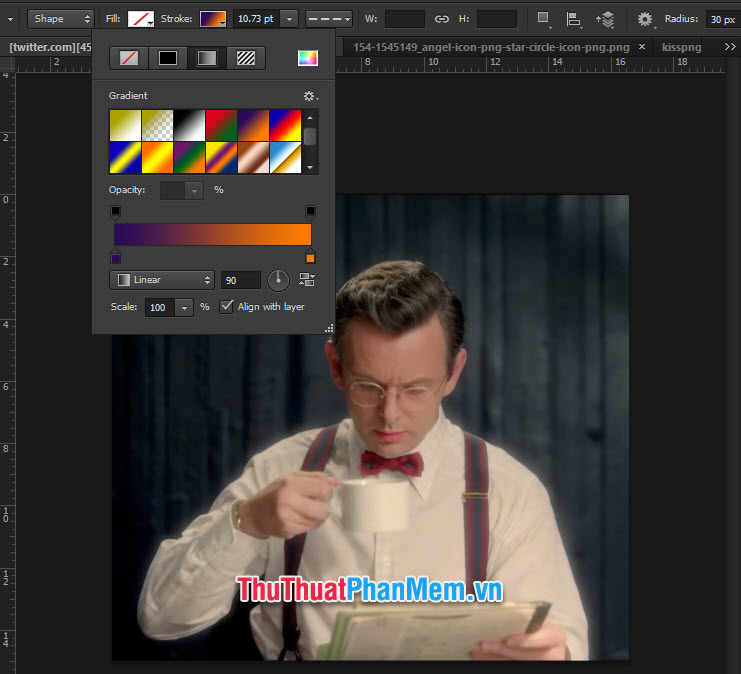
Or if you do not want a monochromatic color frame, then you can click on the gradient next to and choose the colors you want.
Next you select the thickness for the border frame.

Finally, you choose the type of border, can be a continuous line or broken lines or polka dots.

Next, you use the mouse to drag the shape to create the border, can be customized to adjust the shape to small and suitable.
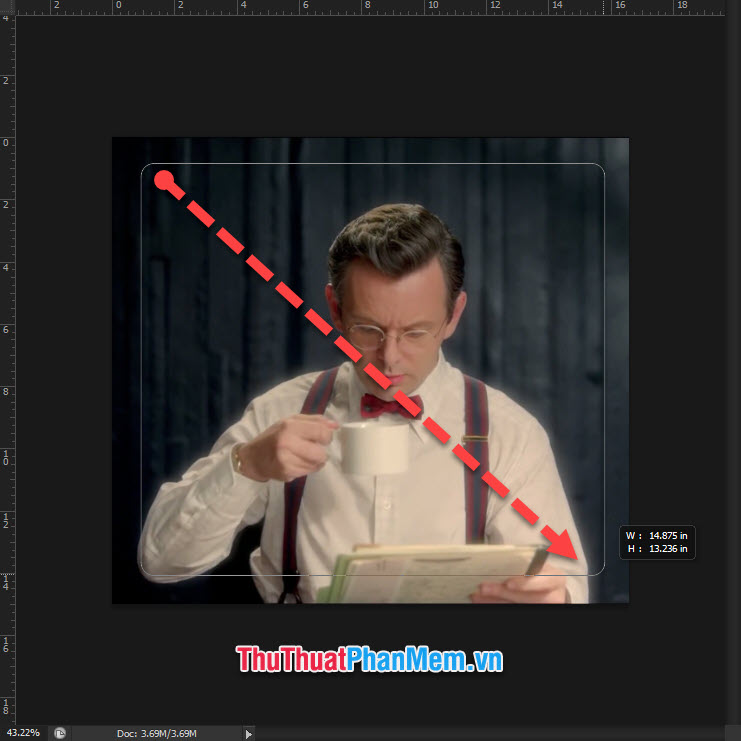
The result will get you a border like the image below:
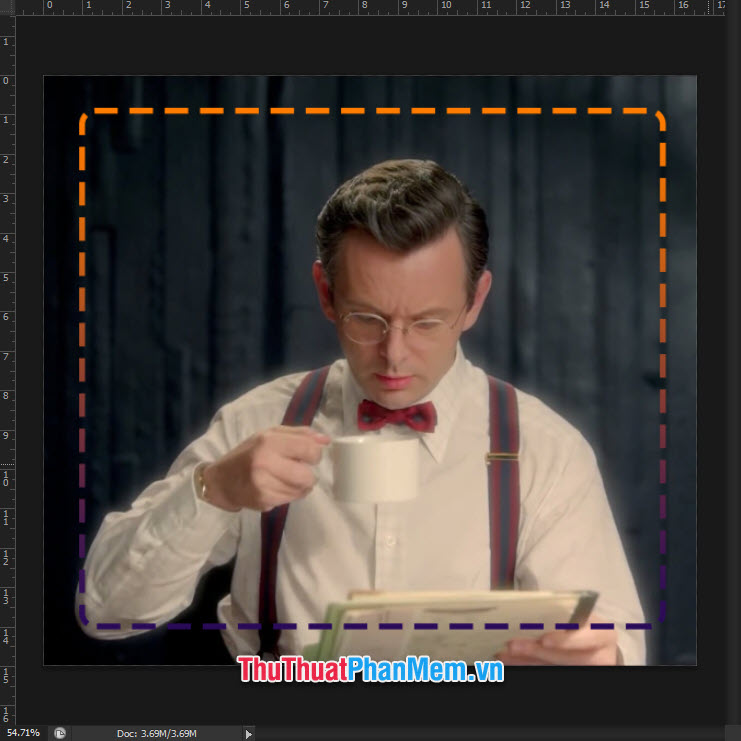
With this type of border, you can also use the Move Tool function to adjust the position and size for your border.
Use the Custom Shape Tool to create an existing frame
To use this function, right-click on the Rectangle Tool icon to change it to Custom Shape Tool mode .
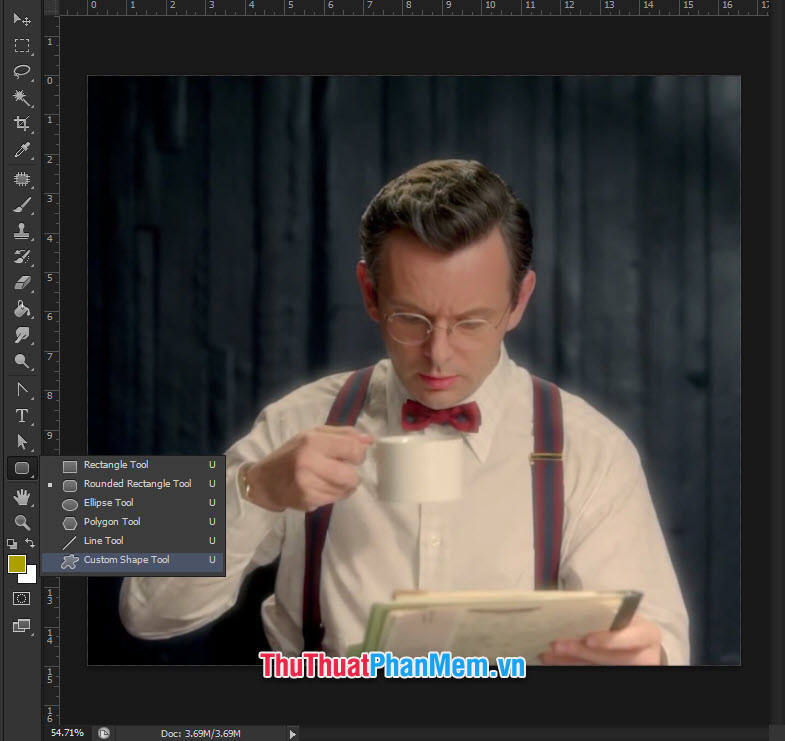
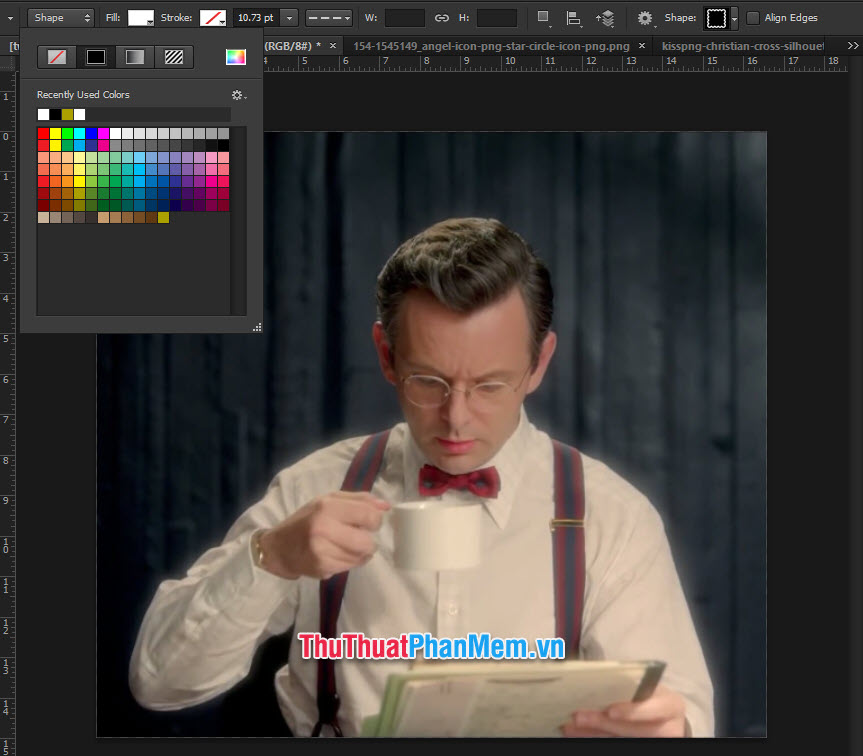
Then you customize the mode in the horizontal bar. You click on the icon next to the word Shape to select the image you want to insert.
Next, click on the Settings gear image and select Frames in the list to switch to the frame list.
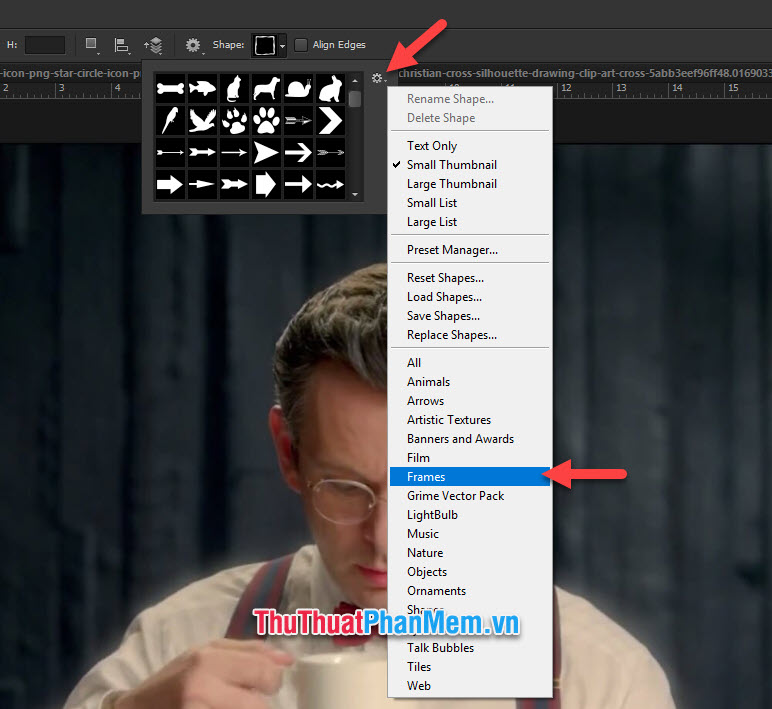
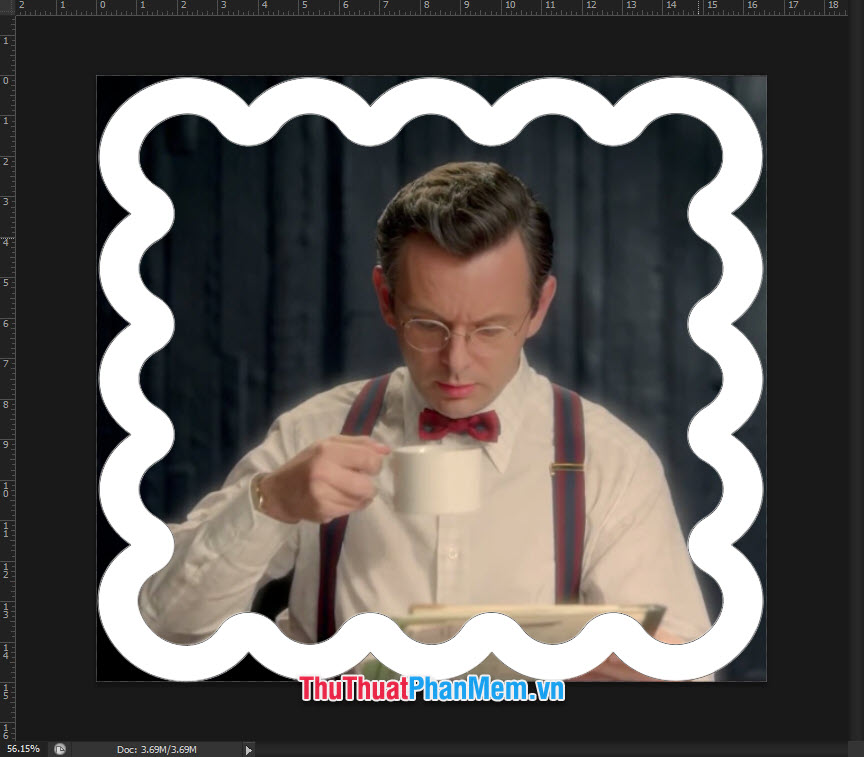
In this list there are a number of frames for you to choose to insert your picture. These frames can be downloaded further online.
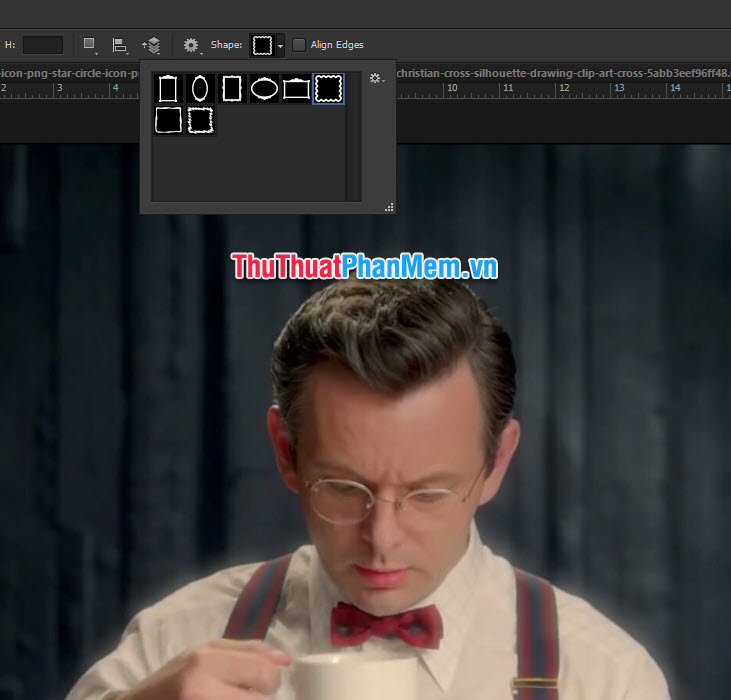
Including Brusheezy site offers quite a lot of interesting Shapes for you to choose.
Next you adjust the Fill and Stroke. In it, you have to adjust in contrast with the method 2.1 mentioned above TipsMake . Stroke in colorless mode Solid Color (rectangular icon with a red cross). Fill is the color you want to select for the border frame.
Then you also pull out a frame with a size that fits your picture to make it border.
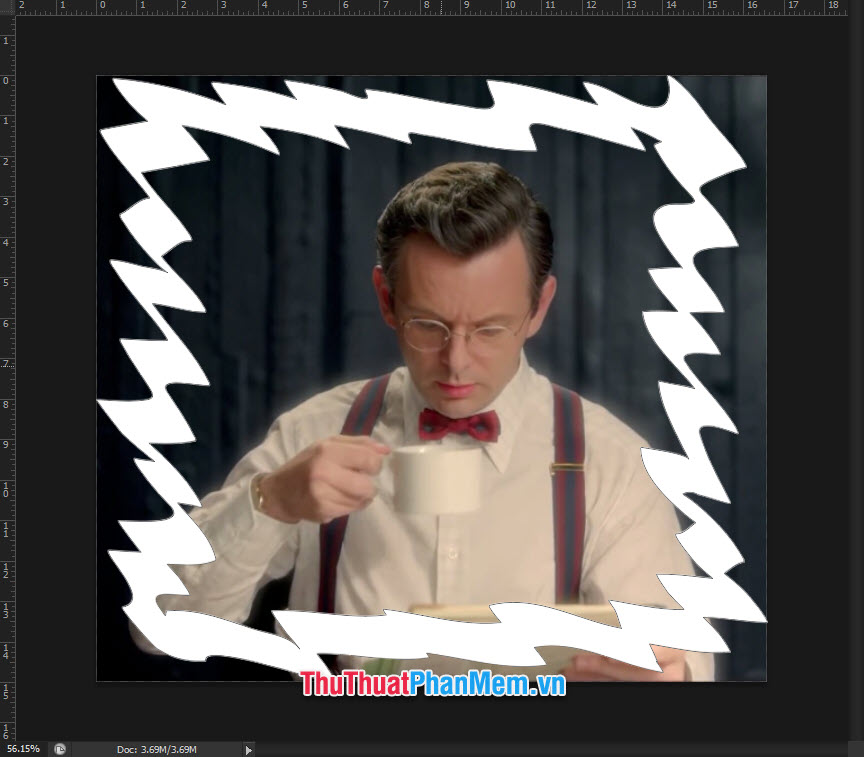
You can also choose from a variety of frame types to better suit your aesthetic.
Thank you for reading the article of TipsMake.com on how to draw frames, create borders in Photoshop. Hopefully this article has provided all the information you need to help you with this tip. Good luck.